Thuan Duong builds near-future urban jungle with Megascans in UE4
Thuan Nguyen Minh Duong first came to our attention with Talis, an original character he created with intricate detail (and went on to create half a dozen variants thereof!).
But just as we thought we had him pegged for a detail-oriented character artist, he stunned us all with an intricate environment inspired by contemporary Asian metropolises set in the not-too-distant future.
We caught up with Thuan to get his take on creating his not-too-distant future with speed and realism. We also wanted to understand how Thuan made use of various urban assets, such as surfaces, 3D assets, and decals, from the Megascans library. And how Megascans and Bridge worked together to bring out the full power of Unreal Engine.
In Thuan’s words:
Hello, artists and enthusiasts!
My name is Thuan Nguyen Minh Duong. I’m from Vietnam. I’m a self-taught CG artist who doesn’t quite fit into any one classification since I make anything I like. From humanoid characters to monsters, from architecture to environments… anything that sparks my interest and gets me excited to get up in the morning is something I will learn to do to the best of my ability. And it brings me the most joy to see my work finished as I want it to be.

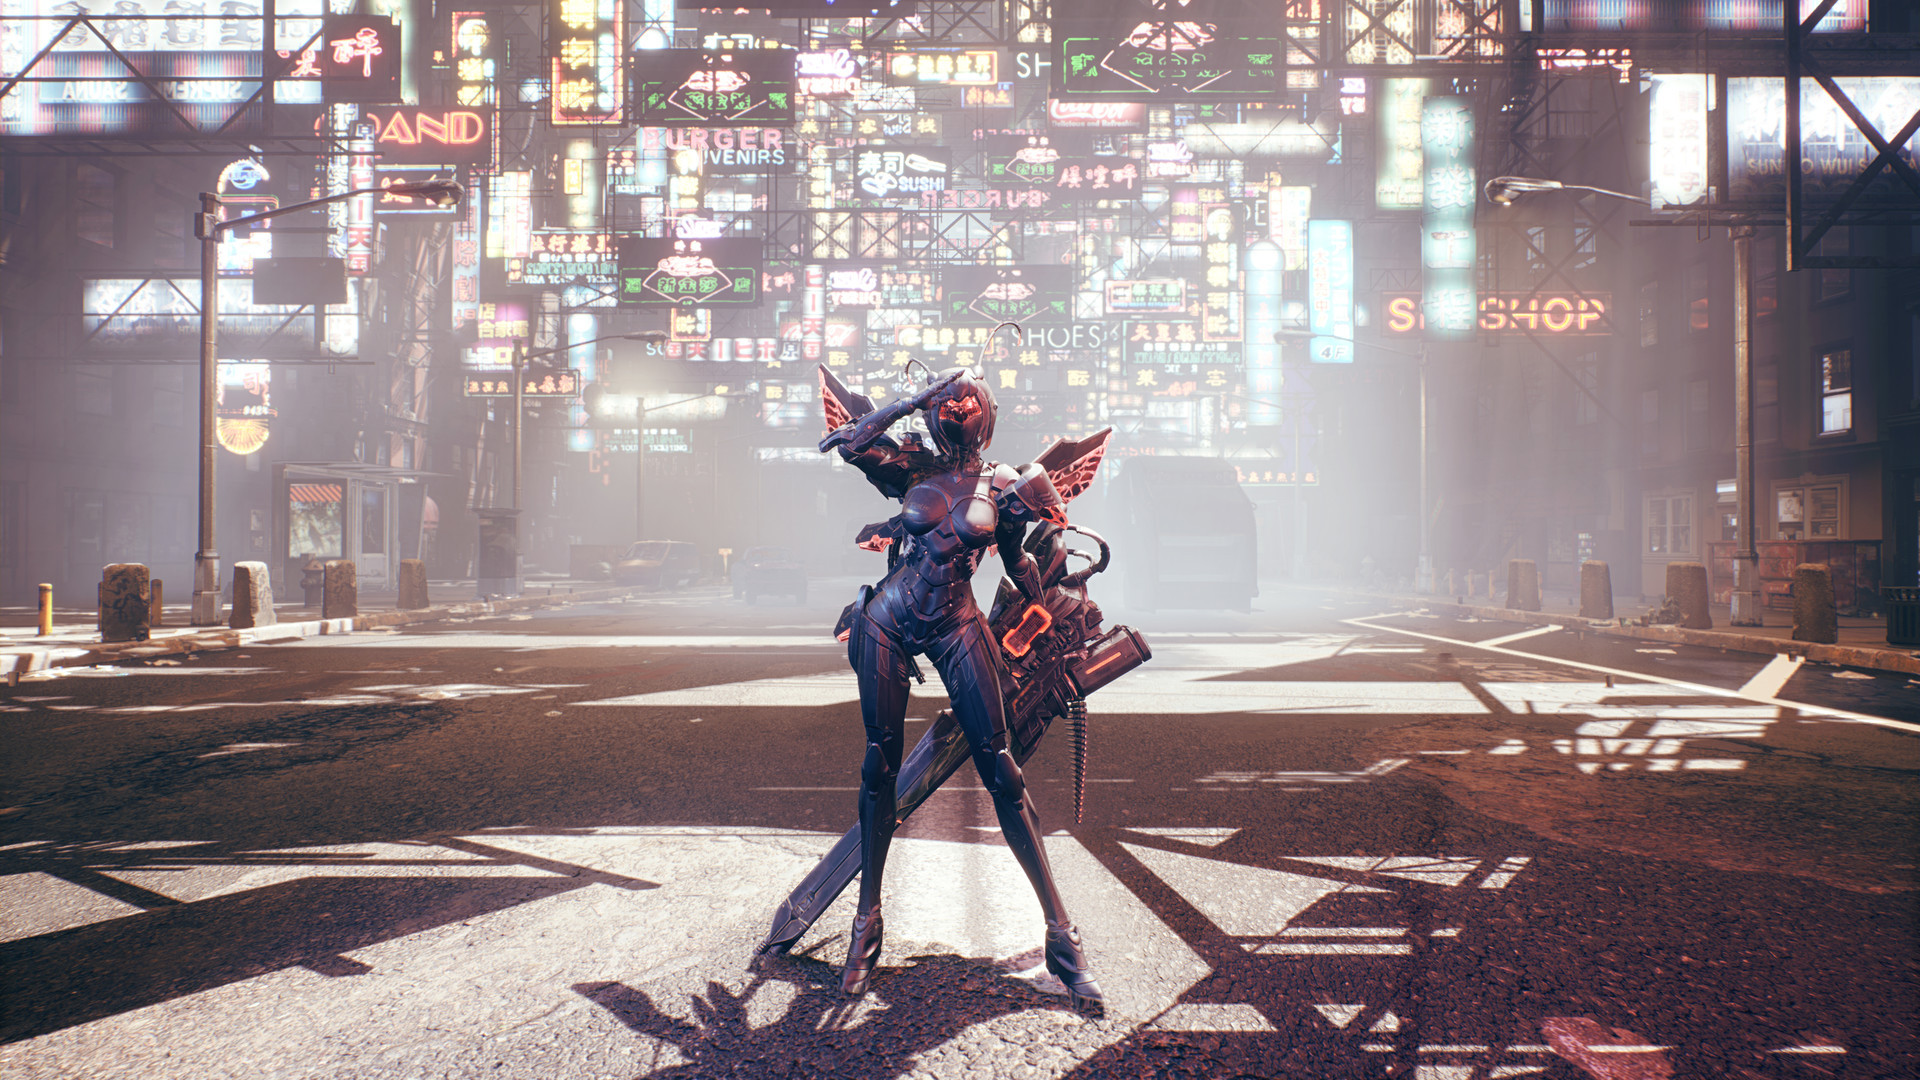
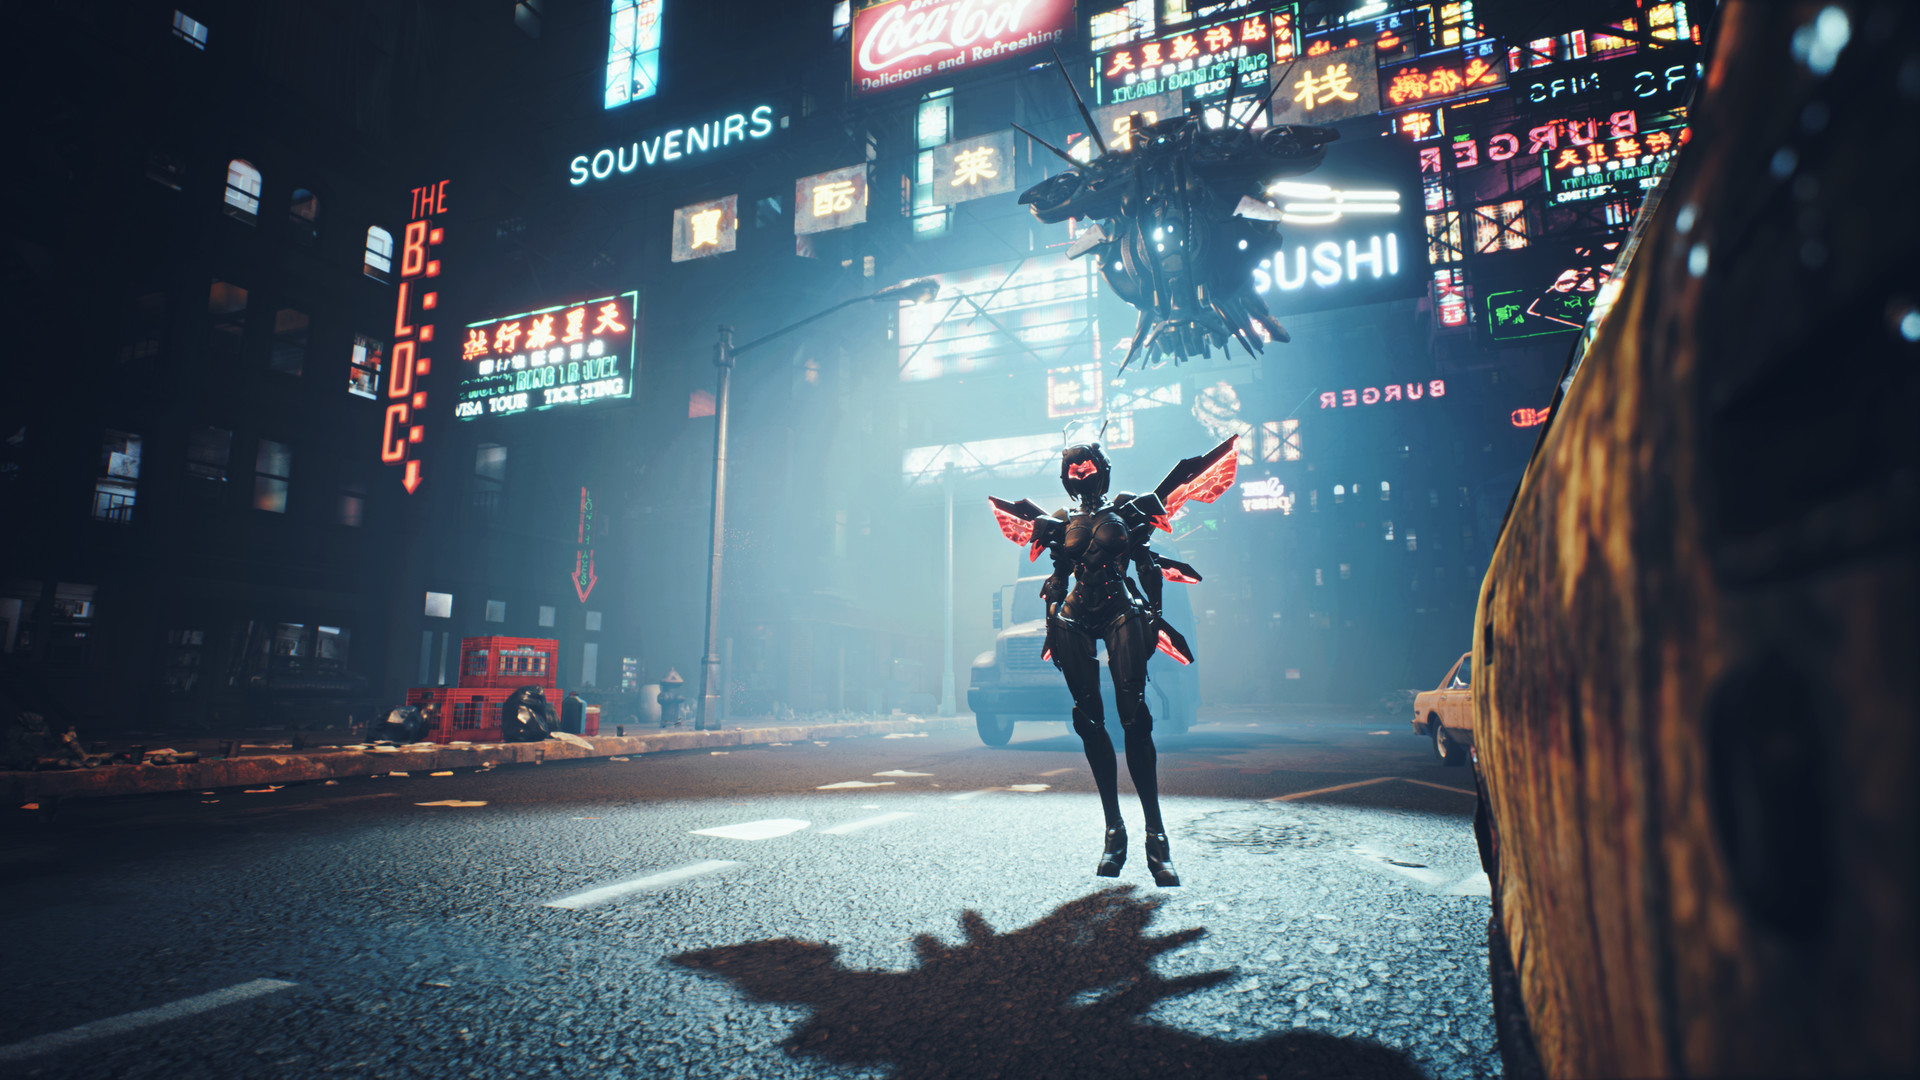
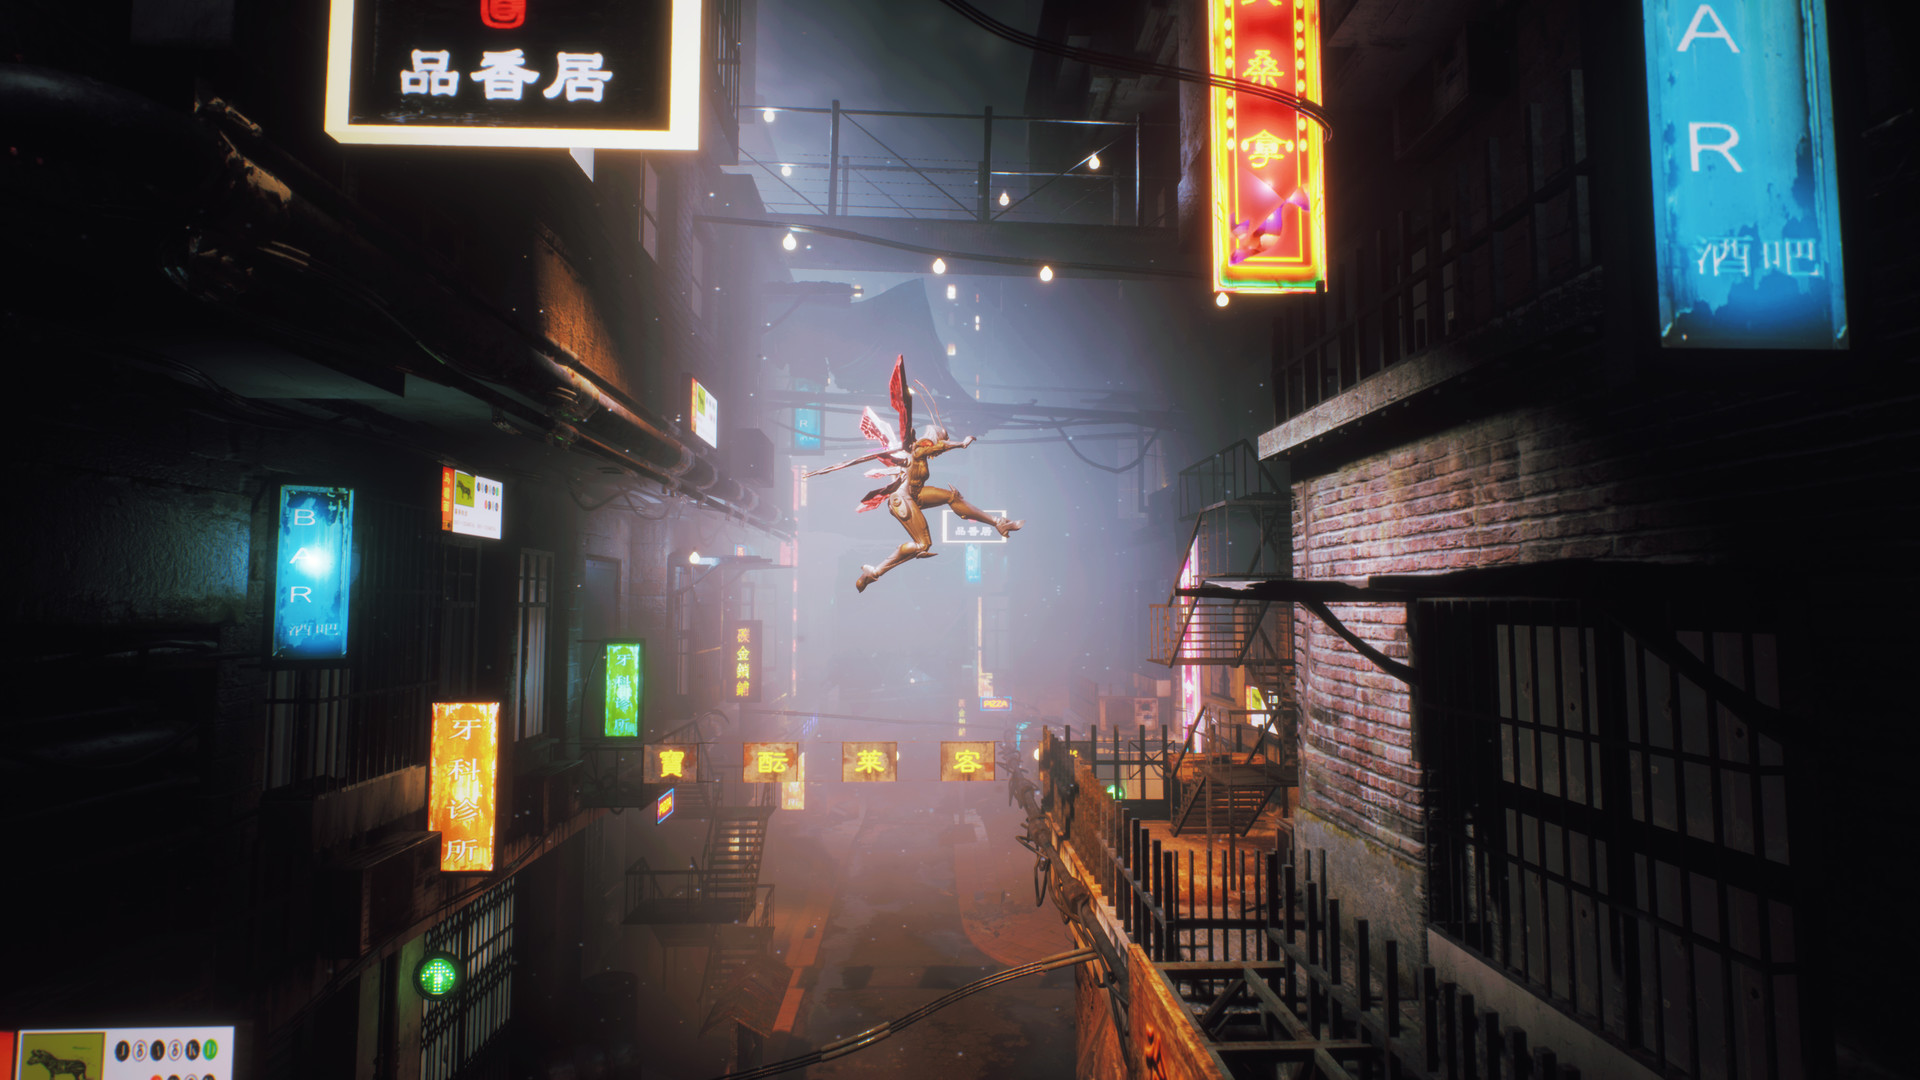
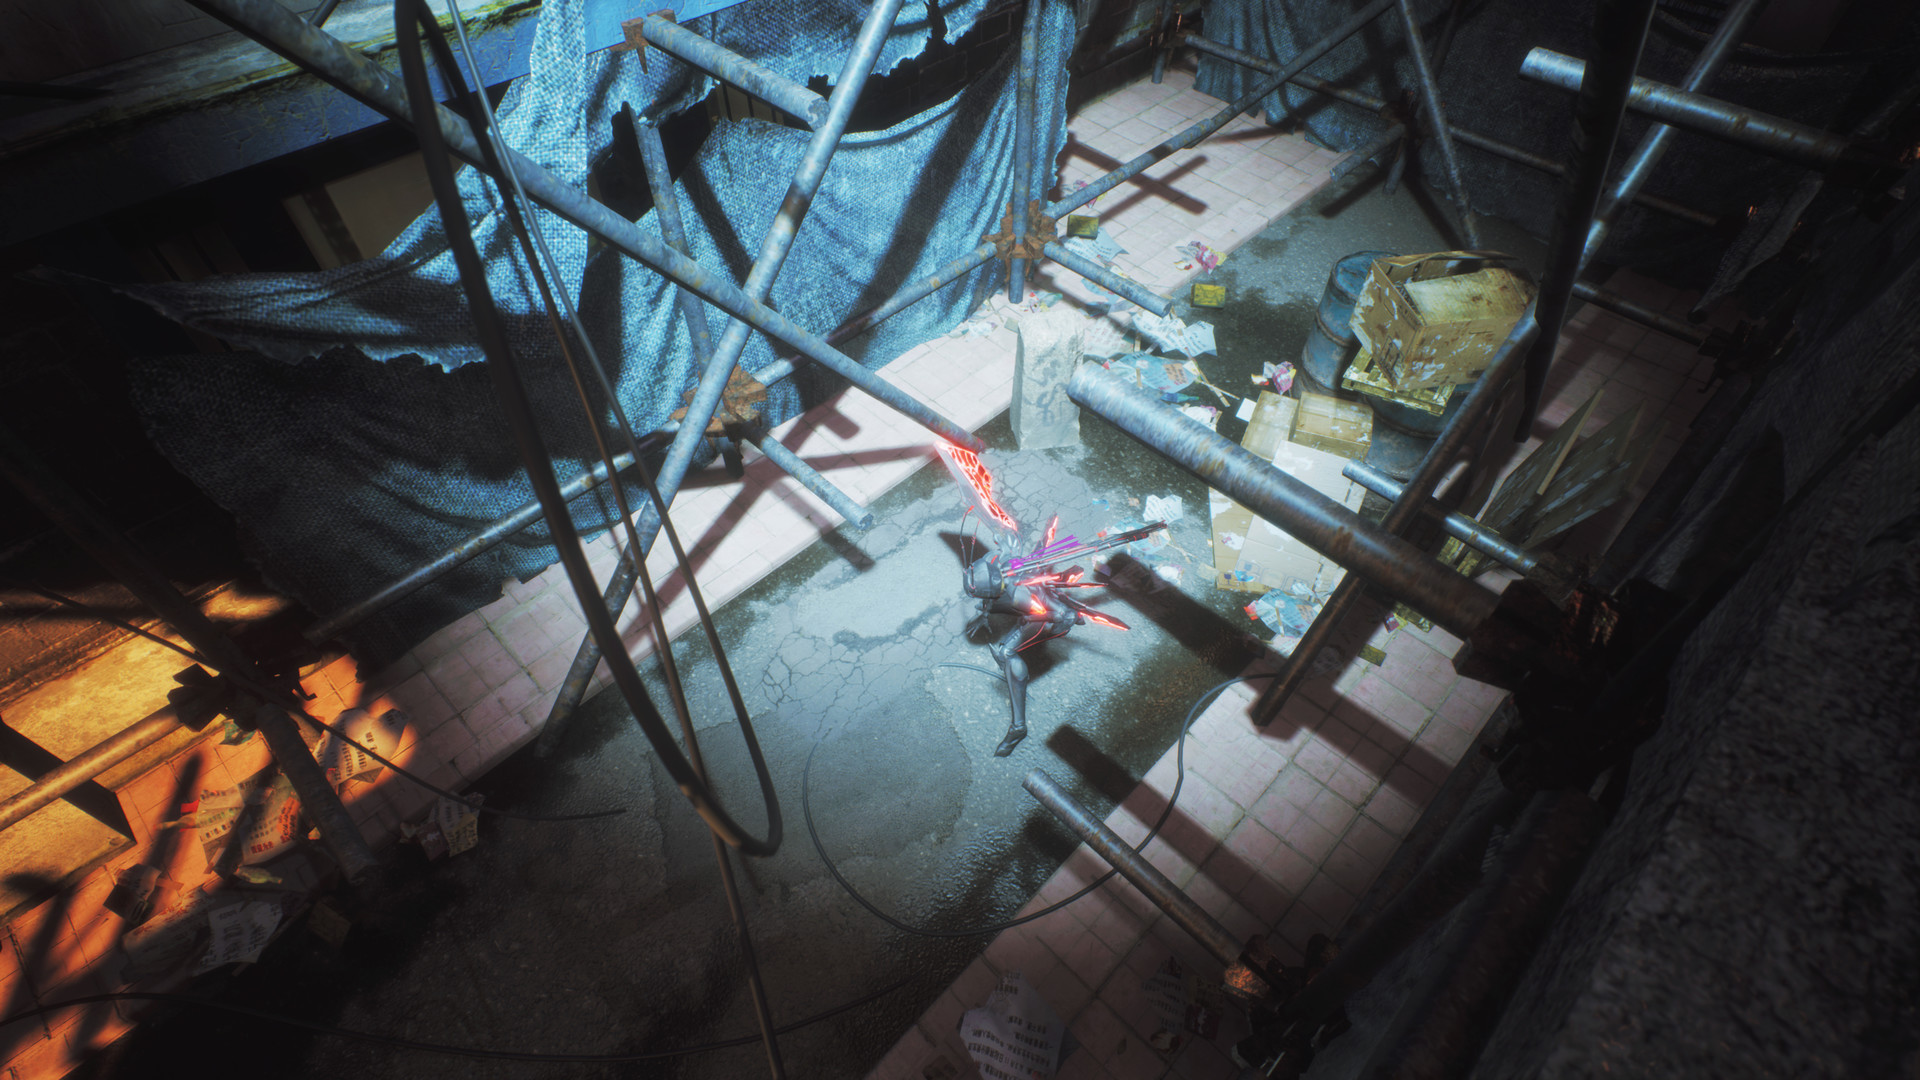
Talis is one of my original characters. She fights crimes and invaders in a chaotic near-future world. There is a grander story I have for her, but this is enough context for the piece of work I present to you today.
I mainly used Unreal Engine at the center to put this project together. Various software such as Blender, Zbrush, UVLayout, Quixel Suite, SP, Photoshop, and, of course, Quixel Megascans and Bridge.
In my opinion, 3D scanning is the future of the industry. It helps us artists focus more on the artistic aspects of our work rather than spending hours on researching and recreate what already exists in the real world. My bet is on Megascans to lead us into the future.
Inspiration
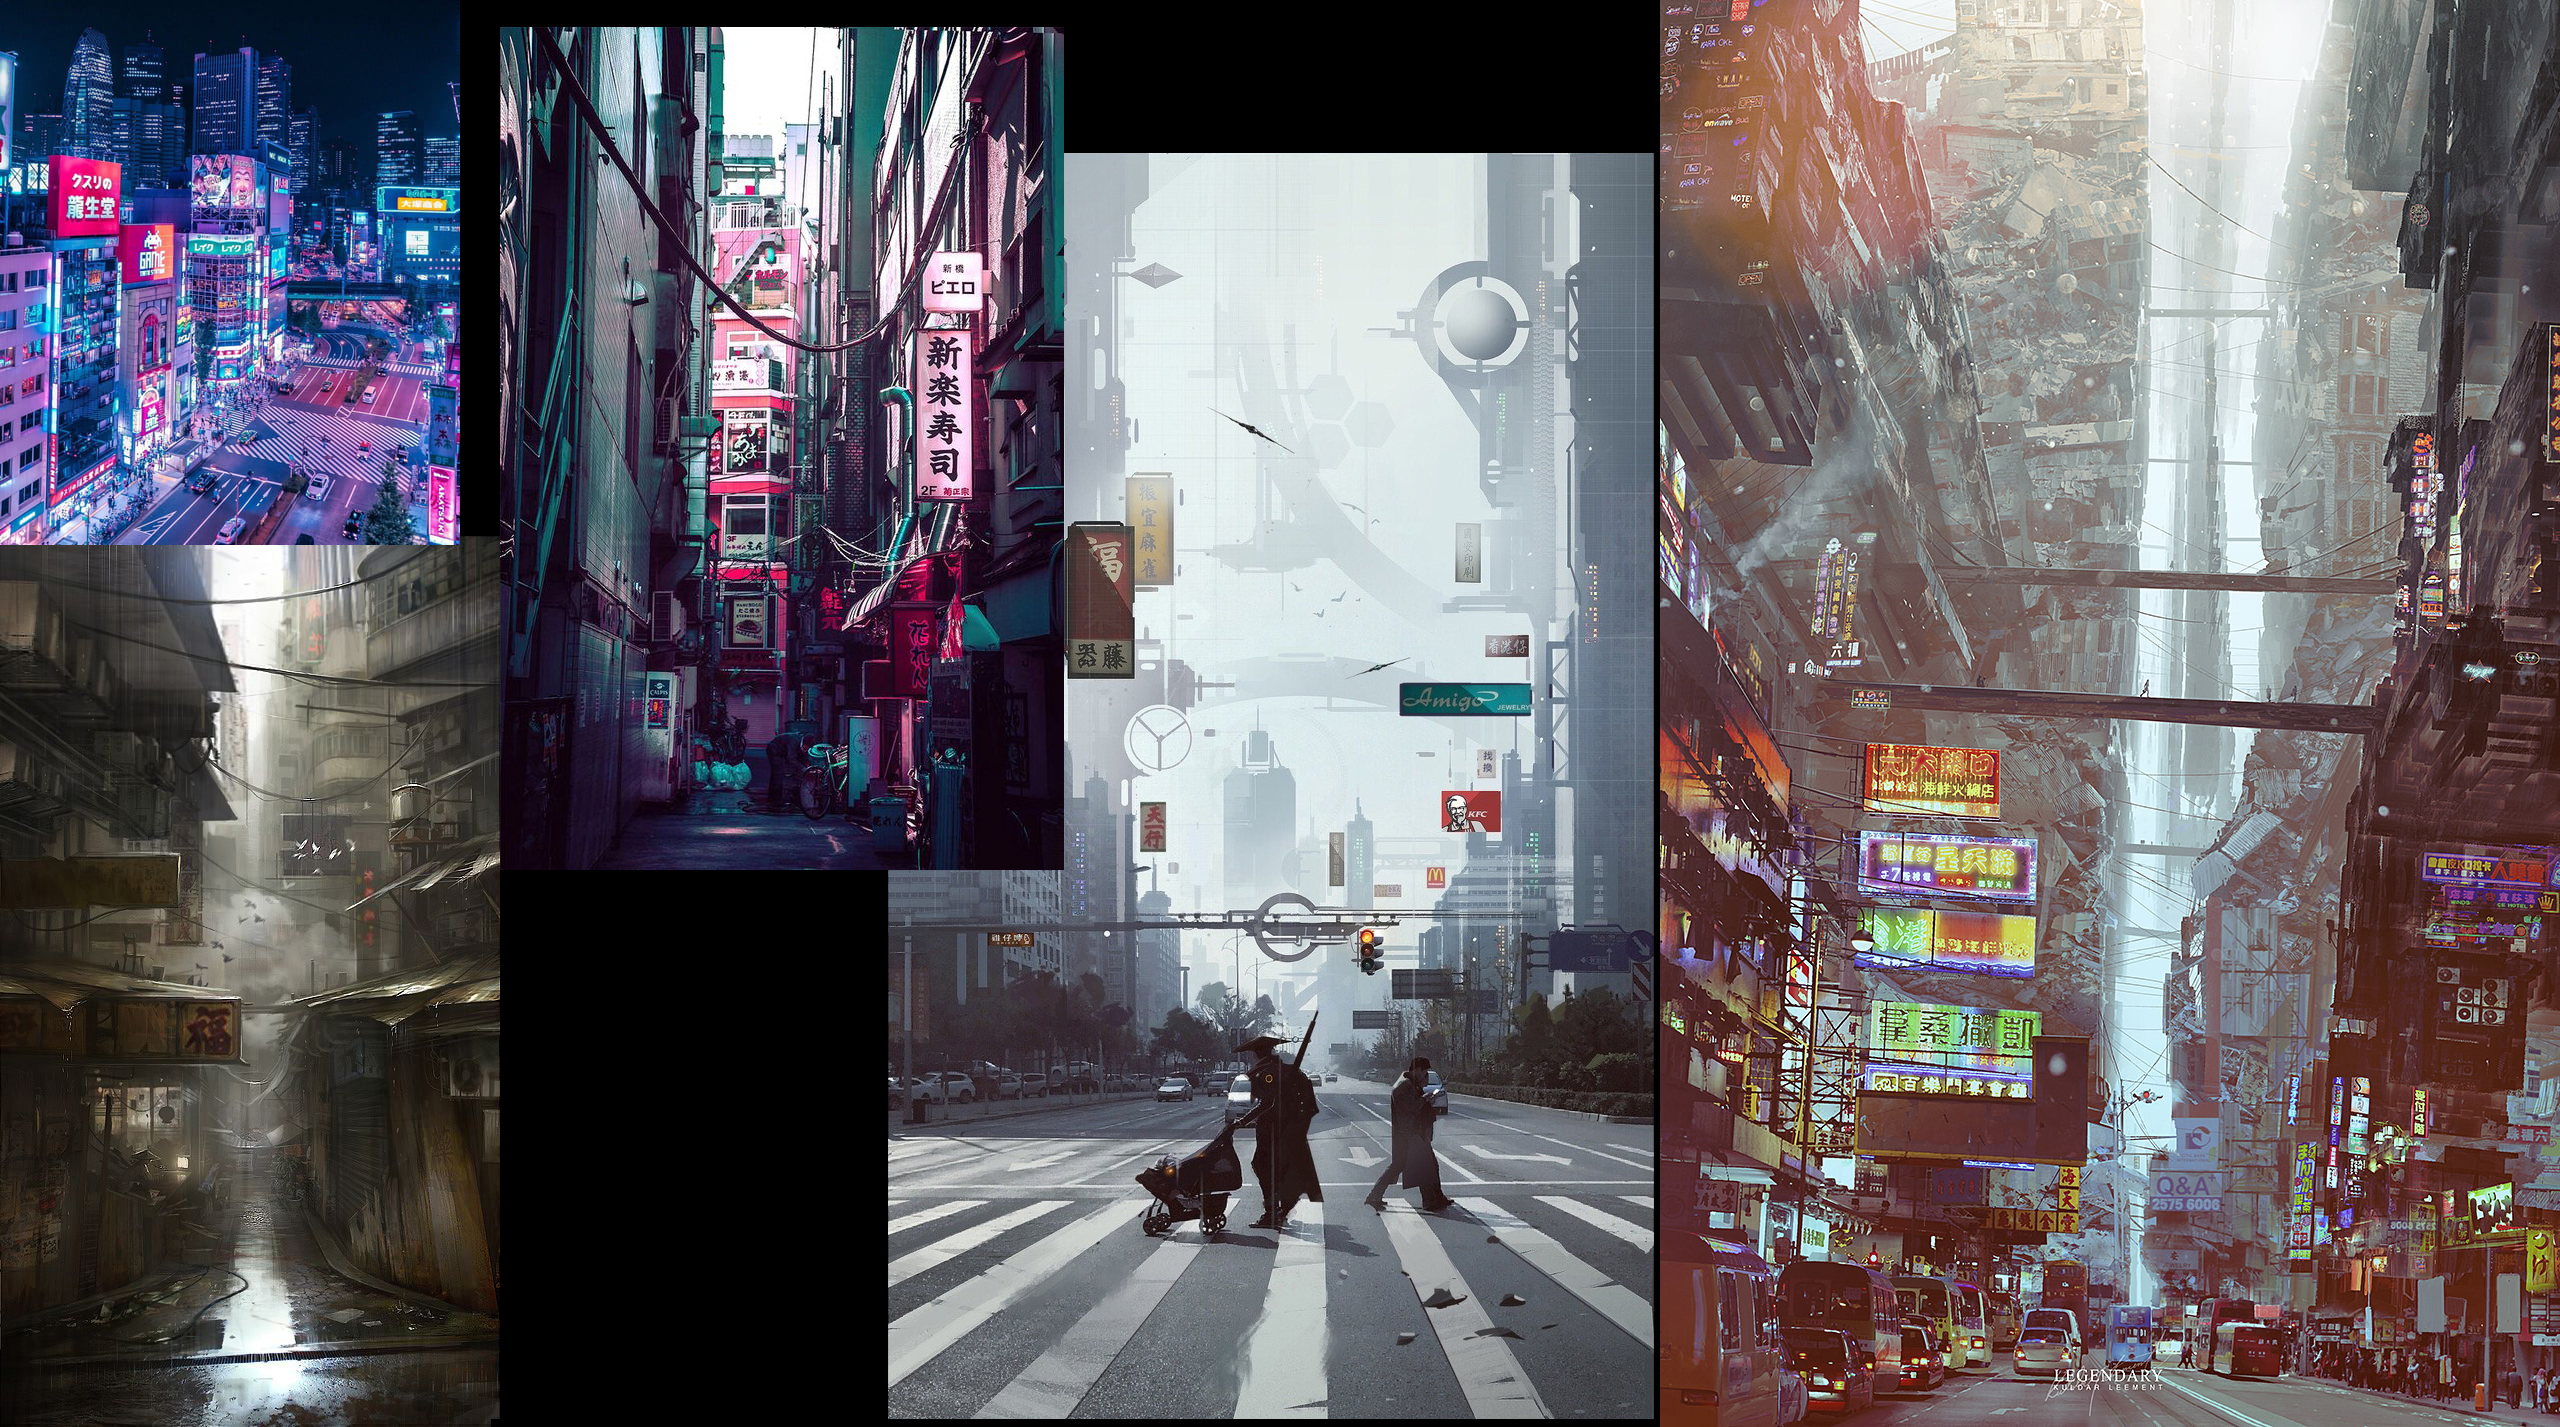
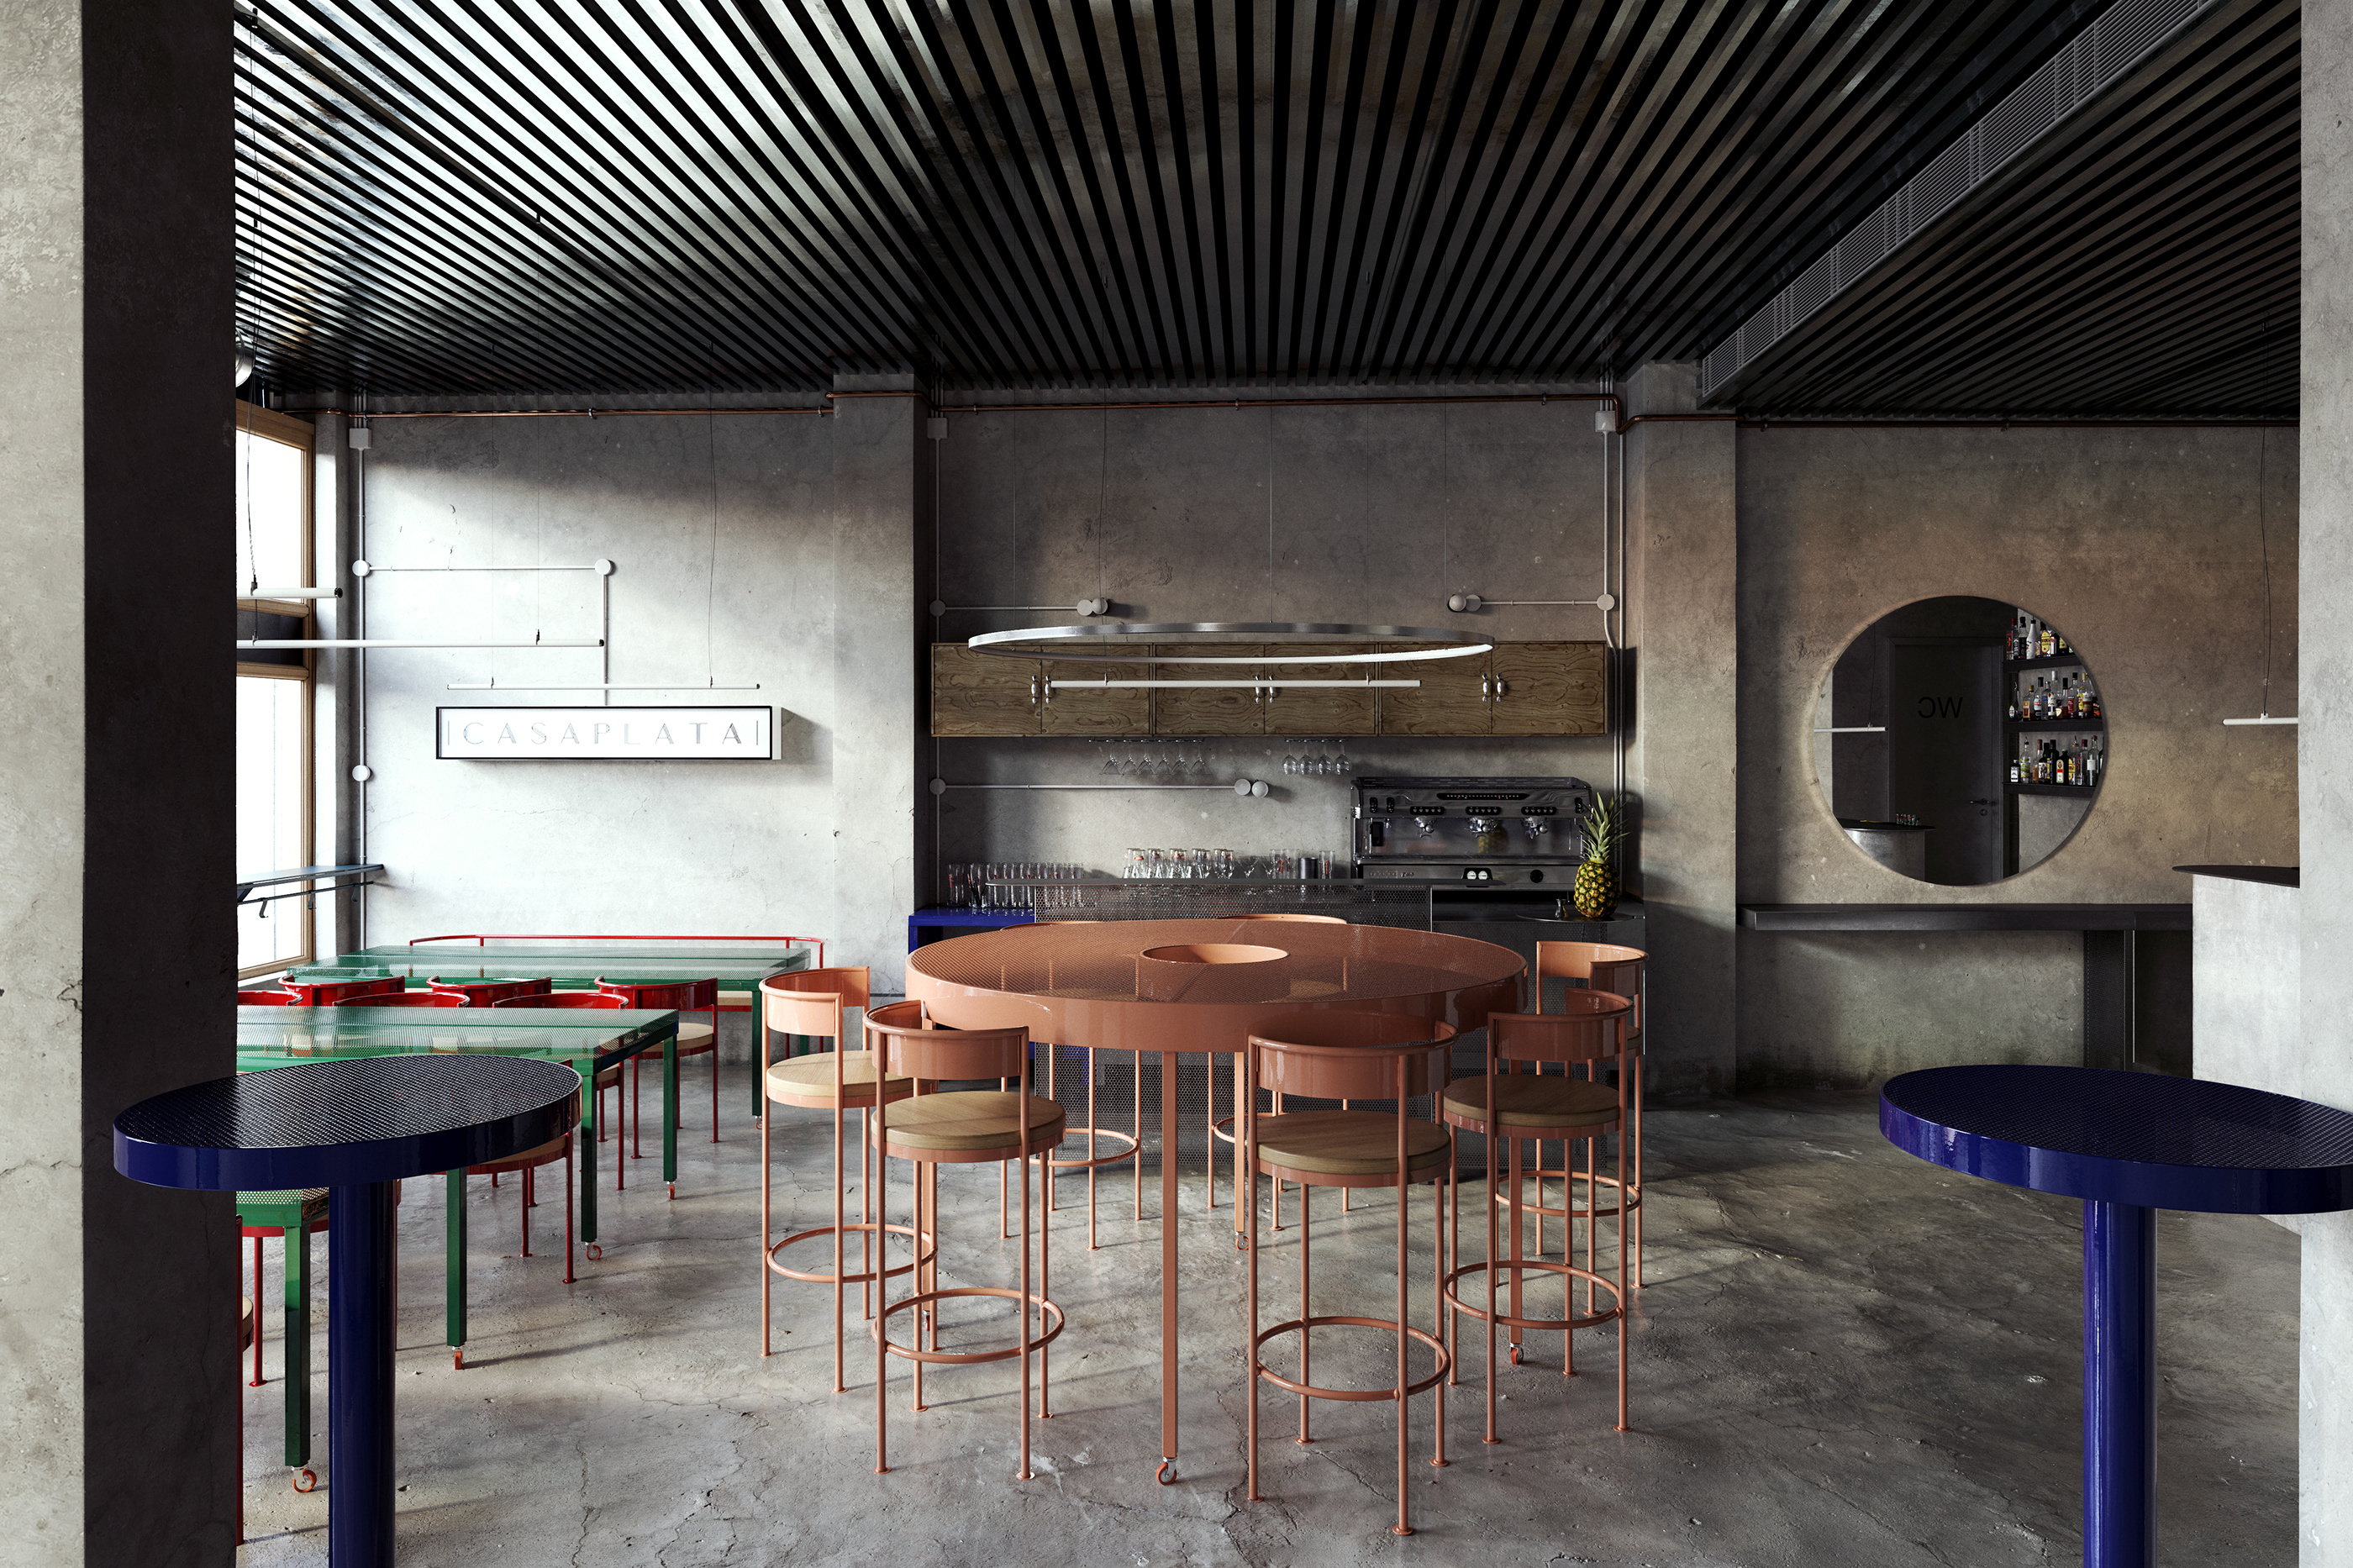
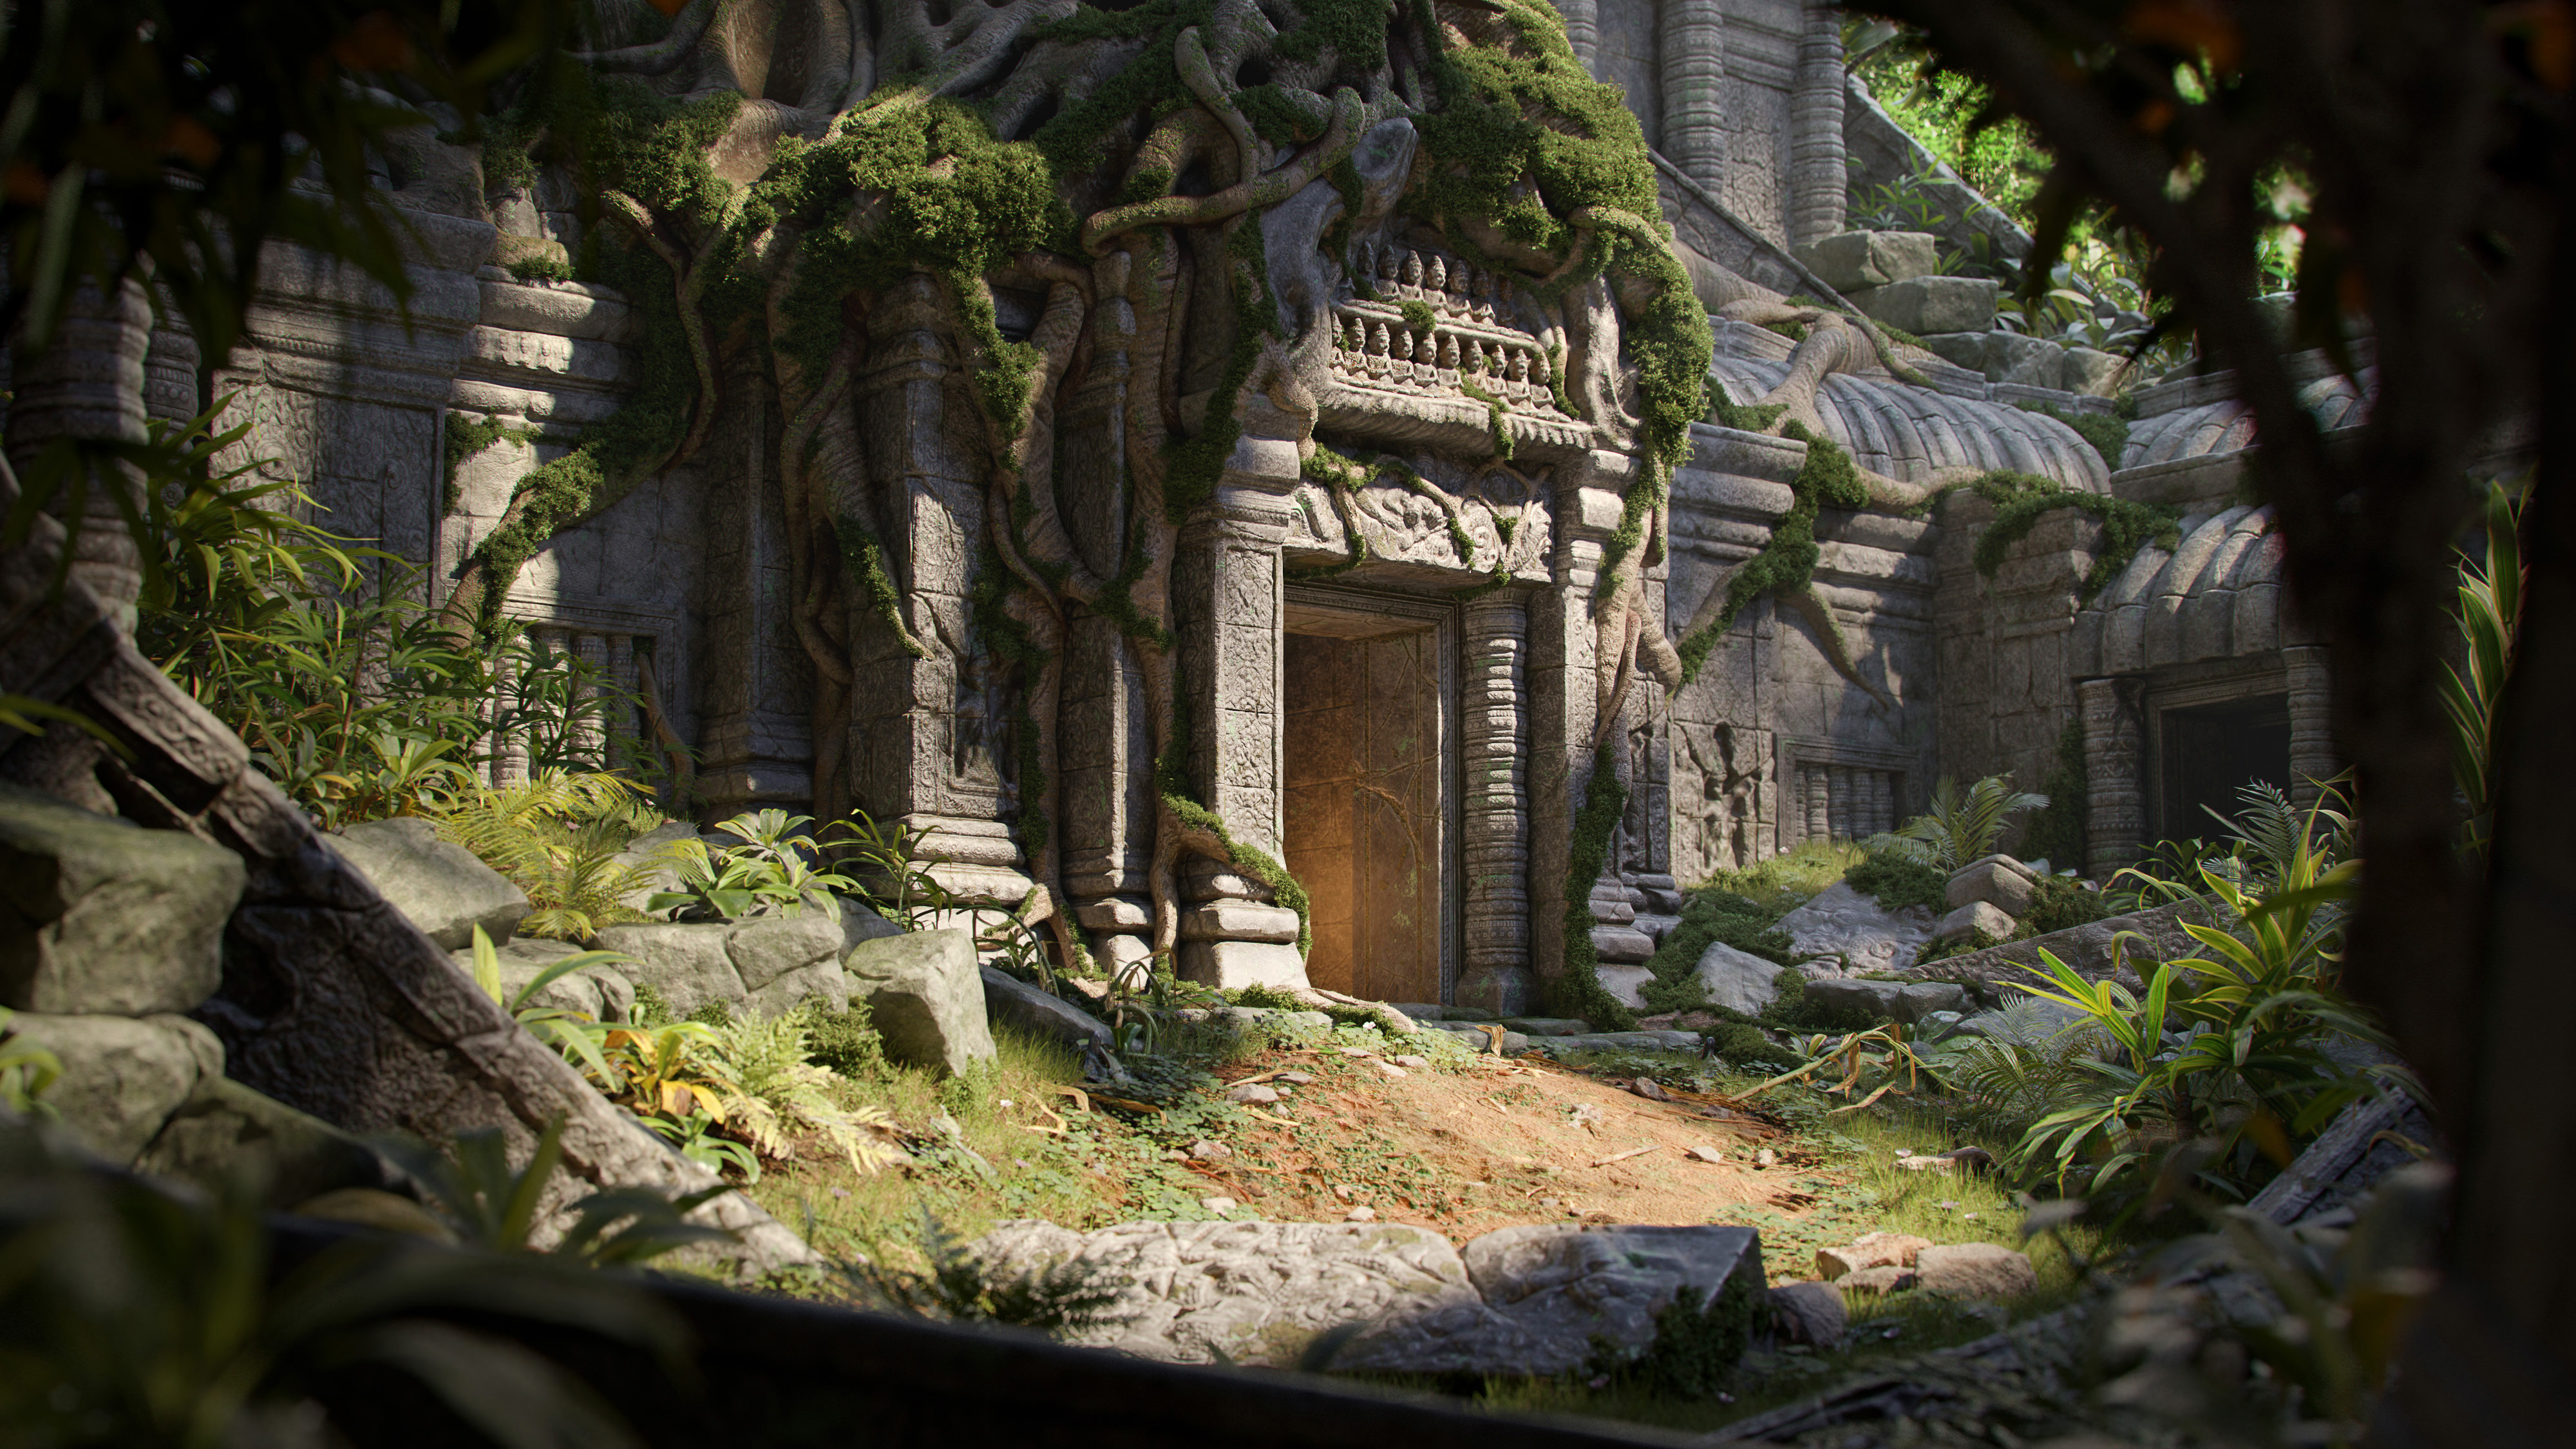
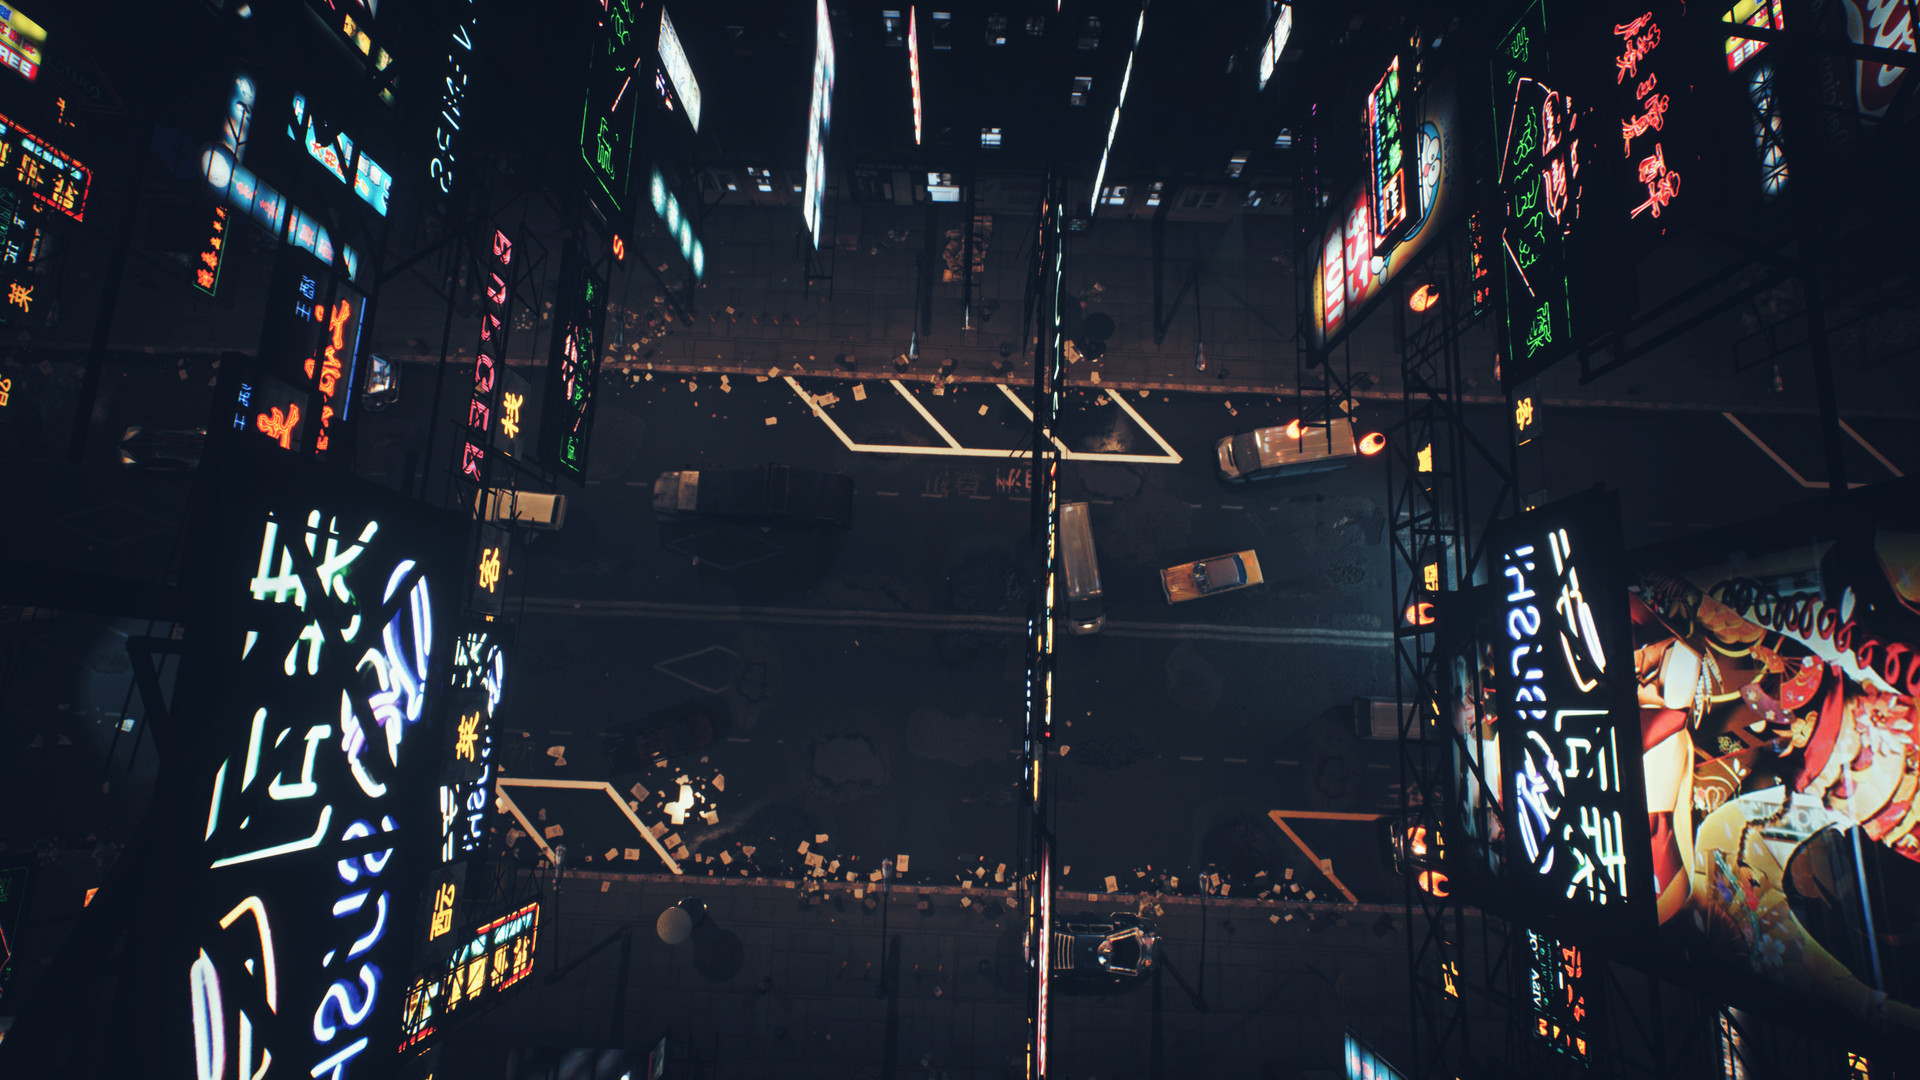
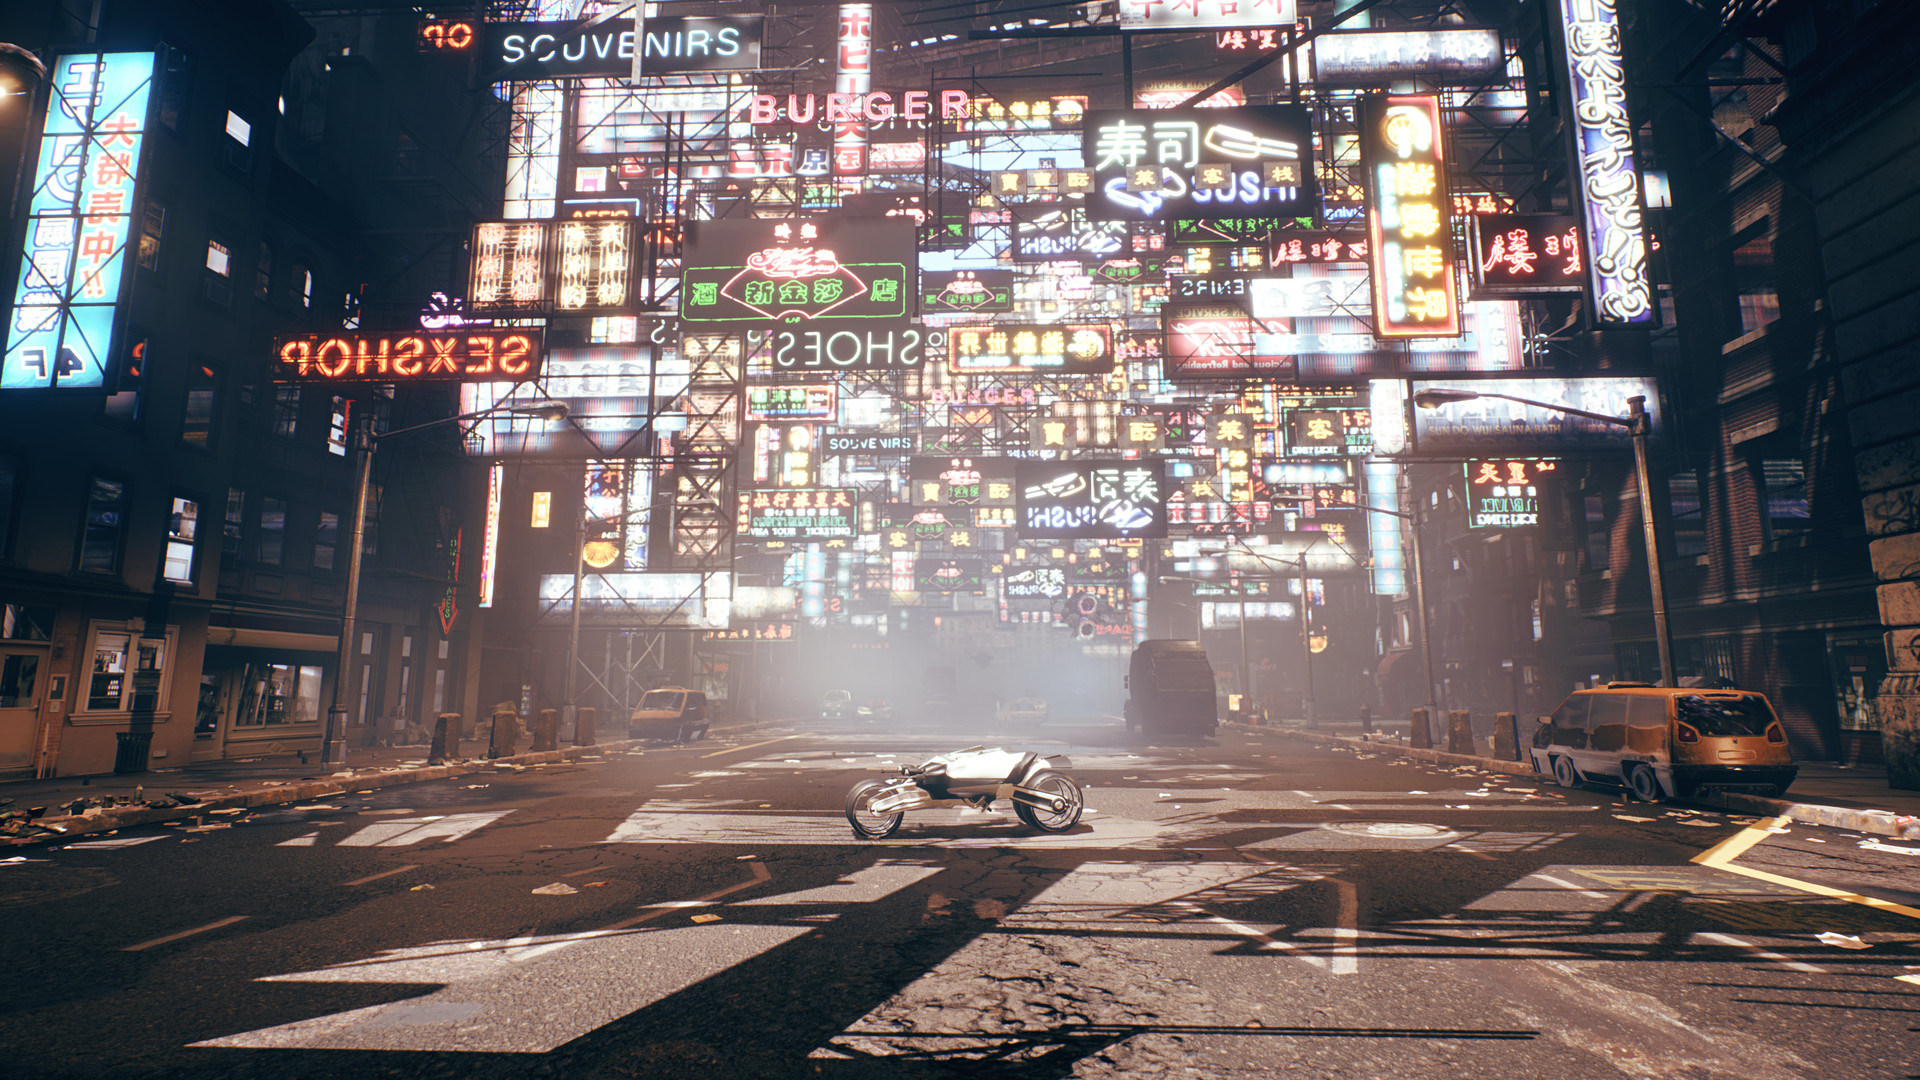
I live in South East Asia, so naturally, I love cyberpunk art style. The main city Talis operates in would be a multicultural city that lies somewhere along the coastal line of Asia. Above are the main references I used to base my city on.
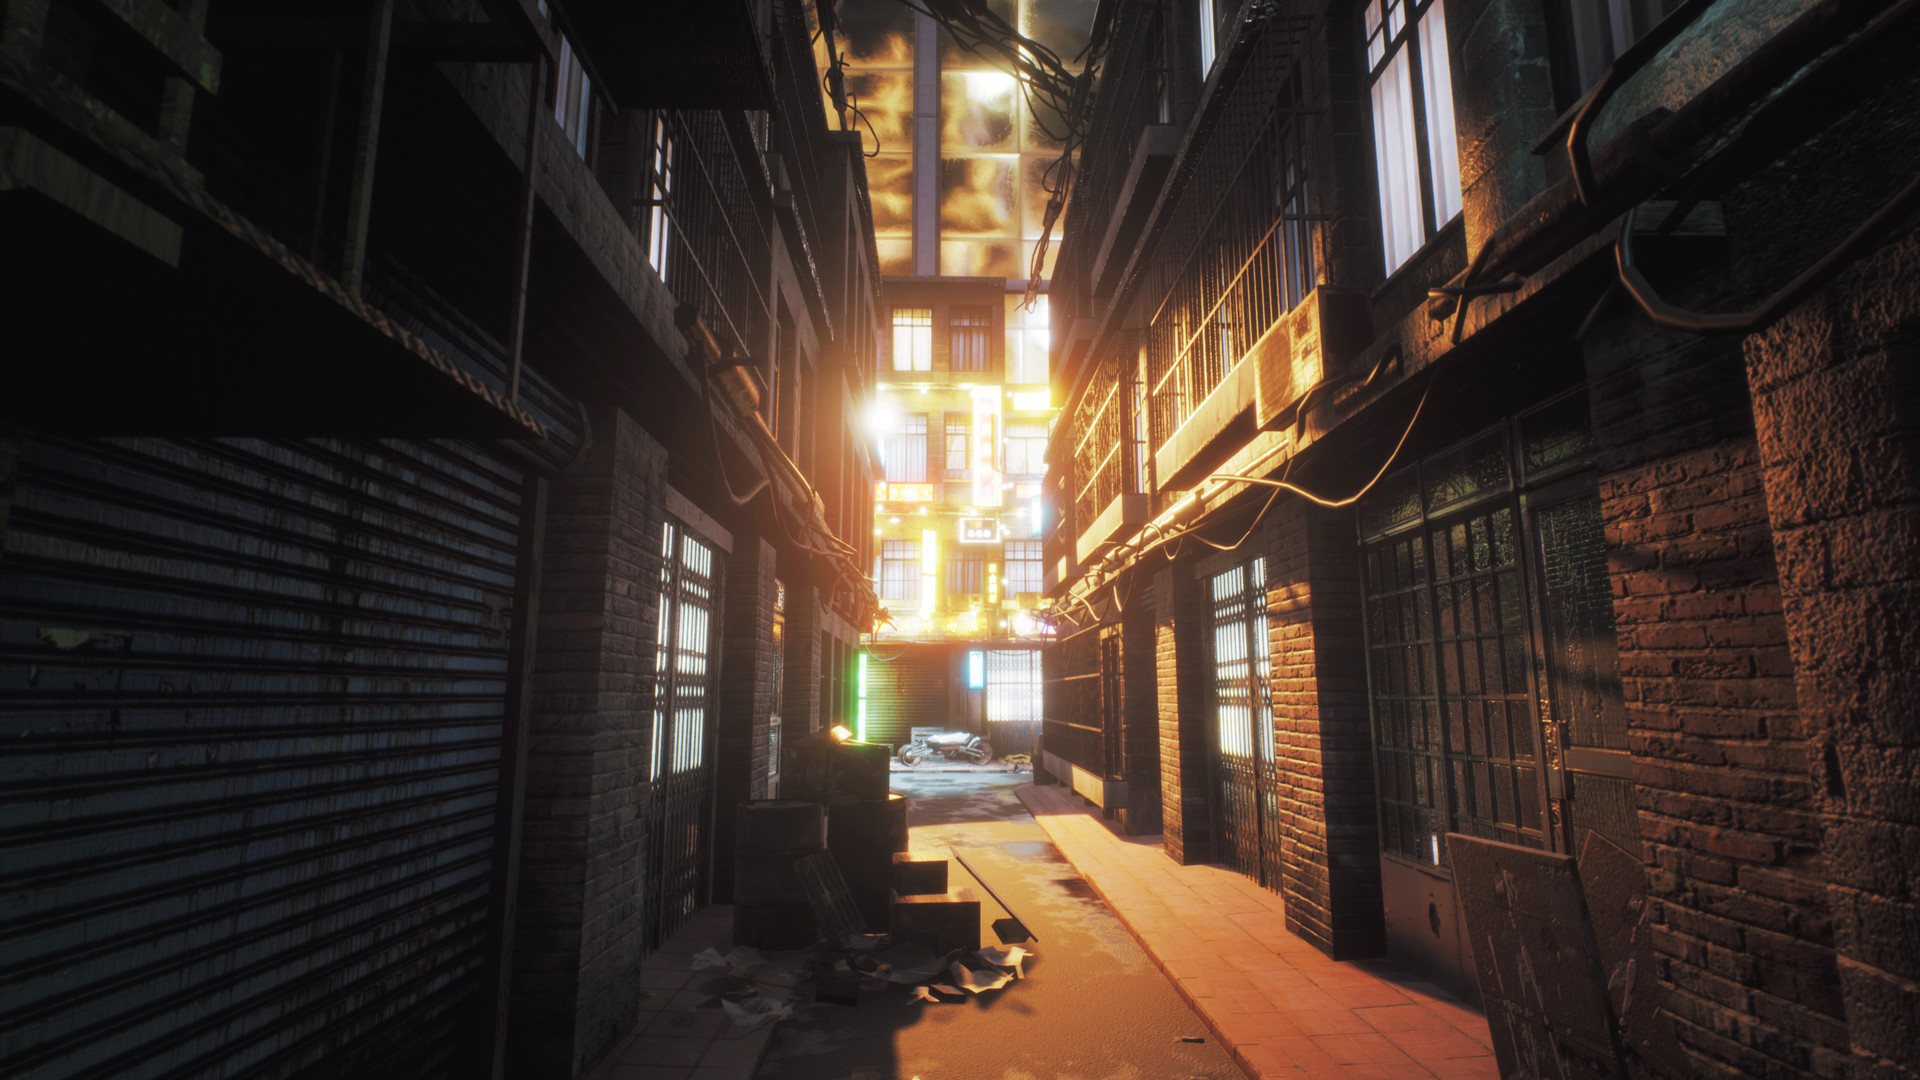
The city needed to have a heavy contrast to the character Talis. It’s dark, dirty, complex, and overwhelming to understand. It makes you want to stick even closer to a defender like Talis.
I did my best to capture the mood of the images above, while consciously not making them look 100% alike. I did pump the craziness of the city to the max when making the electrical wires and neon signs everywhere, as it would be impossible to control the chaotic pattern of the city and its structure. I do believe that if the population in Asia continues to grow at its current pace, this version of the future is not very far-off.
Megascans and Bridge
Here are the assets that I used for this project. They include grass, road, asphalt, concrete, etc. For the textures, I used 4K versions and of the assets and materials, and for 3D assets, I used LOD 1 and 4K textures.
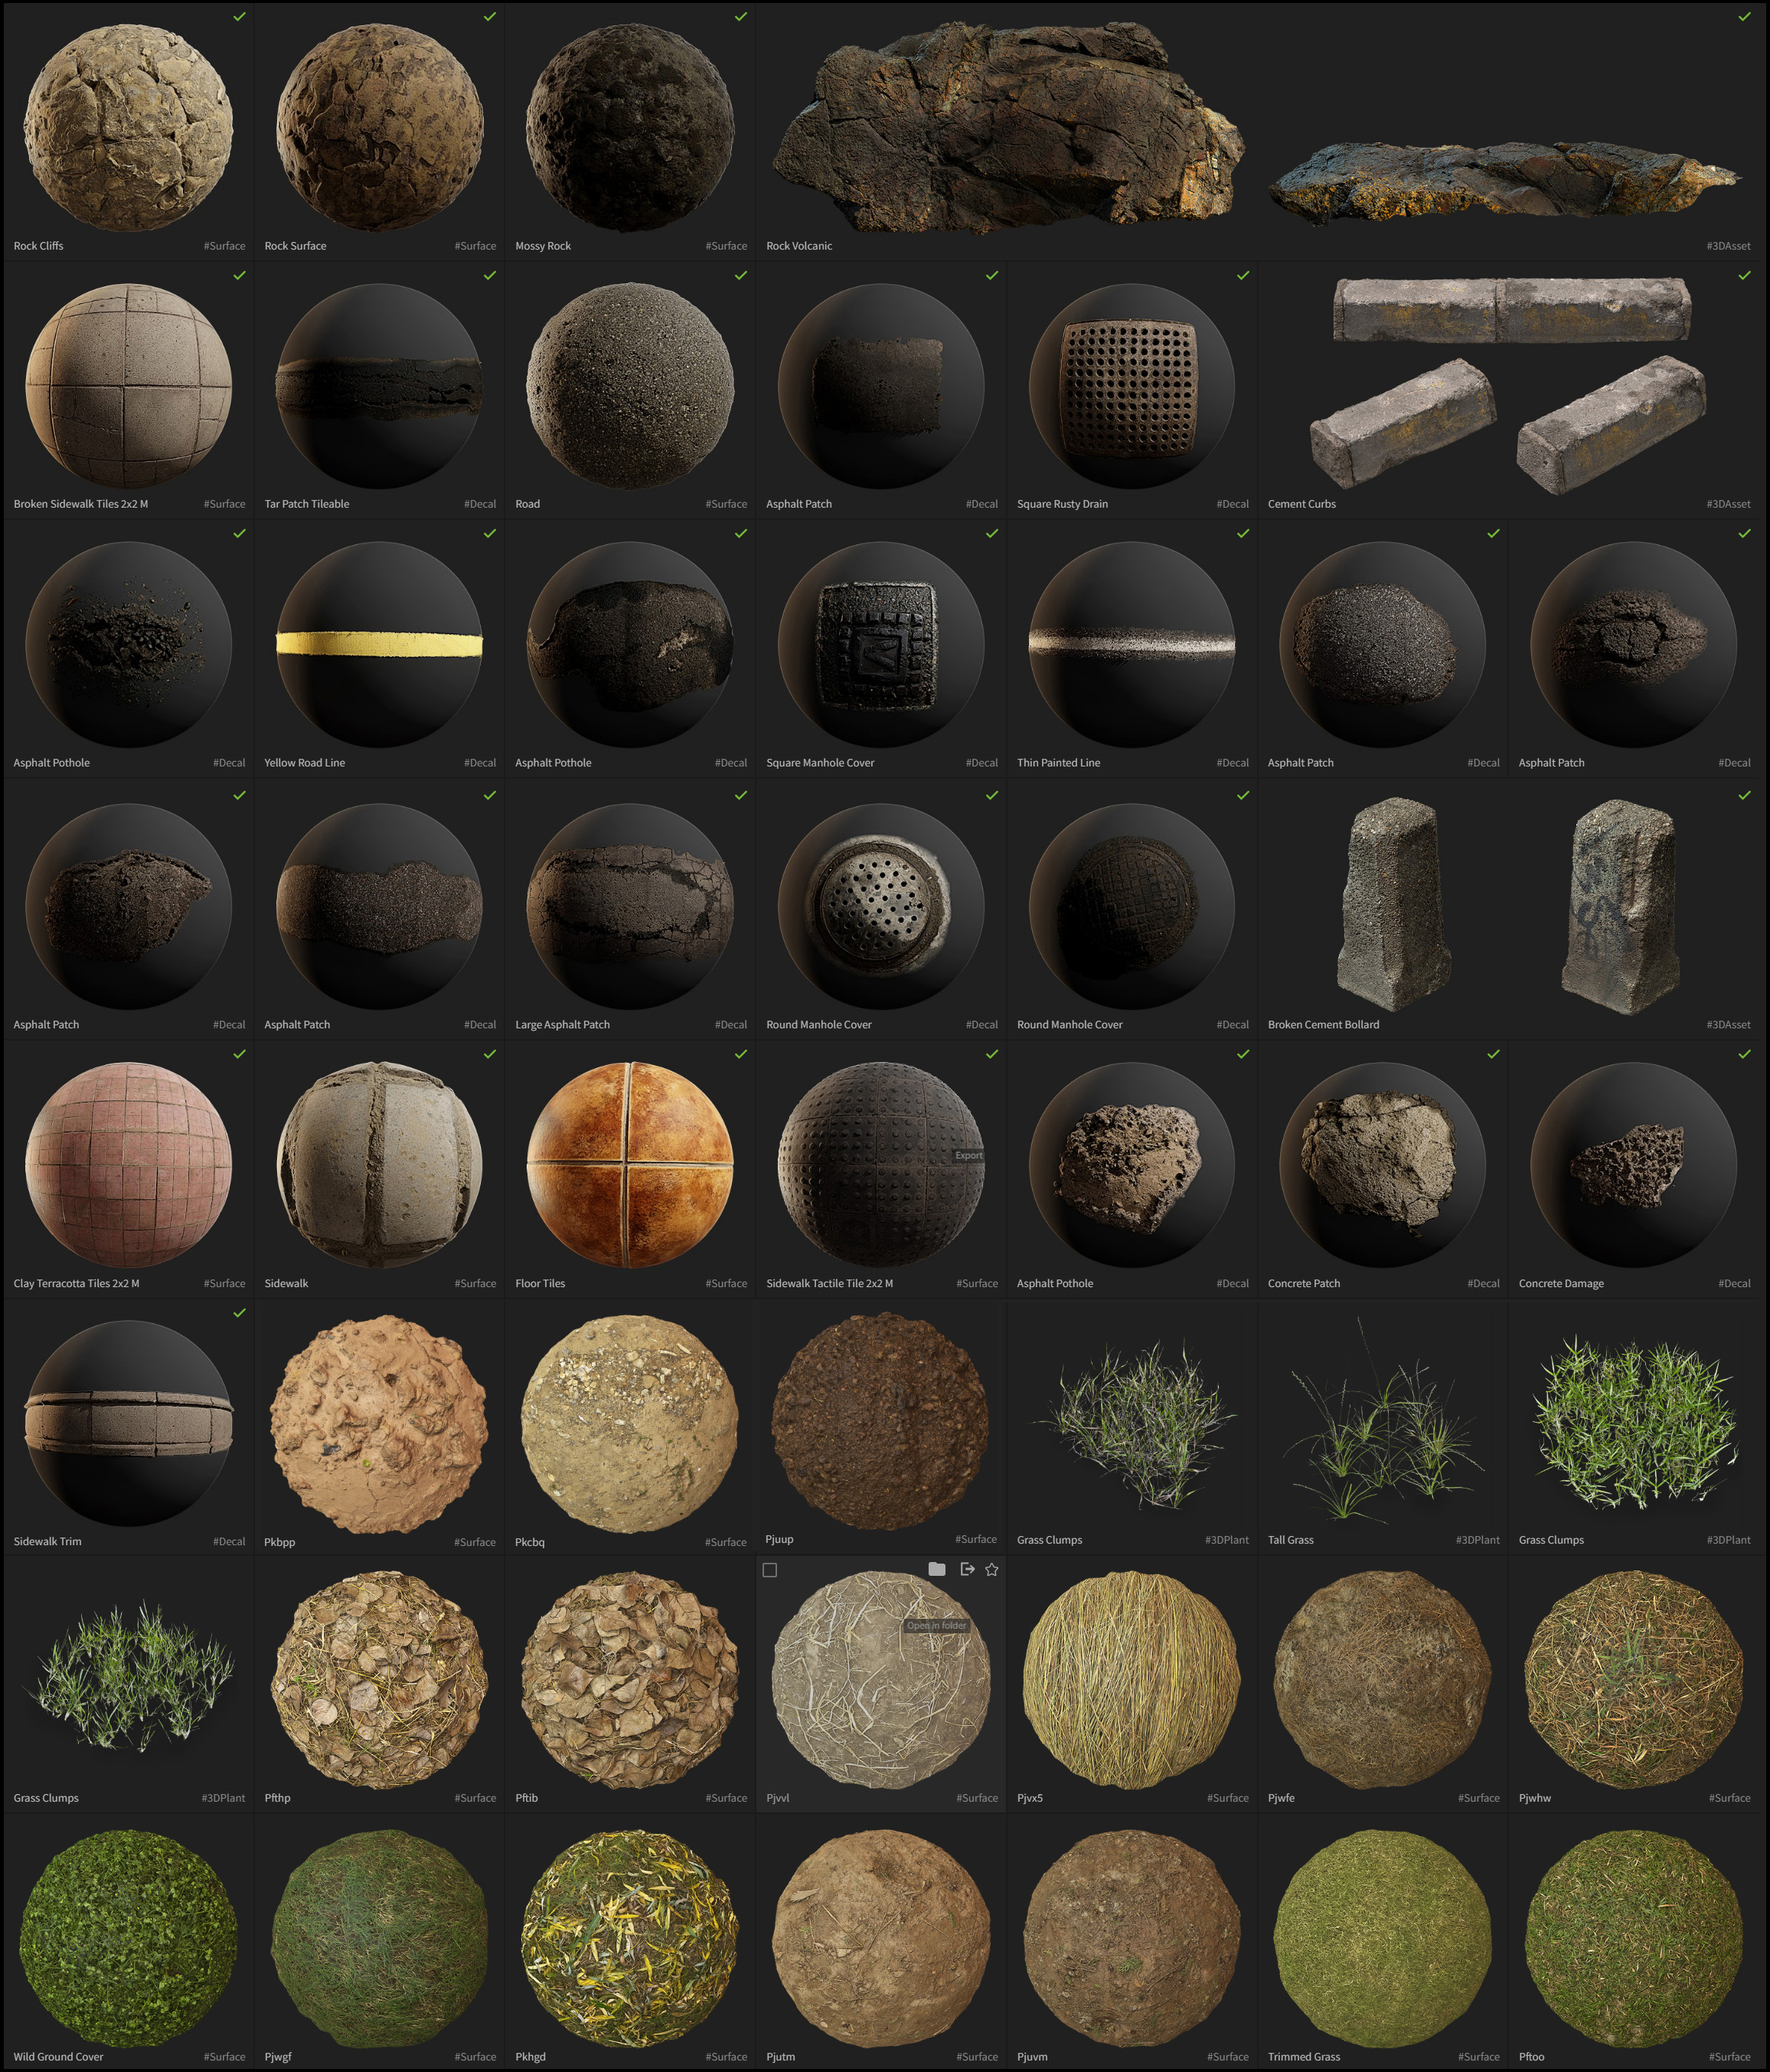
I did not use atlases since it takes quite some time to prepare them, and I really needed to cut anytime so that I could bring this project to life. So 3D assets, decals, and surface scans from the Megascans library were my go-to for this project.
After I had chosen all the asset I needed, I used Bridge to export them to UE4. The process is very fast; only 1 click away from using your assets of choice in UE4, skipping all the many steps such as importing, naming, setting the materials, and so forth.
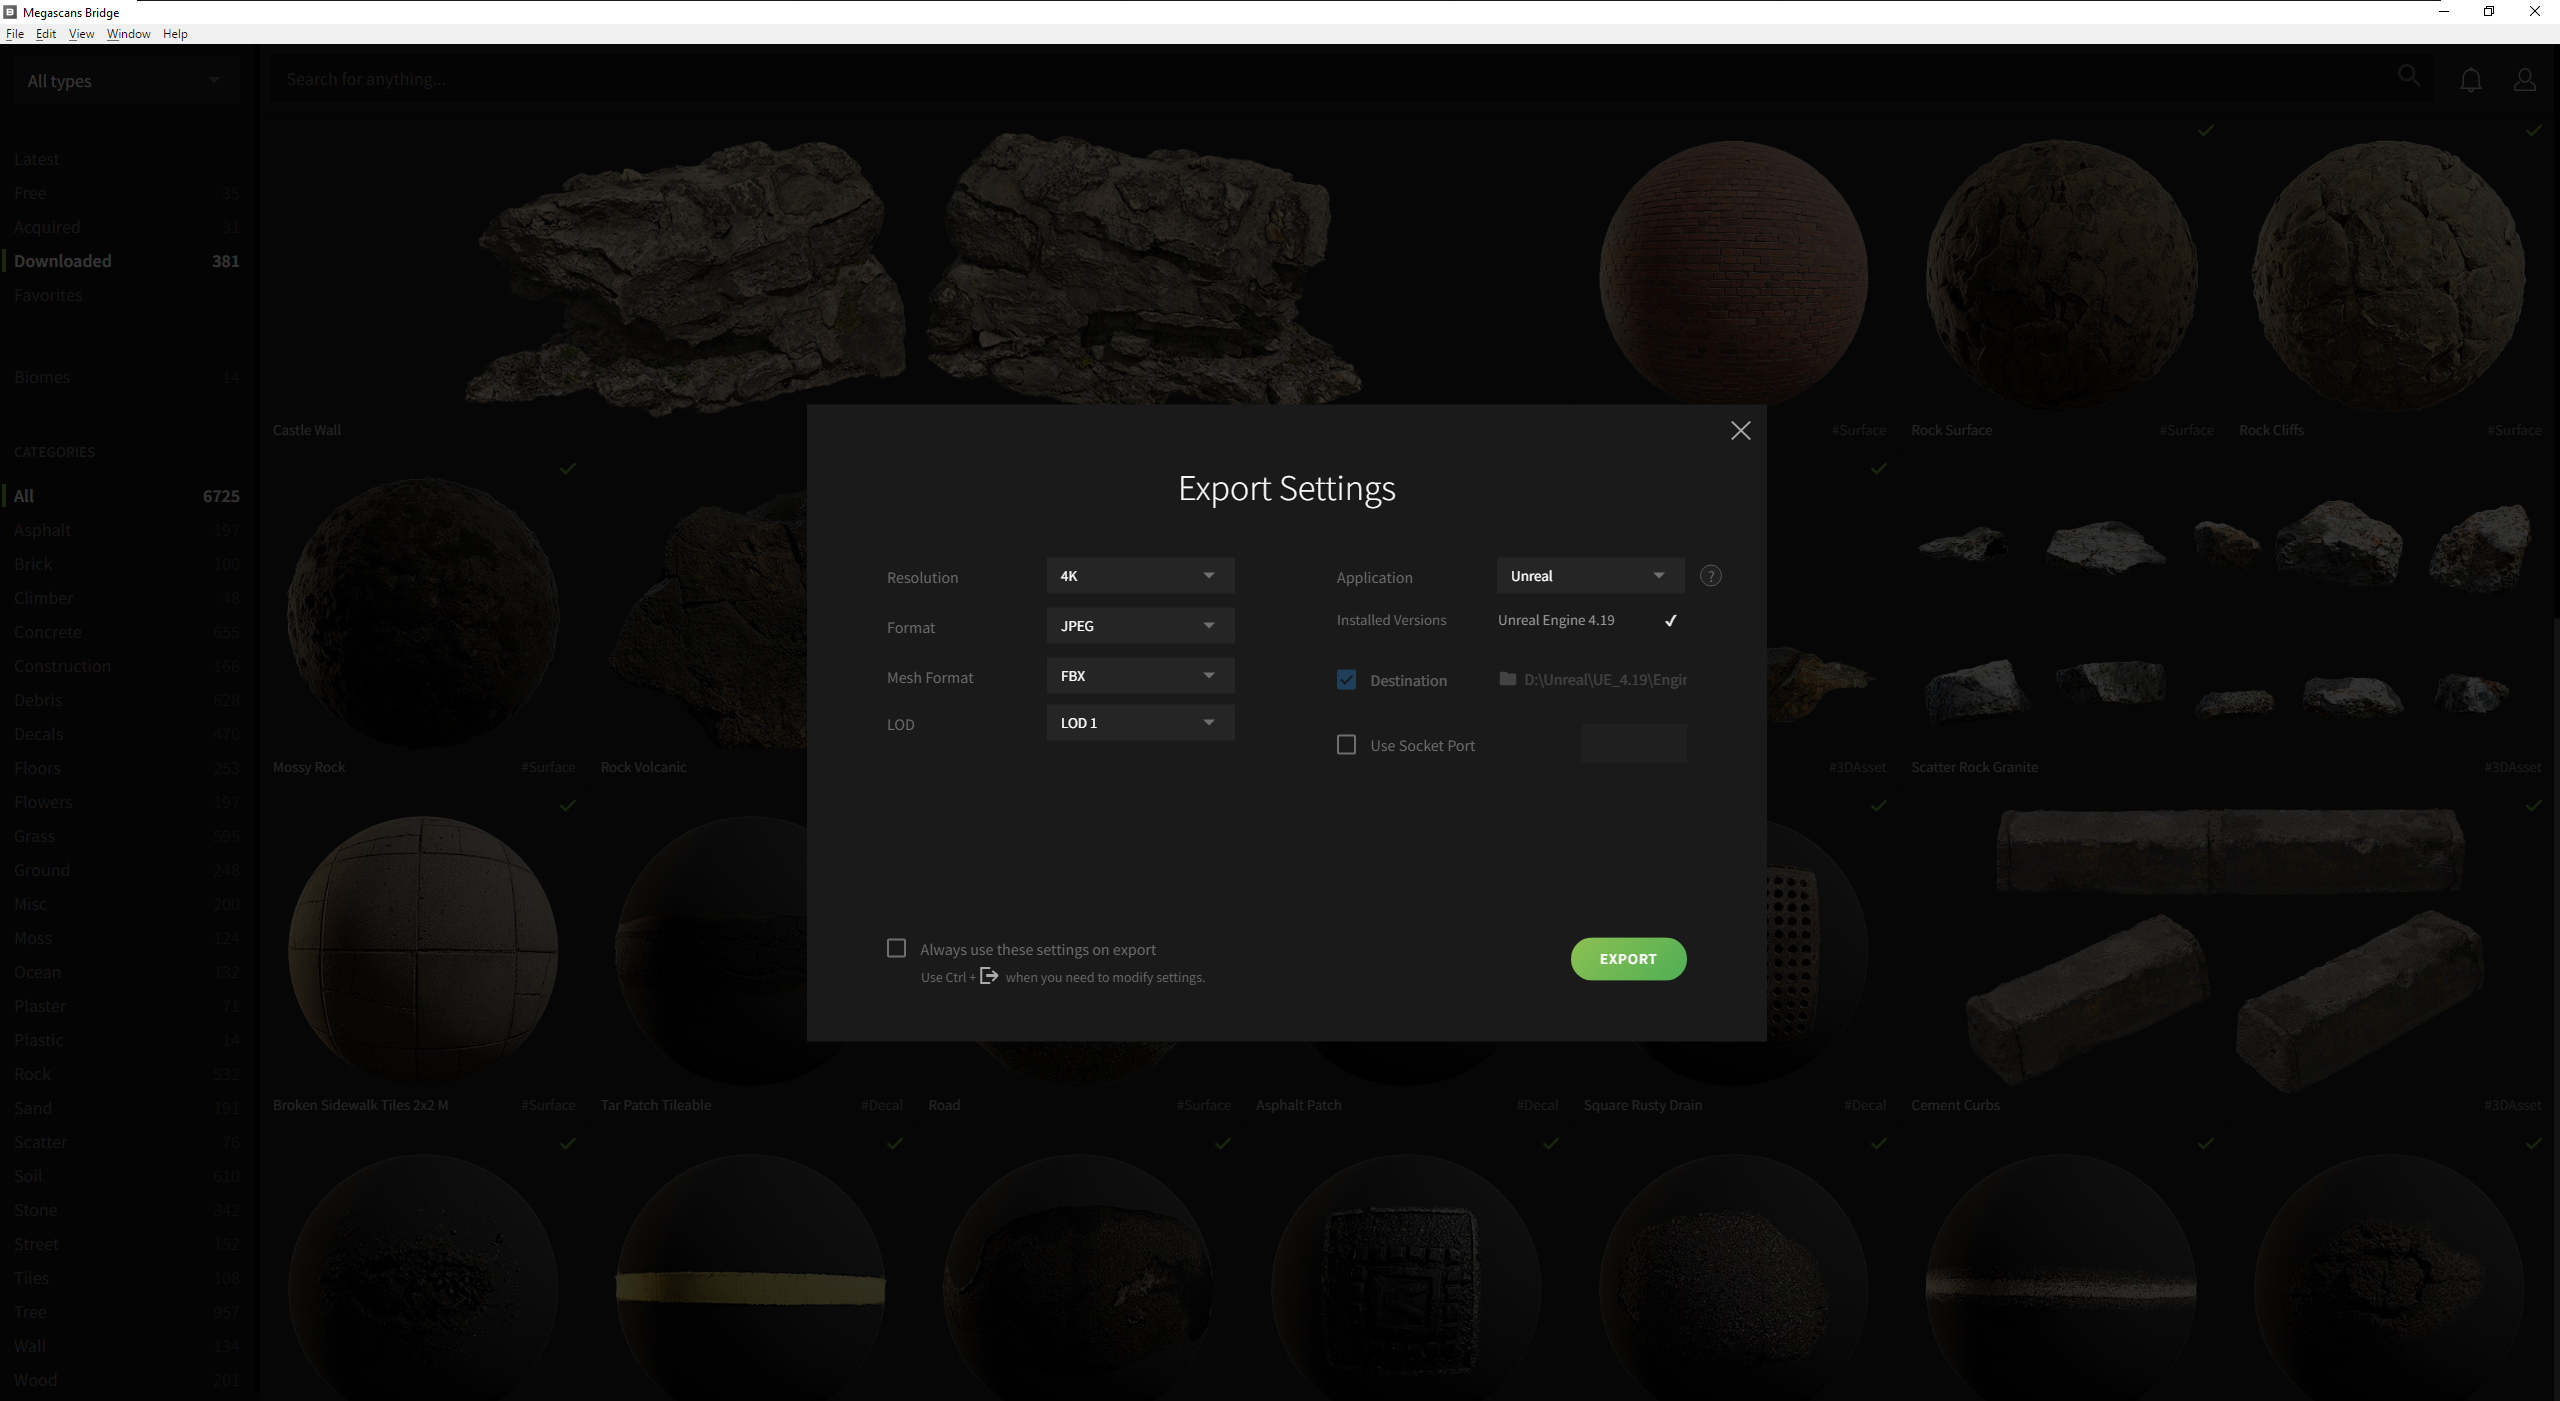
The master materials provided by Quixel are a step away from perfection. With a little tweaking, they fit most projects, in my opinion.
Megascans in Unreal Engine 4
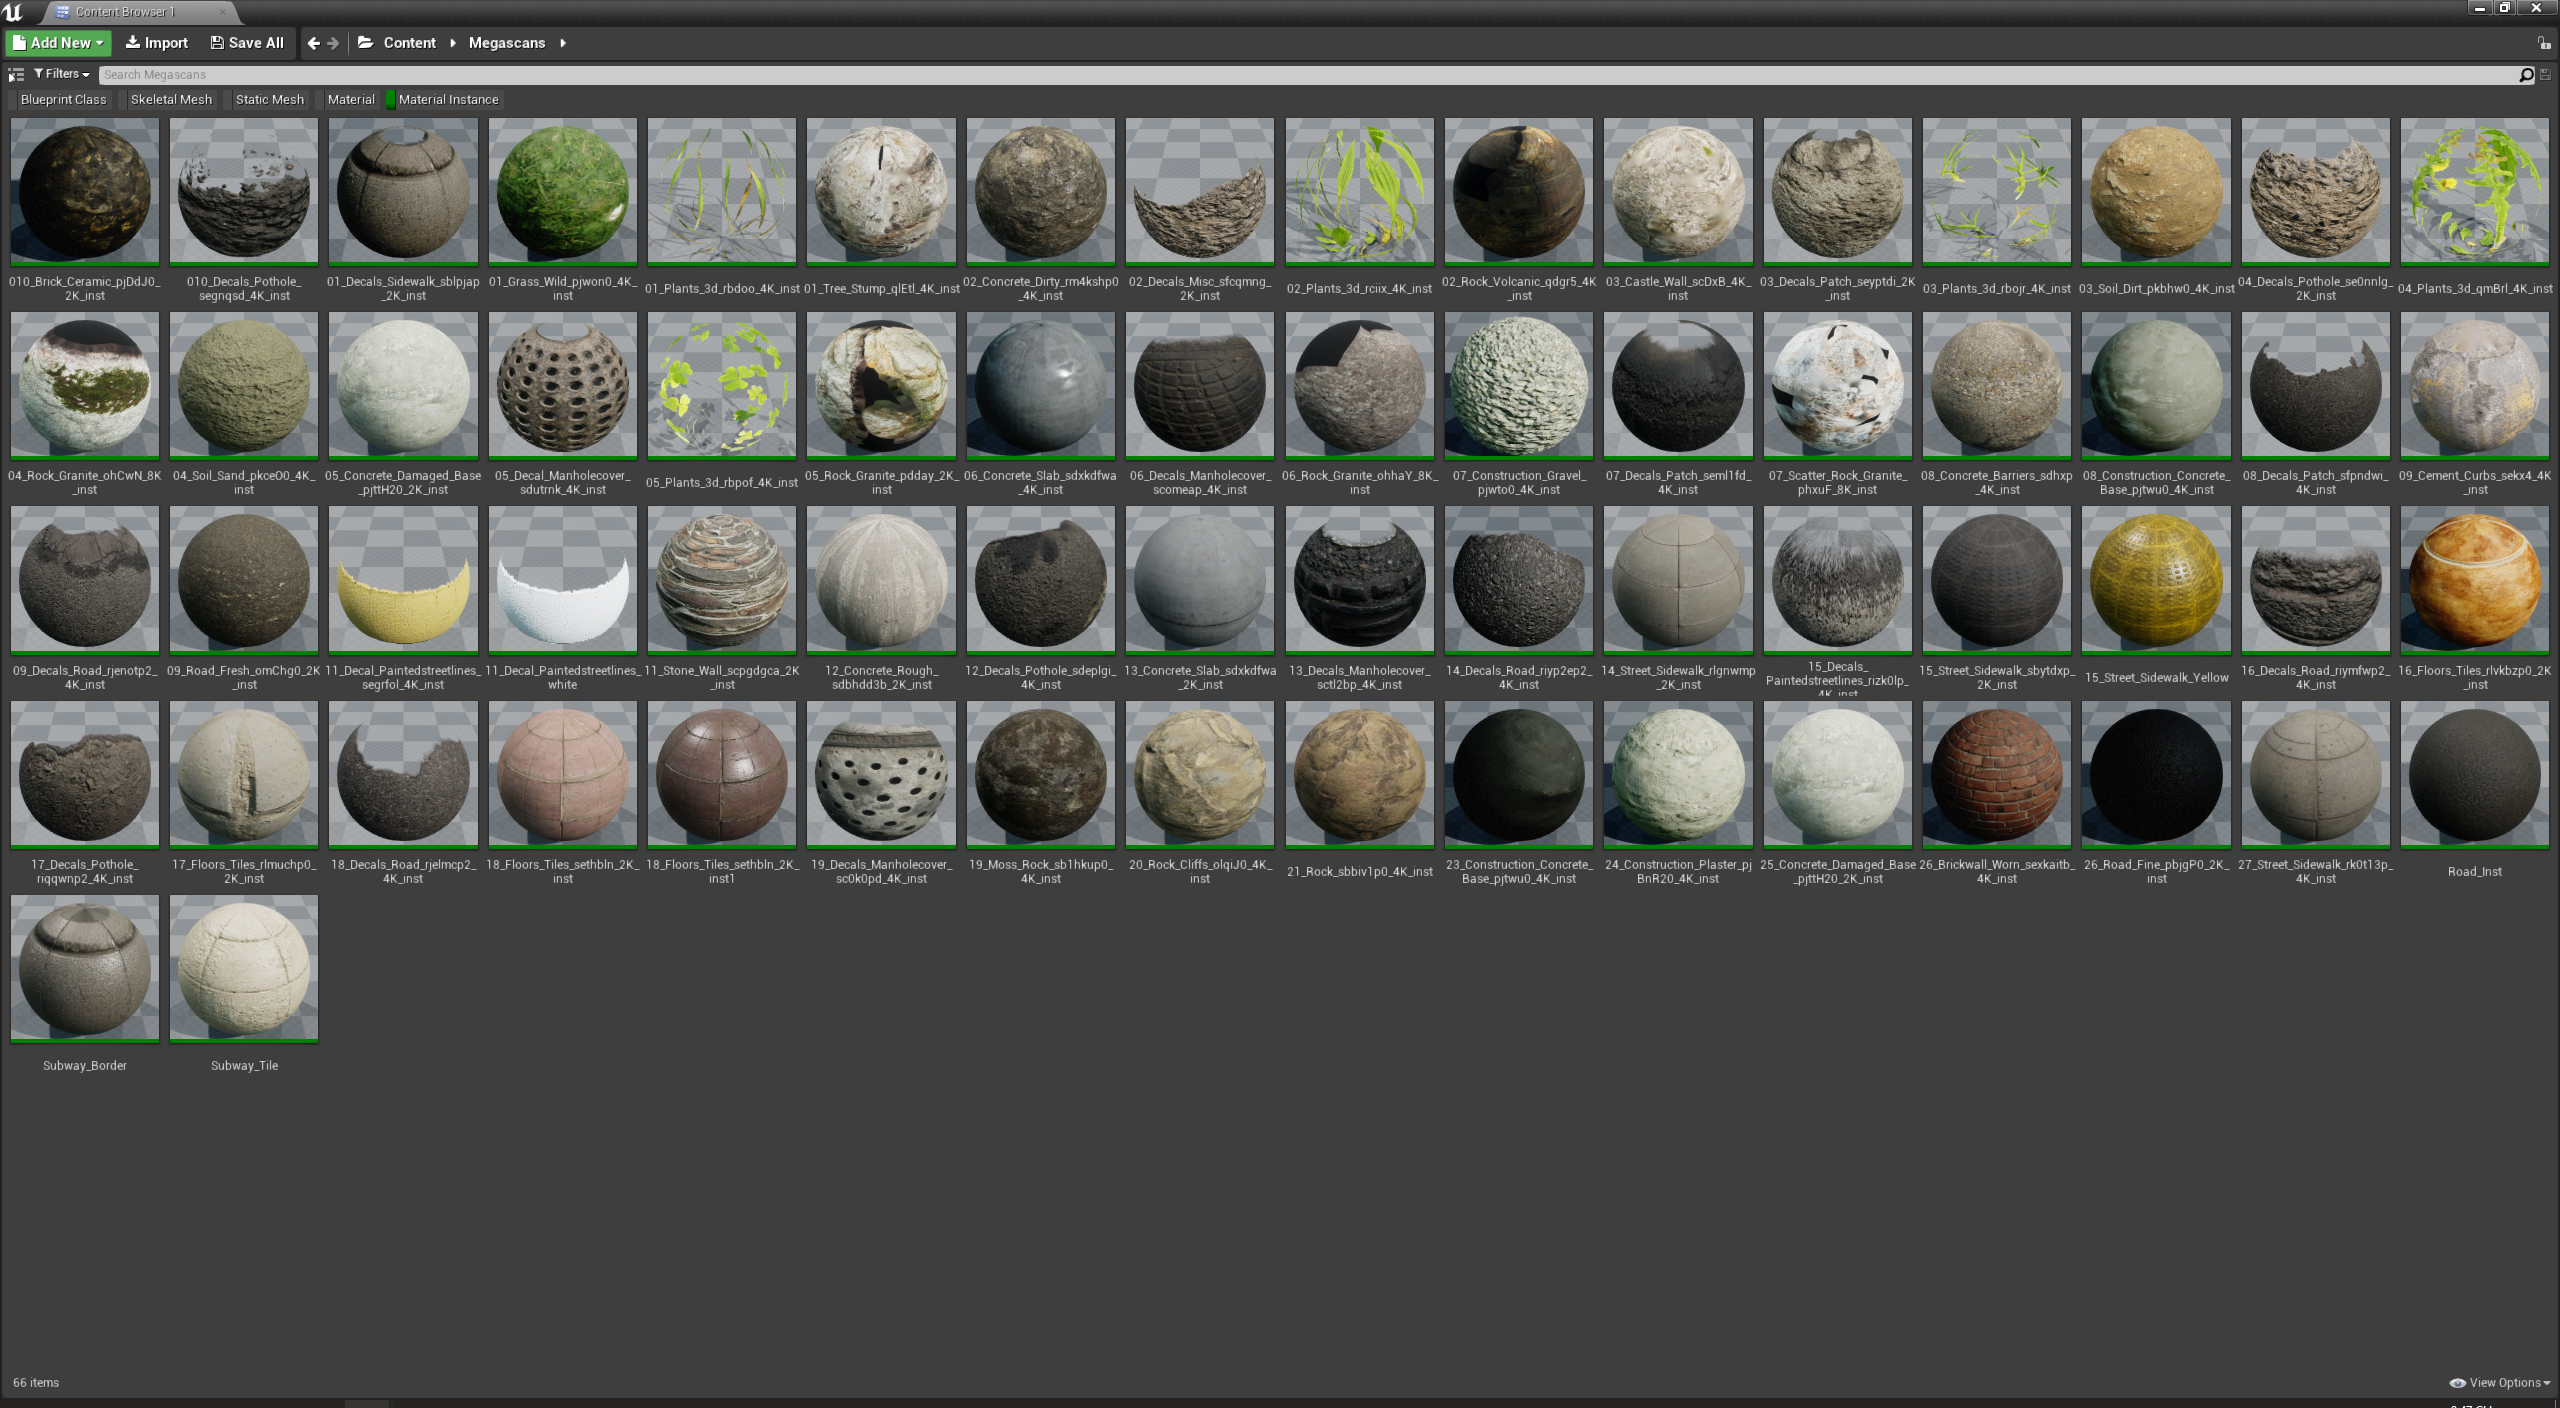
(All material instances in my project)
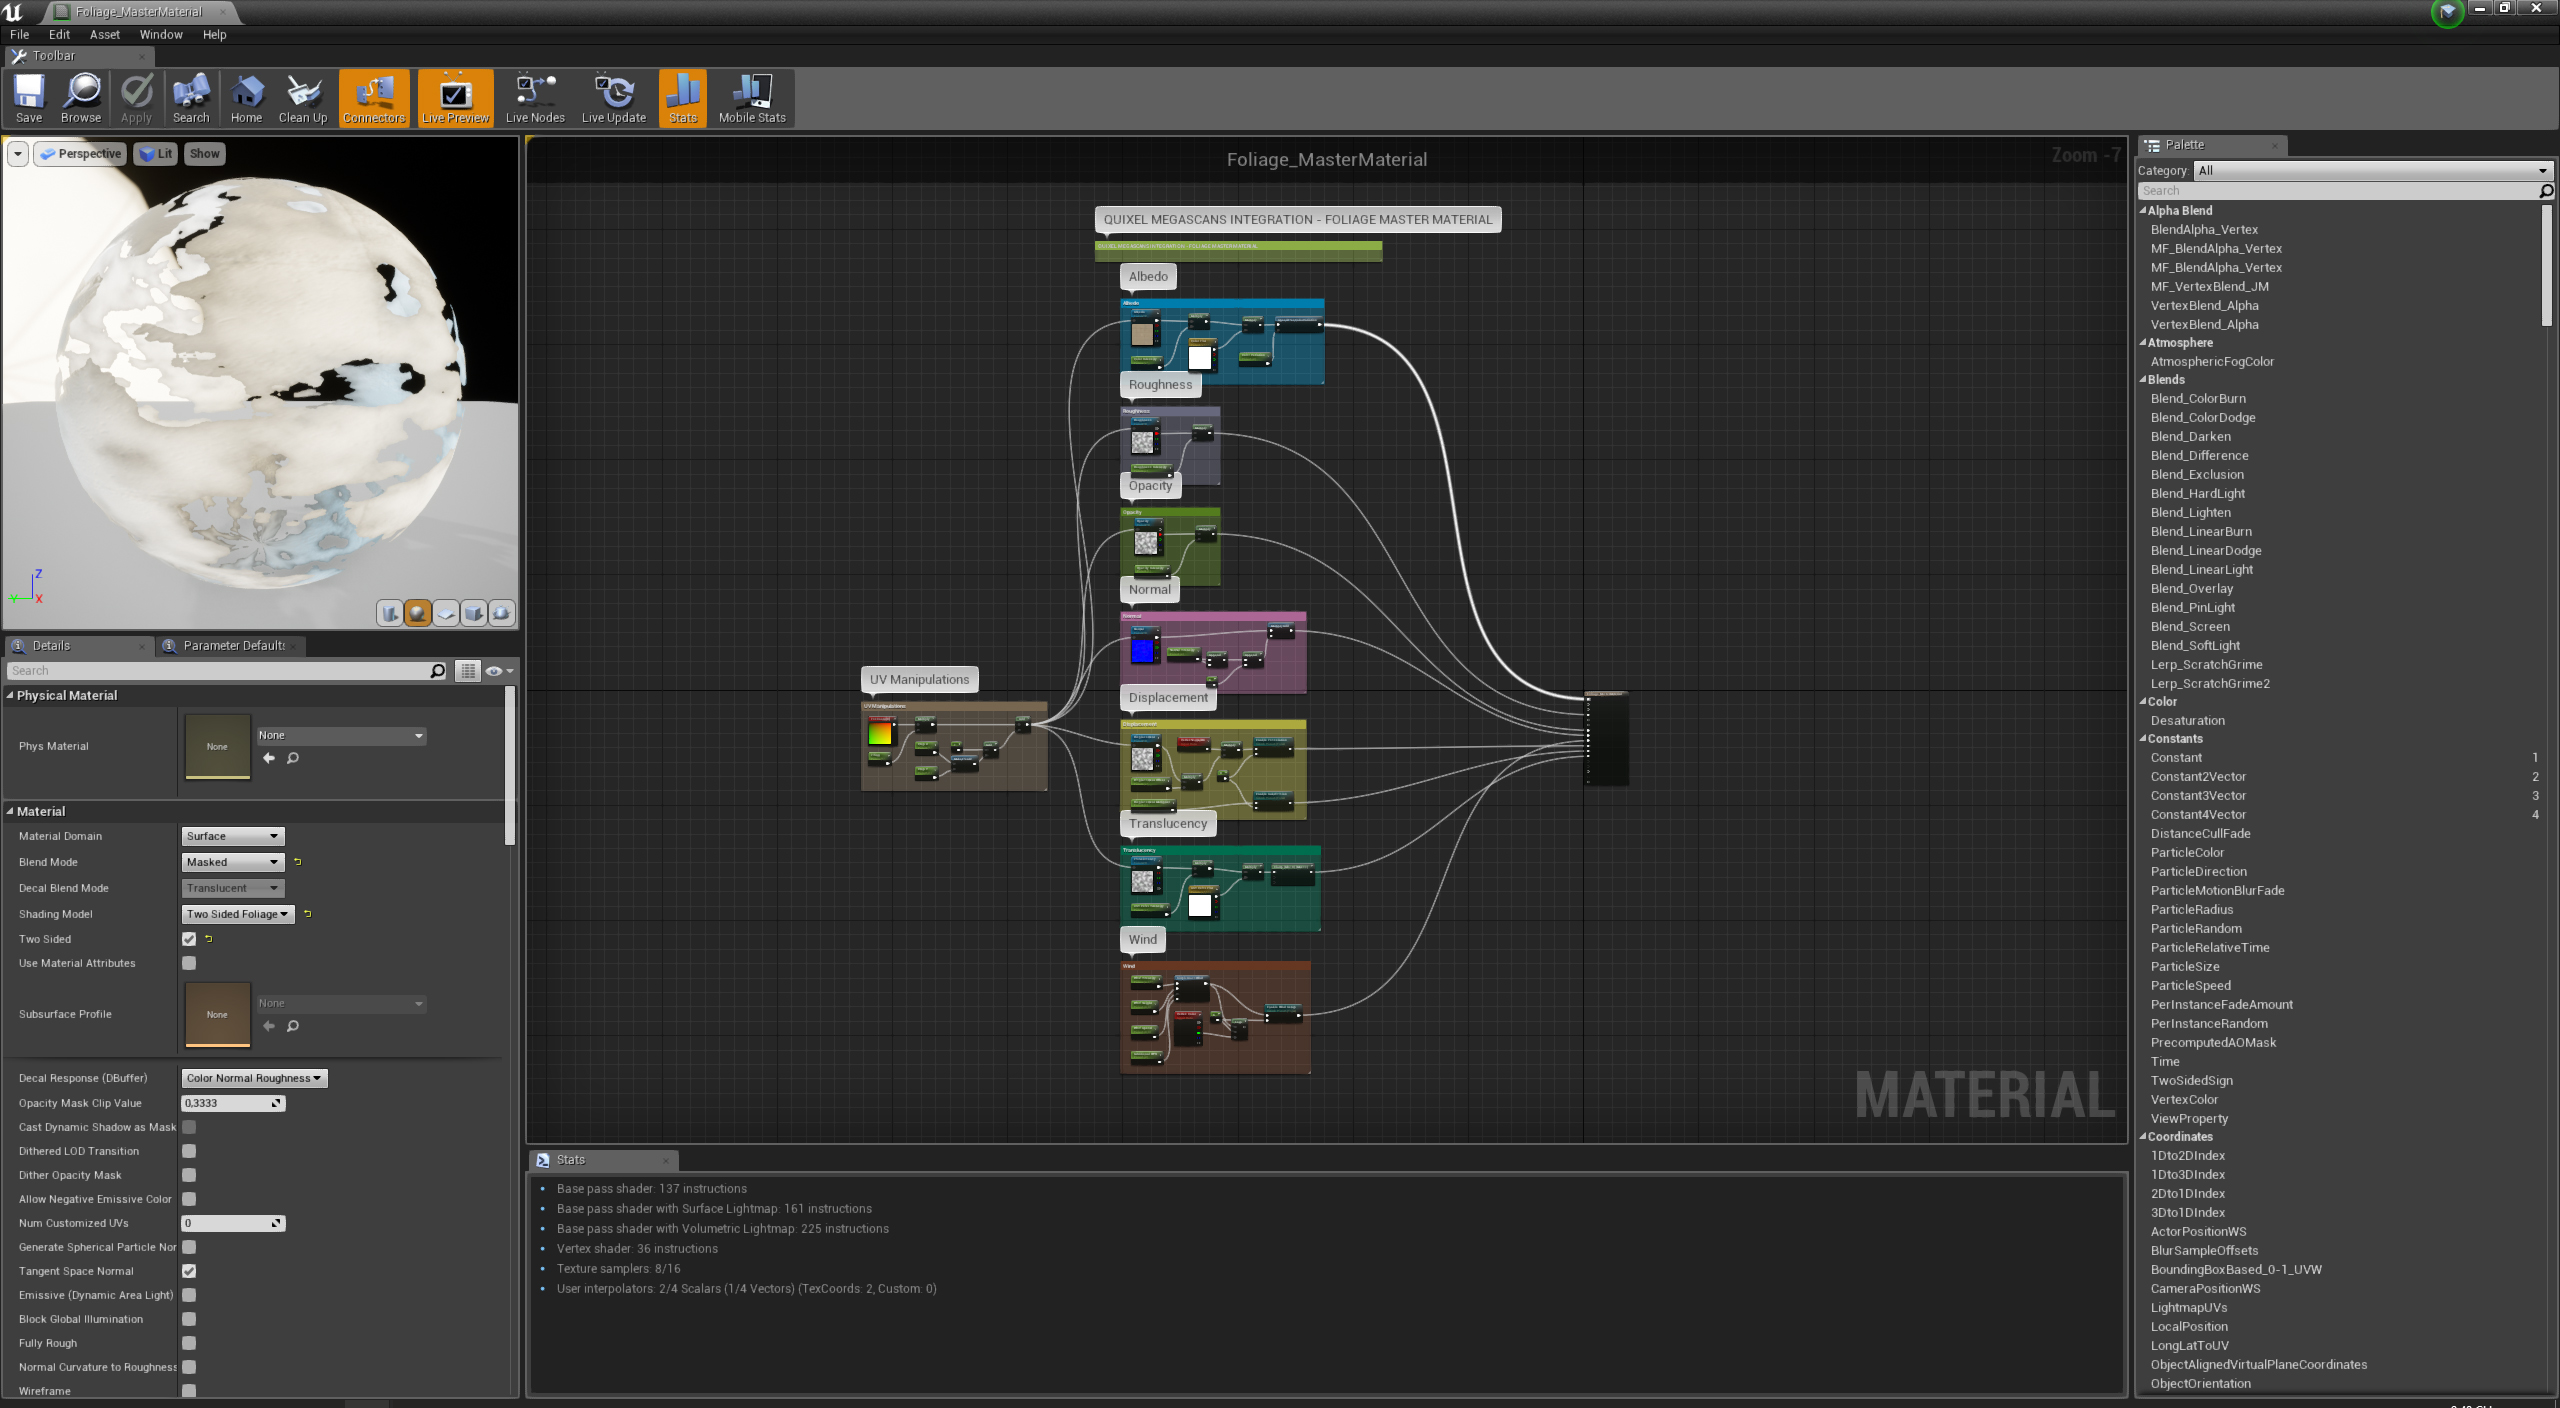
(Default Foliage material by Megascans)
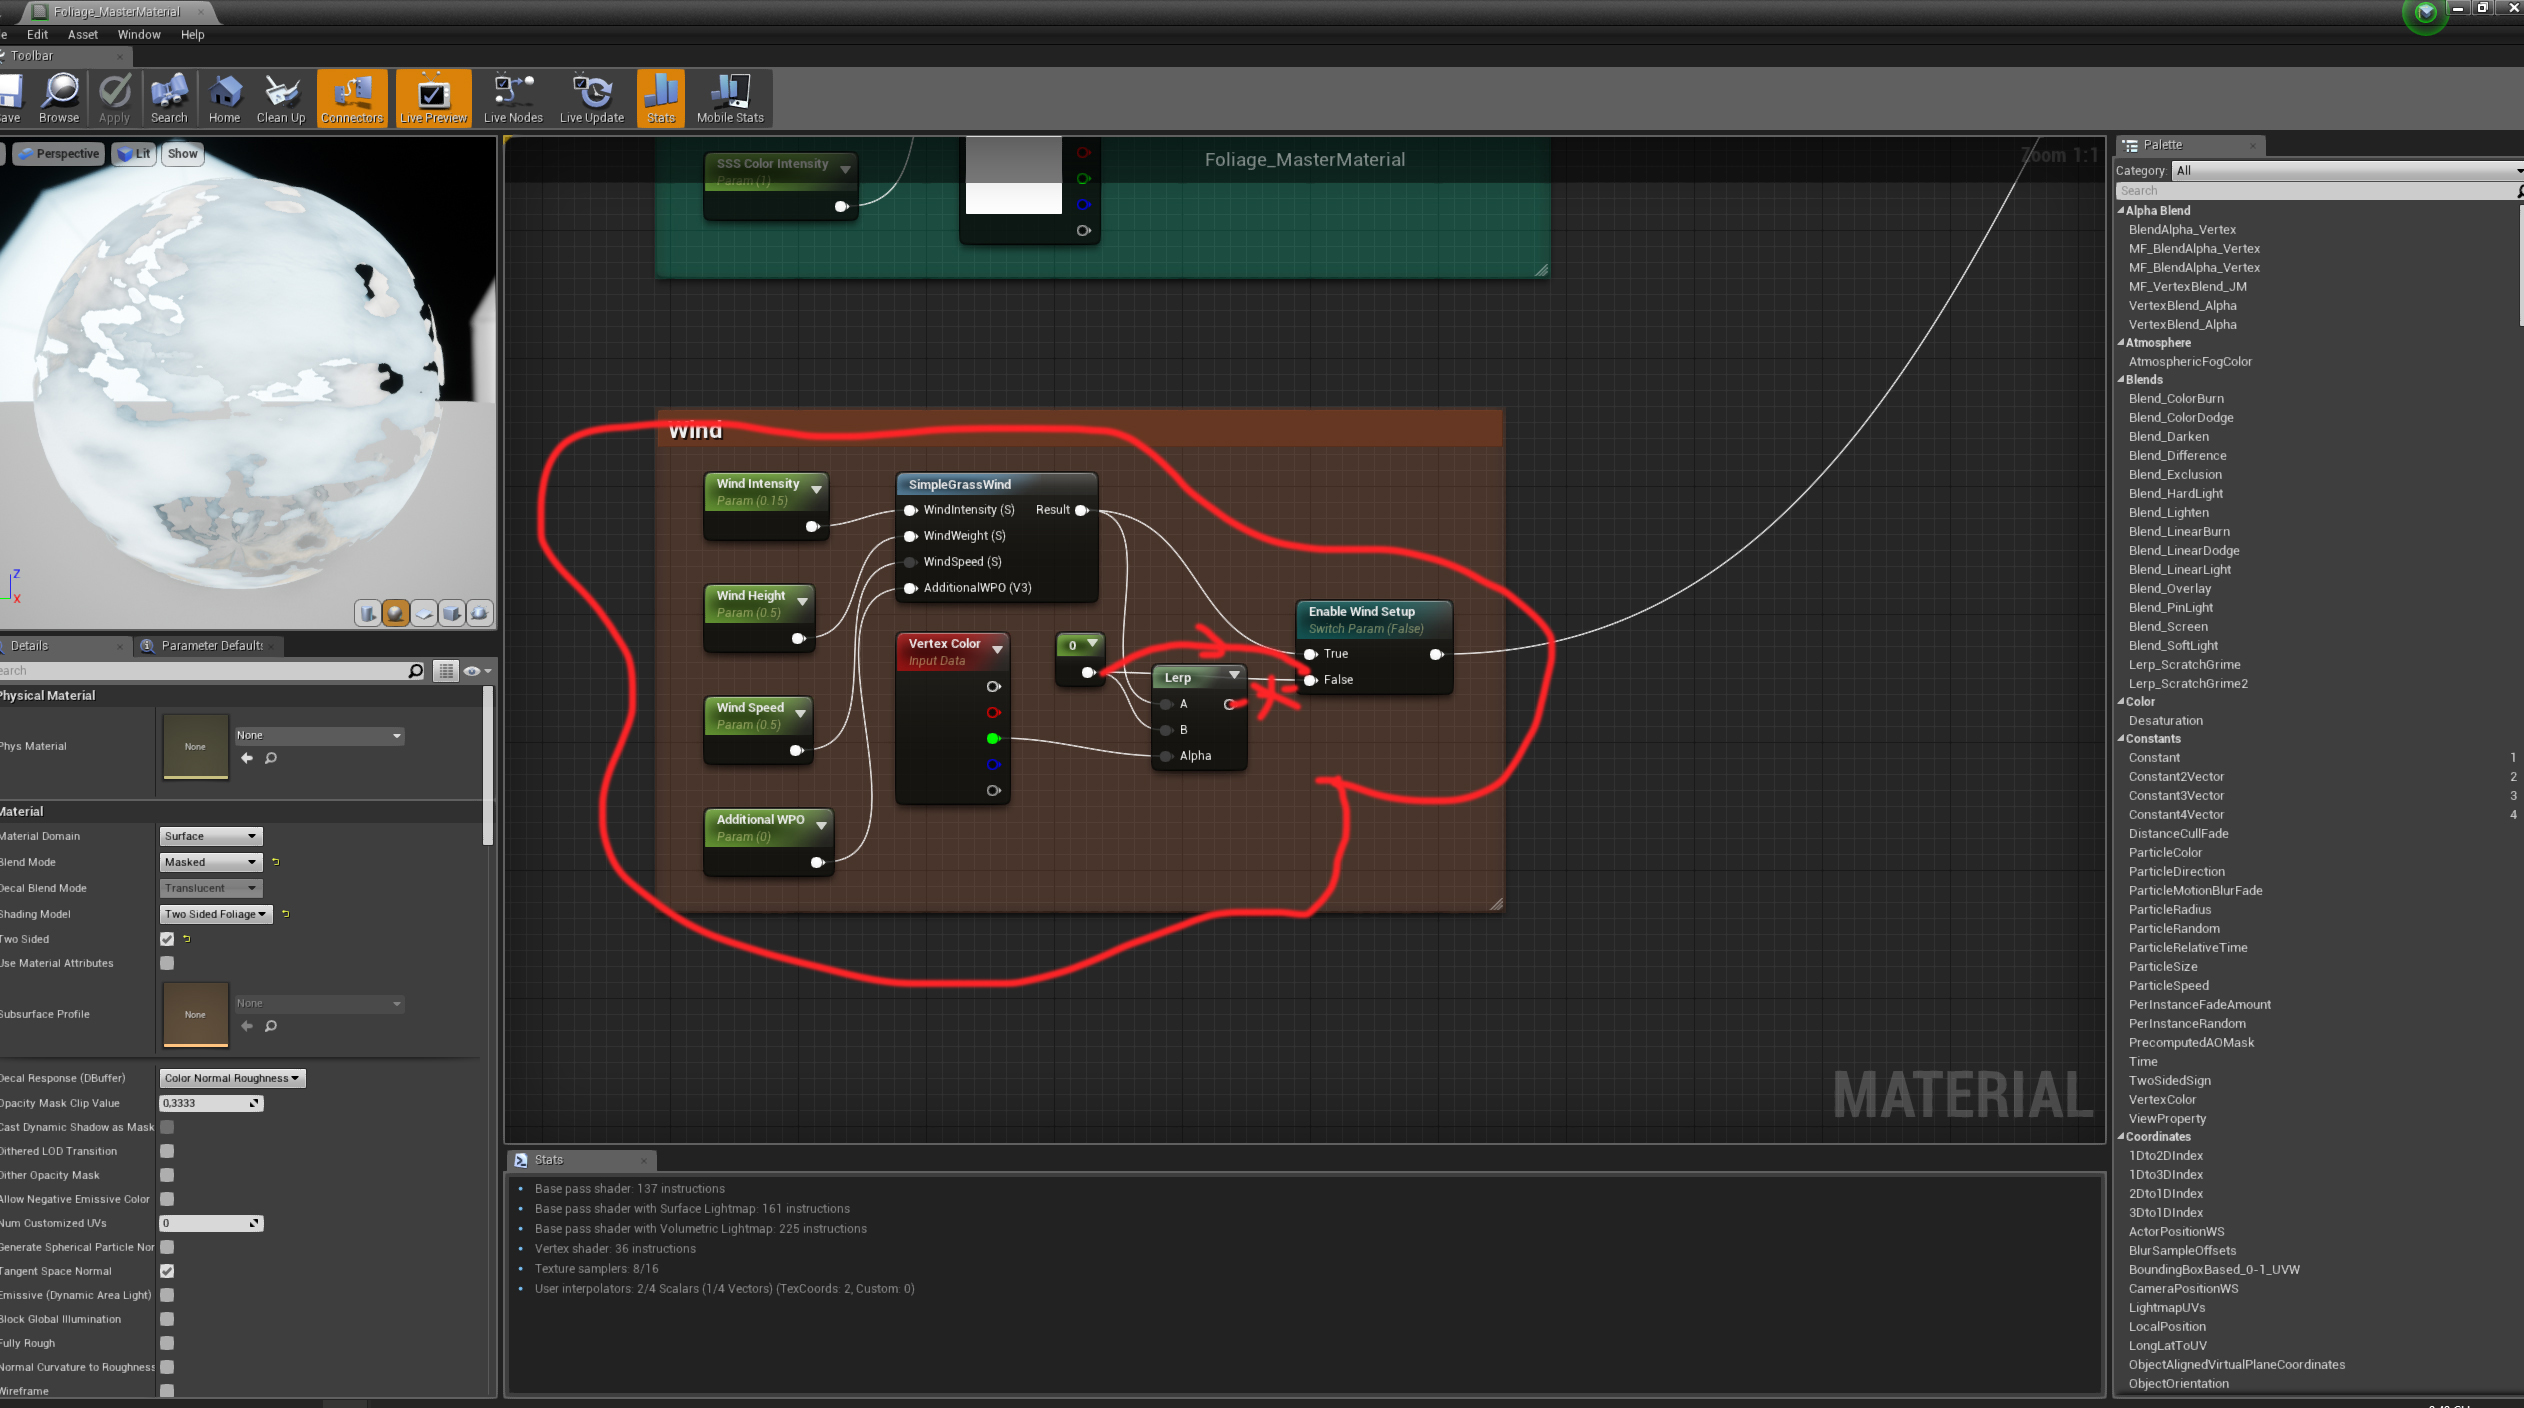
You actually have to Vertex Paint the foliages to get a windy effect on them. So I made a few changes, as above, to apply Vertex Displacement wind effect en-mass by simply bypassing the Vertex Color node.
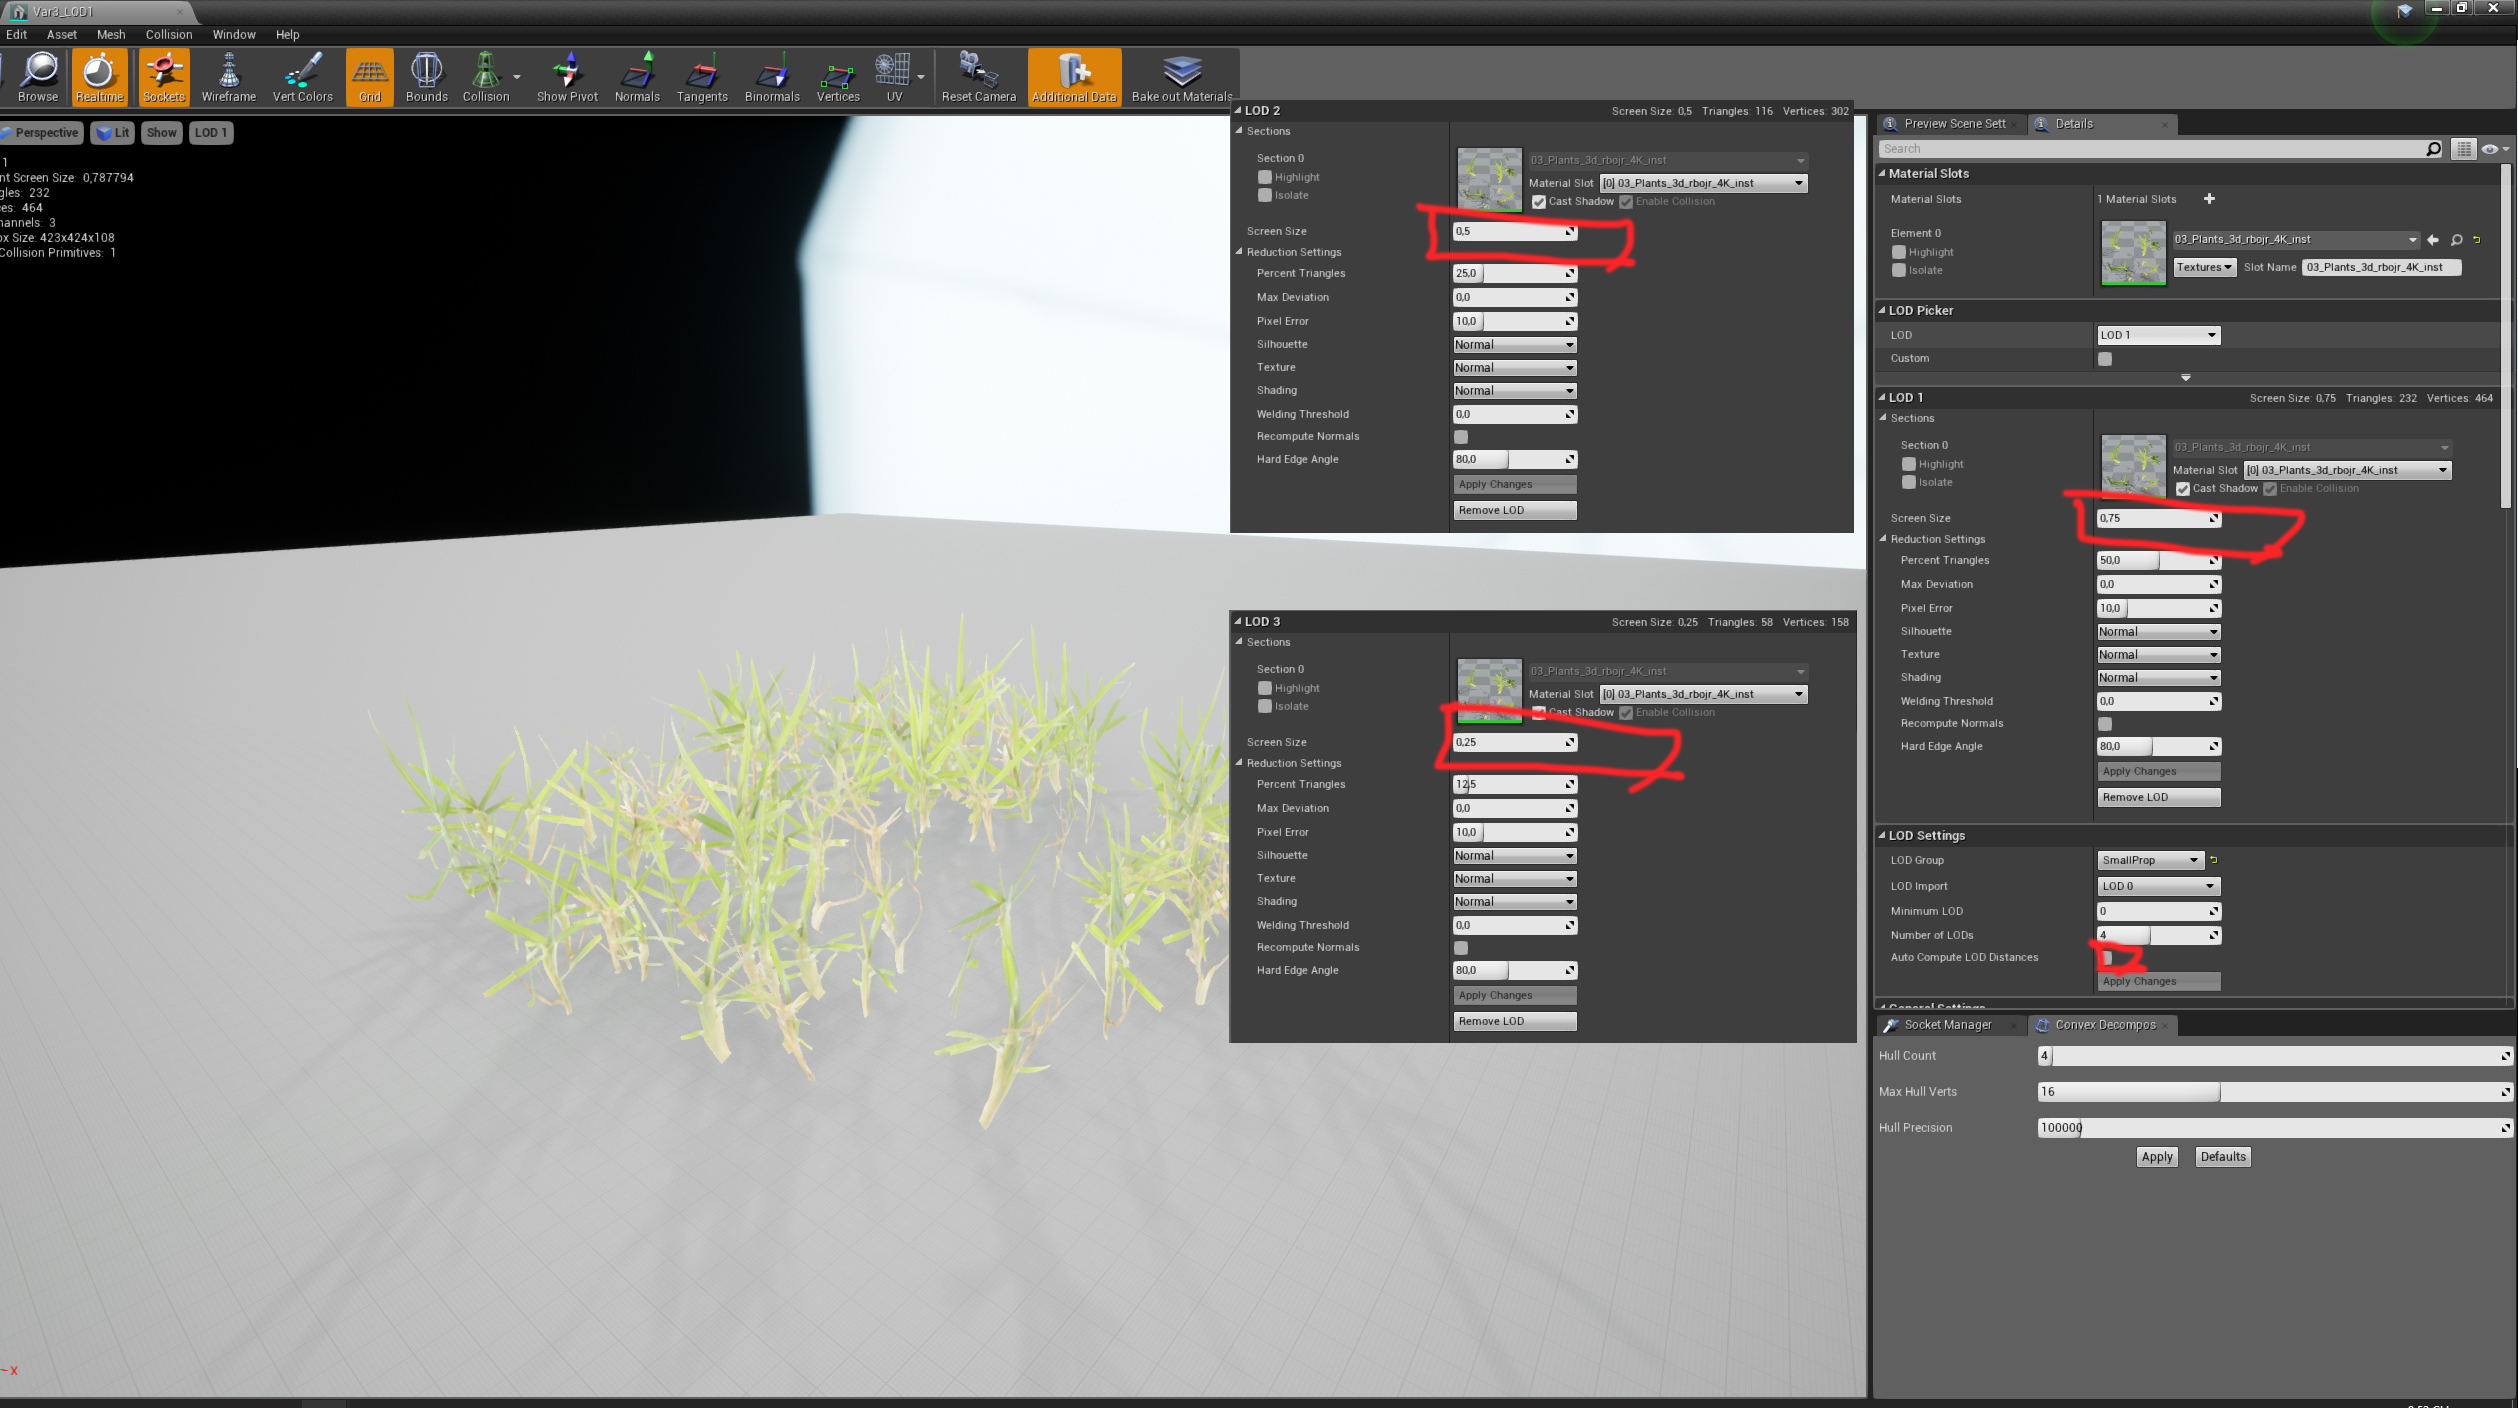
3D scans come with auto LOD in UE4, but the default setting is not the best, so I went to LOD settings and manually set the screen size associated with LOD levels to 0.75, 0.5, and 0.25 for optimization of the vegetation.
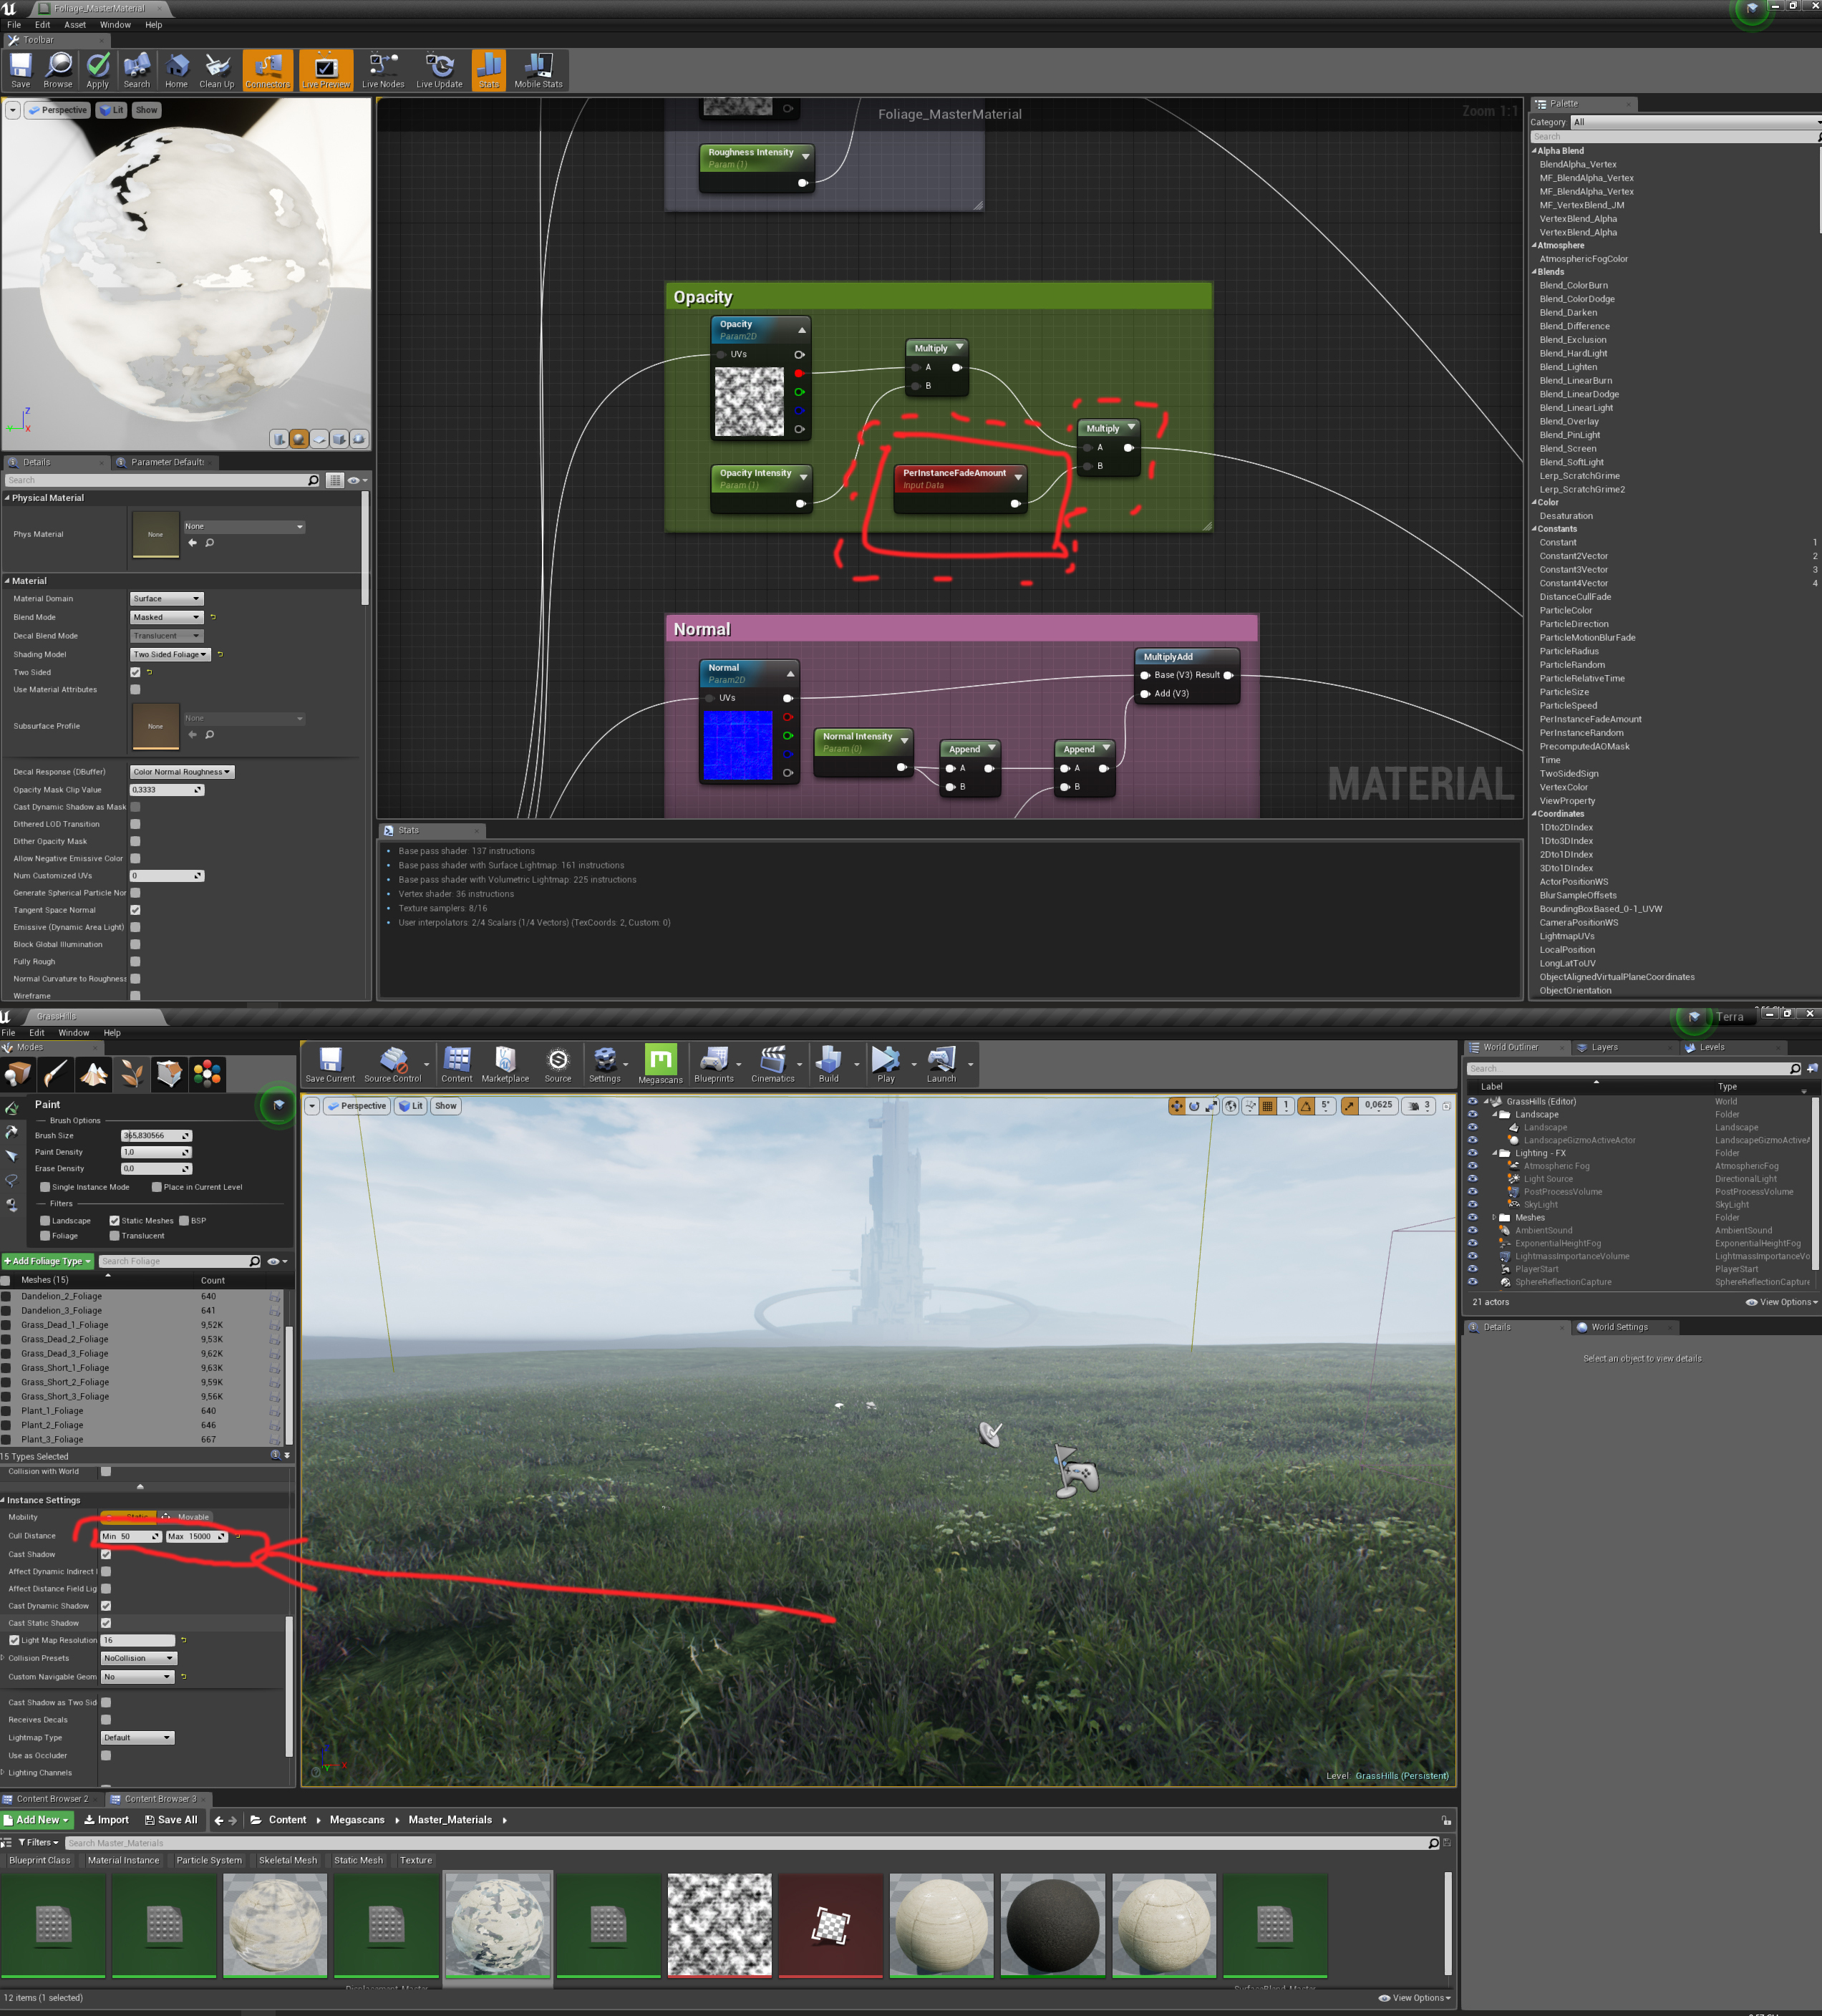
For further optimization for the foliage, you can use the Cull Distance feature, which requires you to add a Fade Node, as I have shown above, to the Master Material and then all the foliage should work wonderfully with this feature.
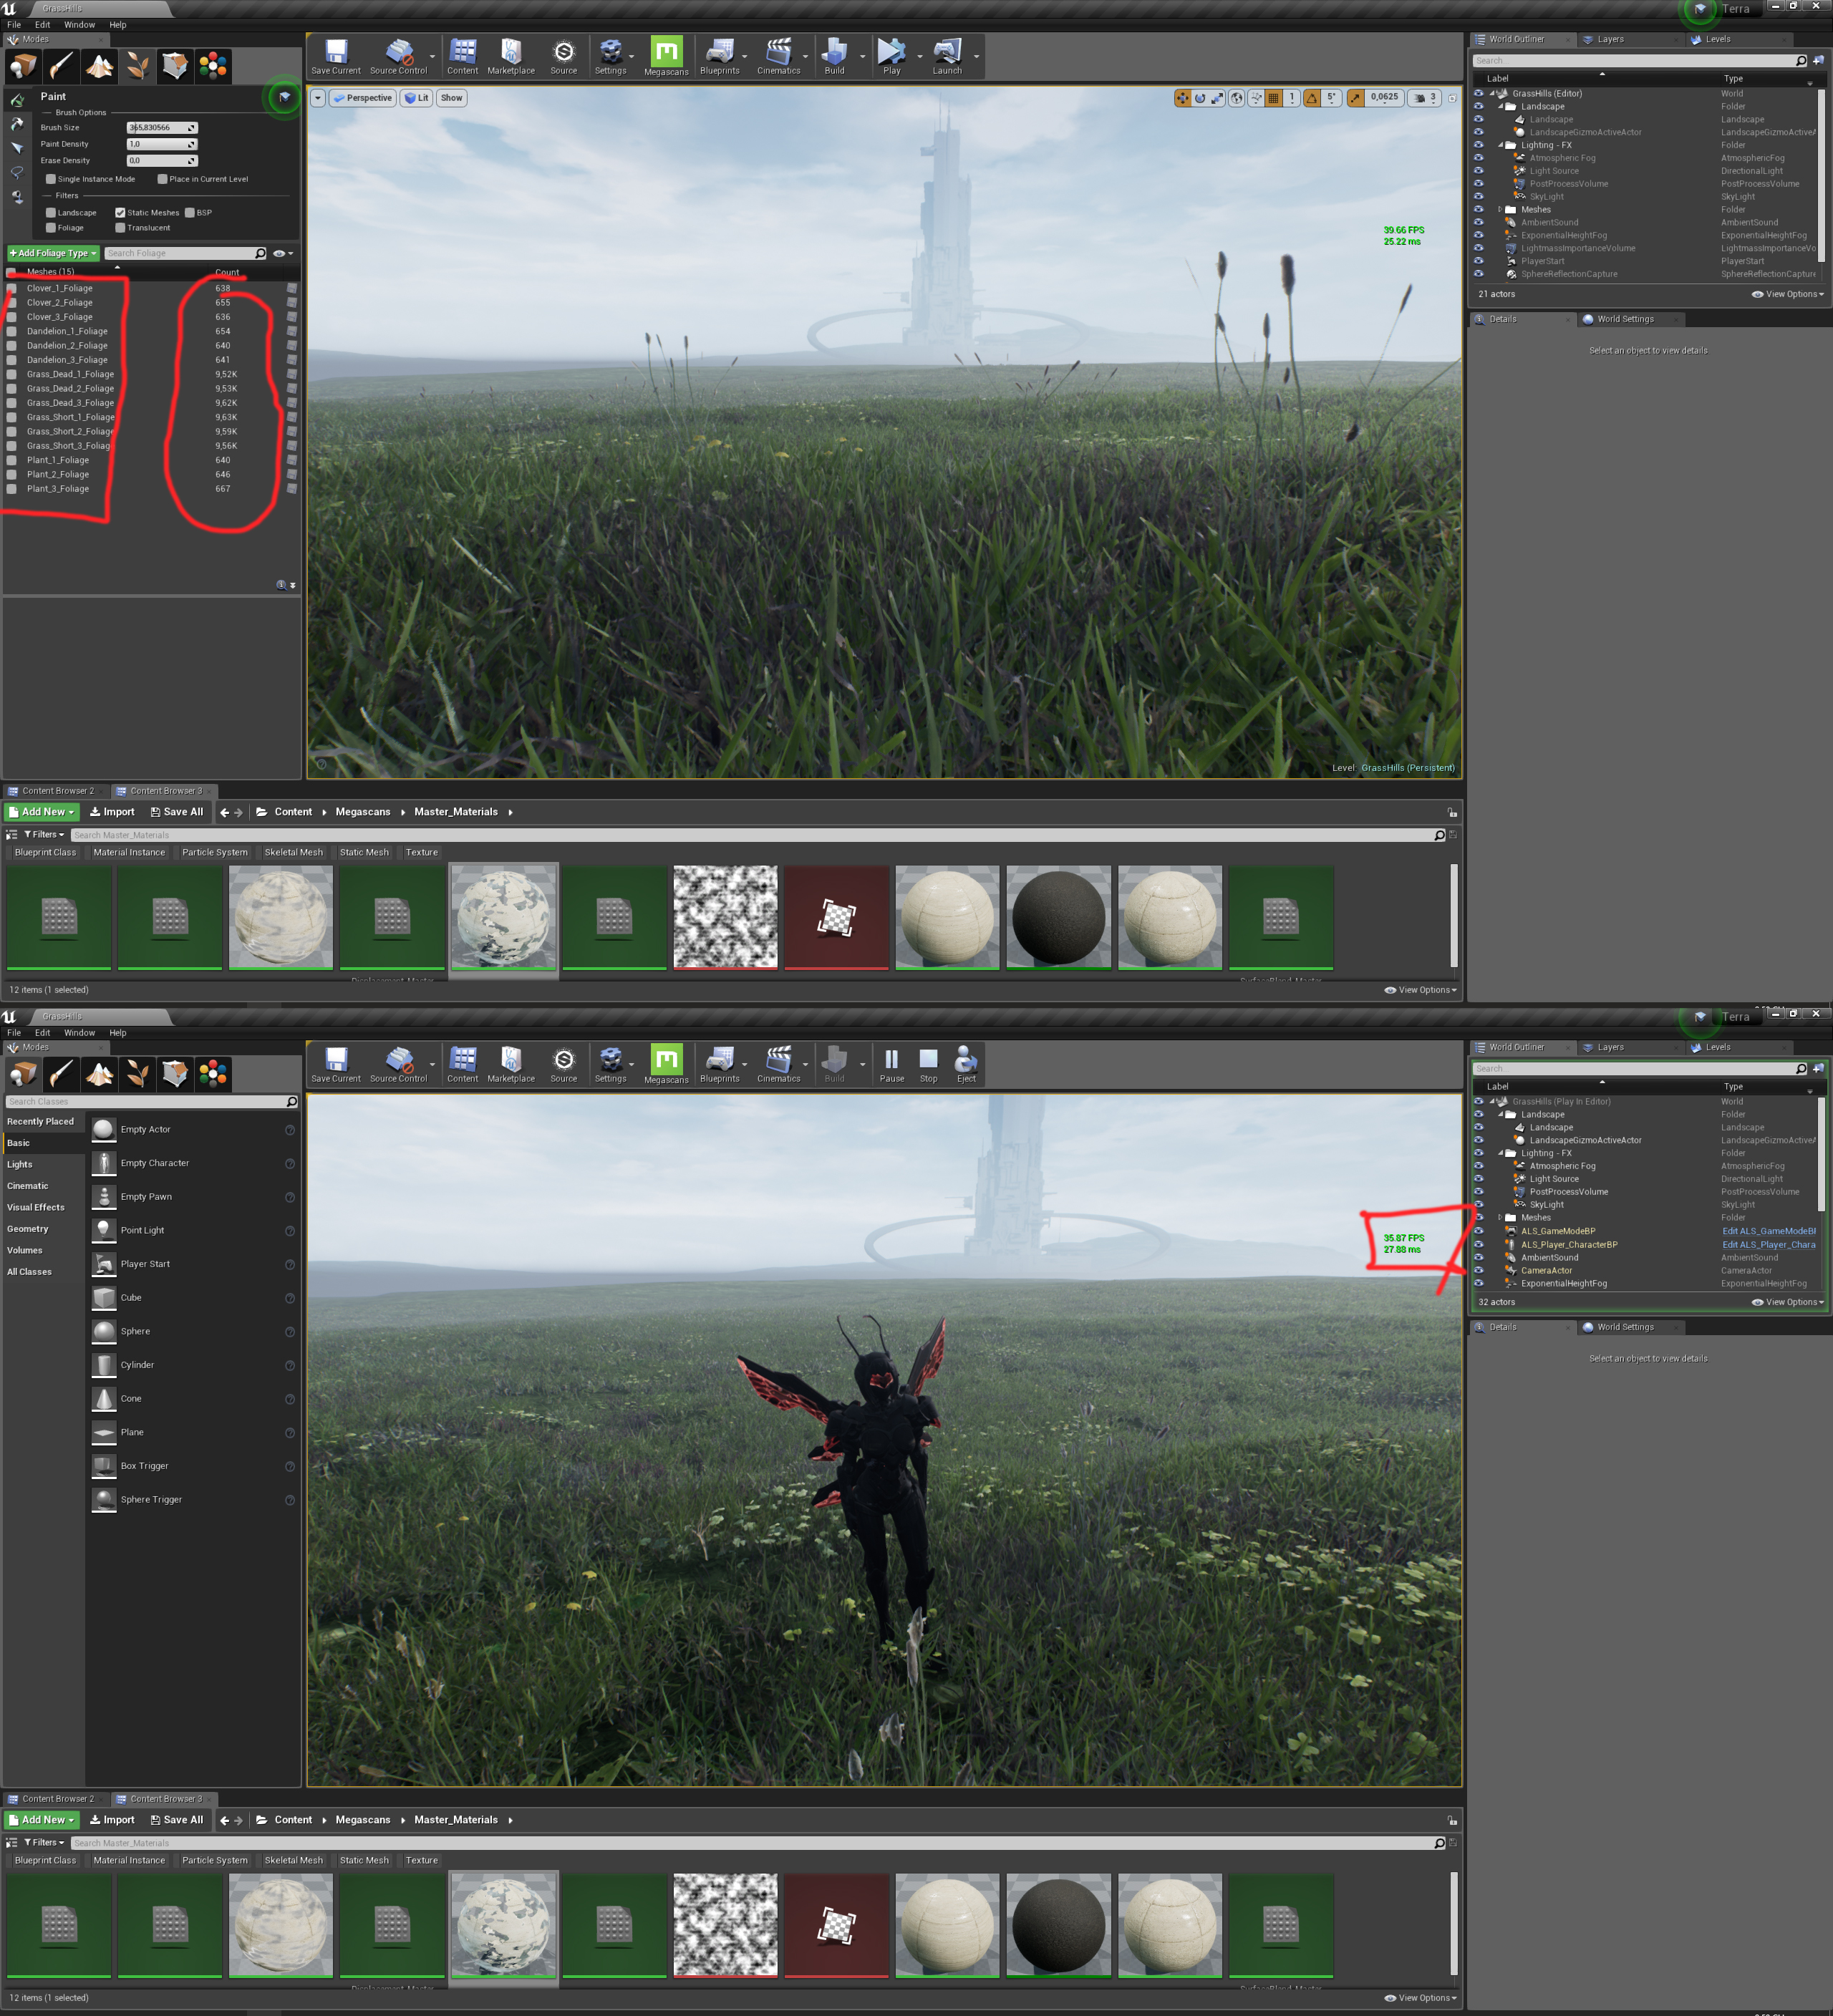
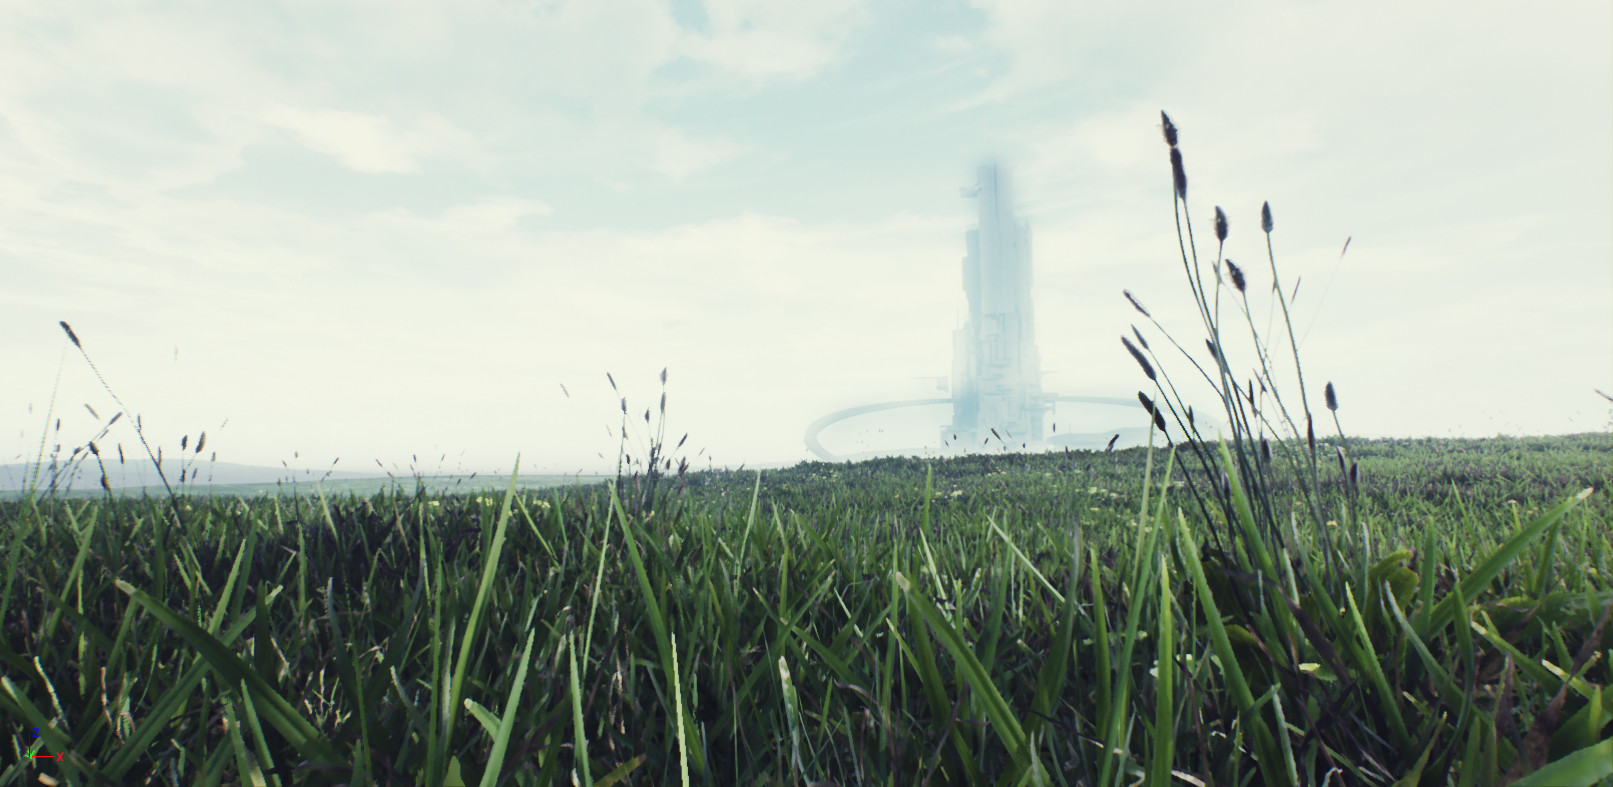
Here we have over 30FPS at about 40000 individual LOD 1 grass of 15 types at a 2K texture. Talis herself has more than 20 materials and 80x2K textures, with all the post process, lighting, and fog effects calculated.
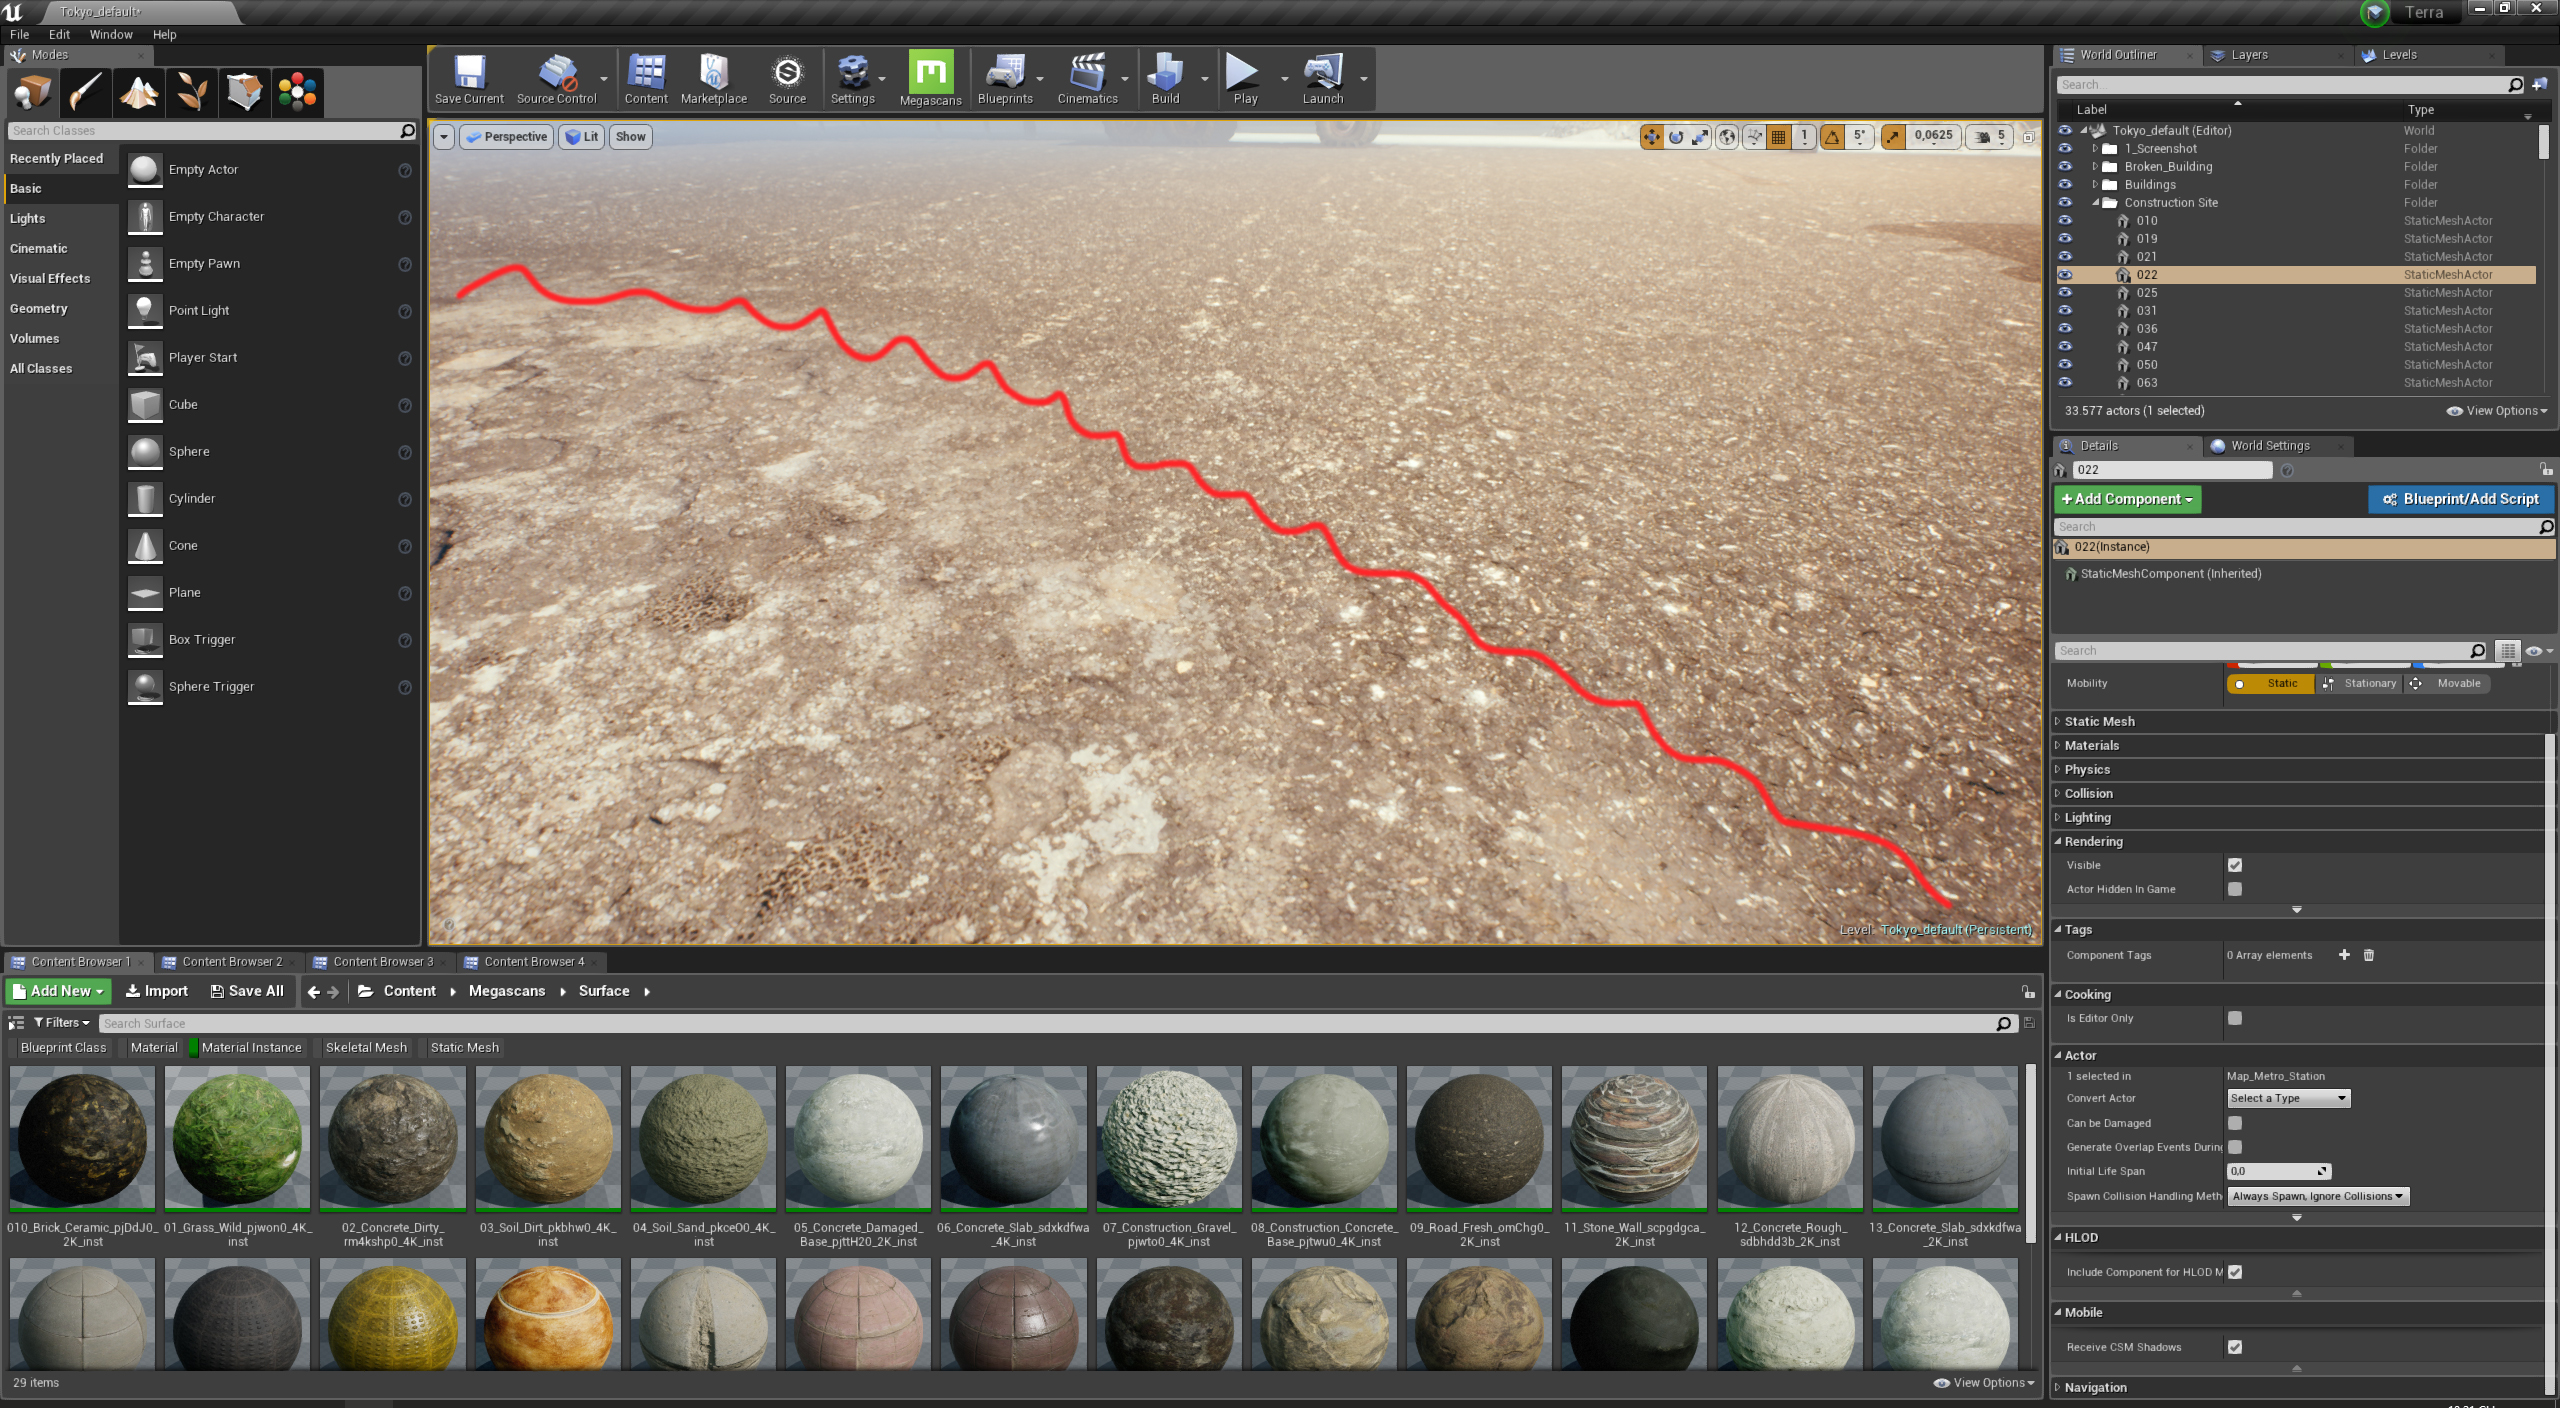
Quick asset access:
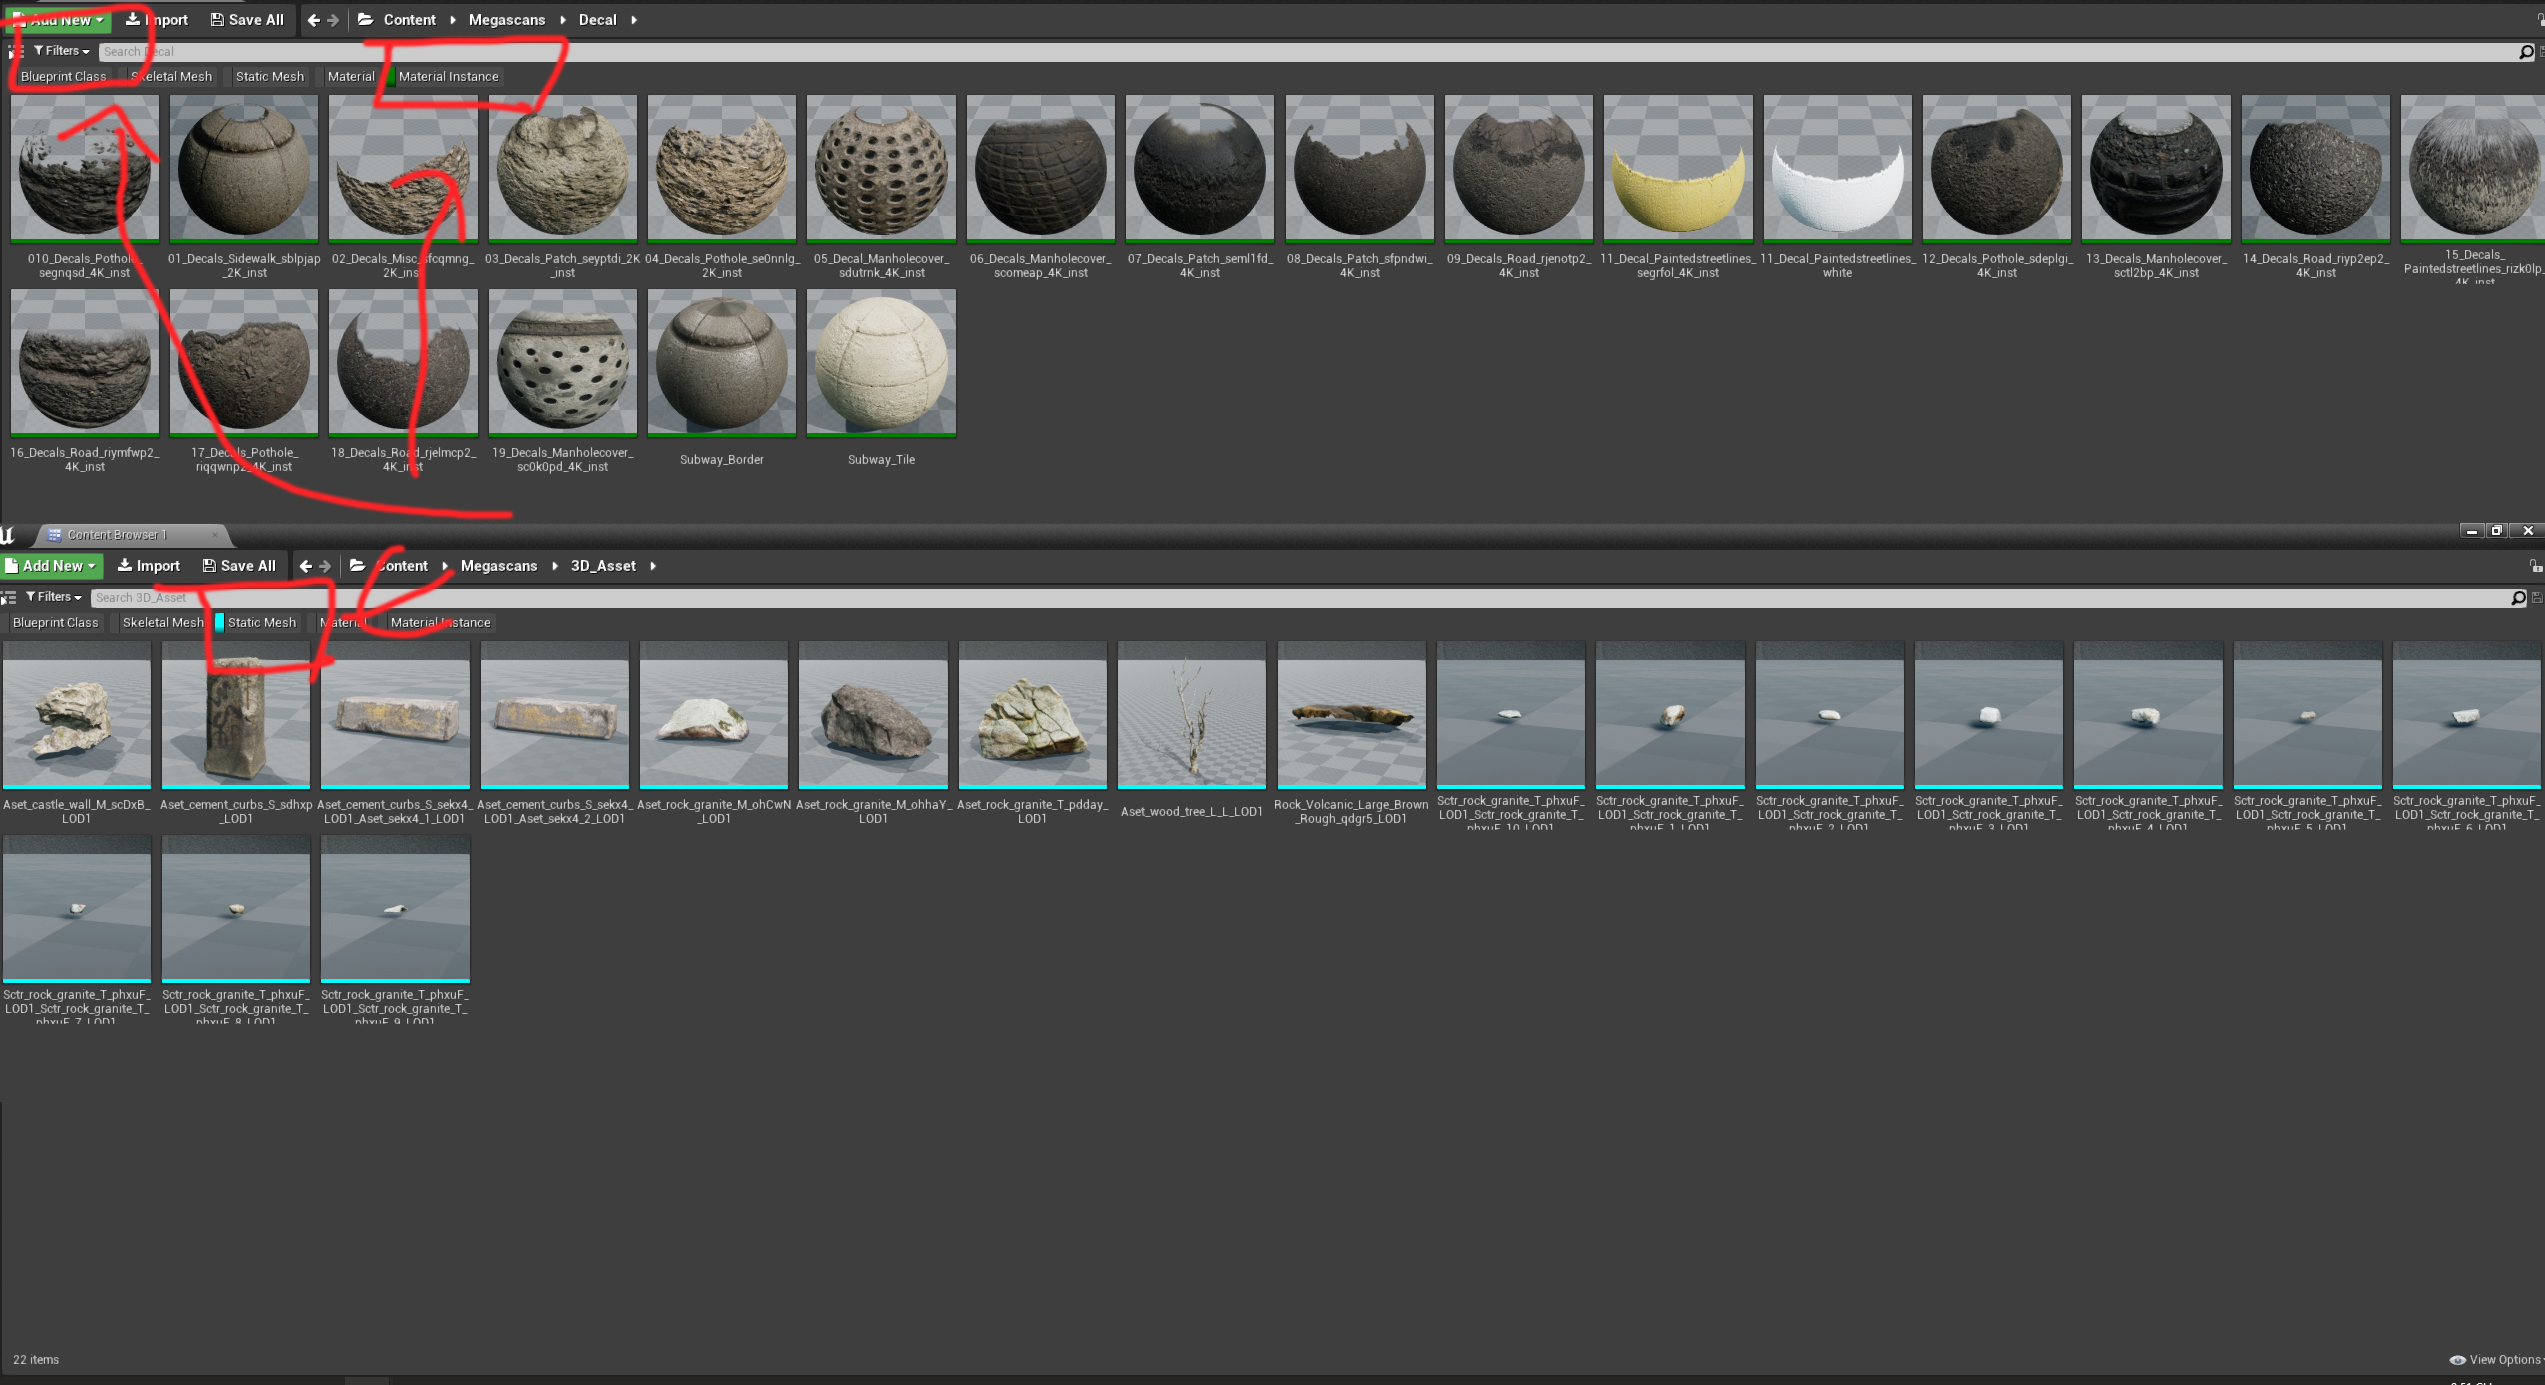
In the Megascan folder, only the Material Instances and Static Mesh are important so you can use Filter to sort them out for fast asset selection.
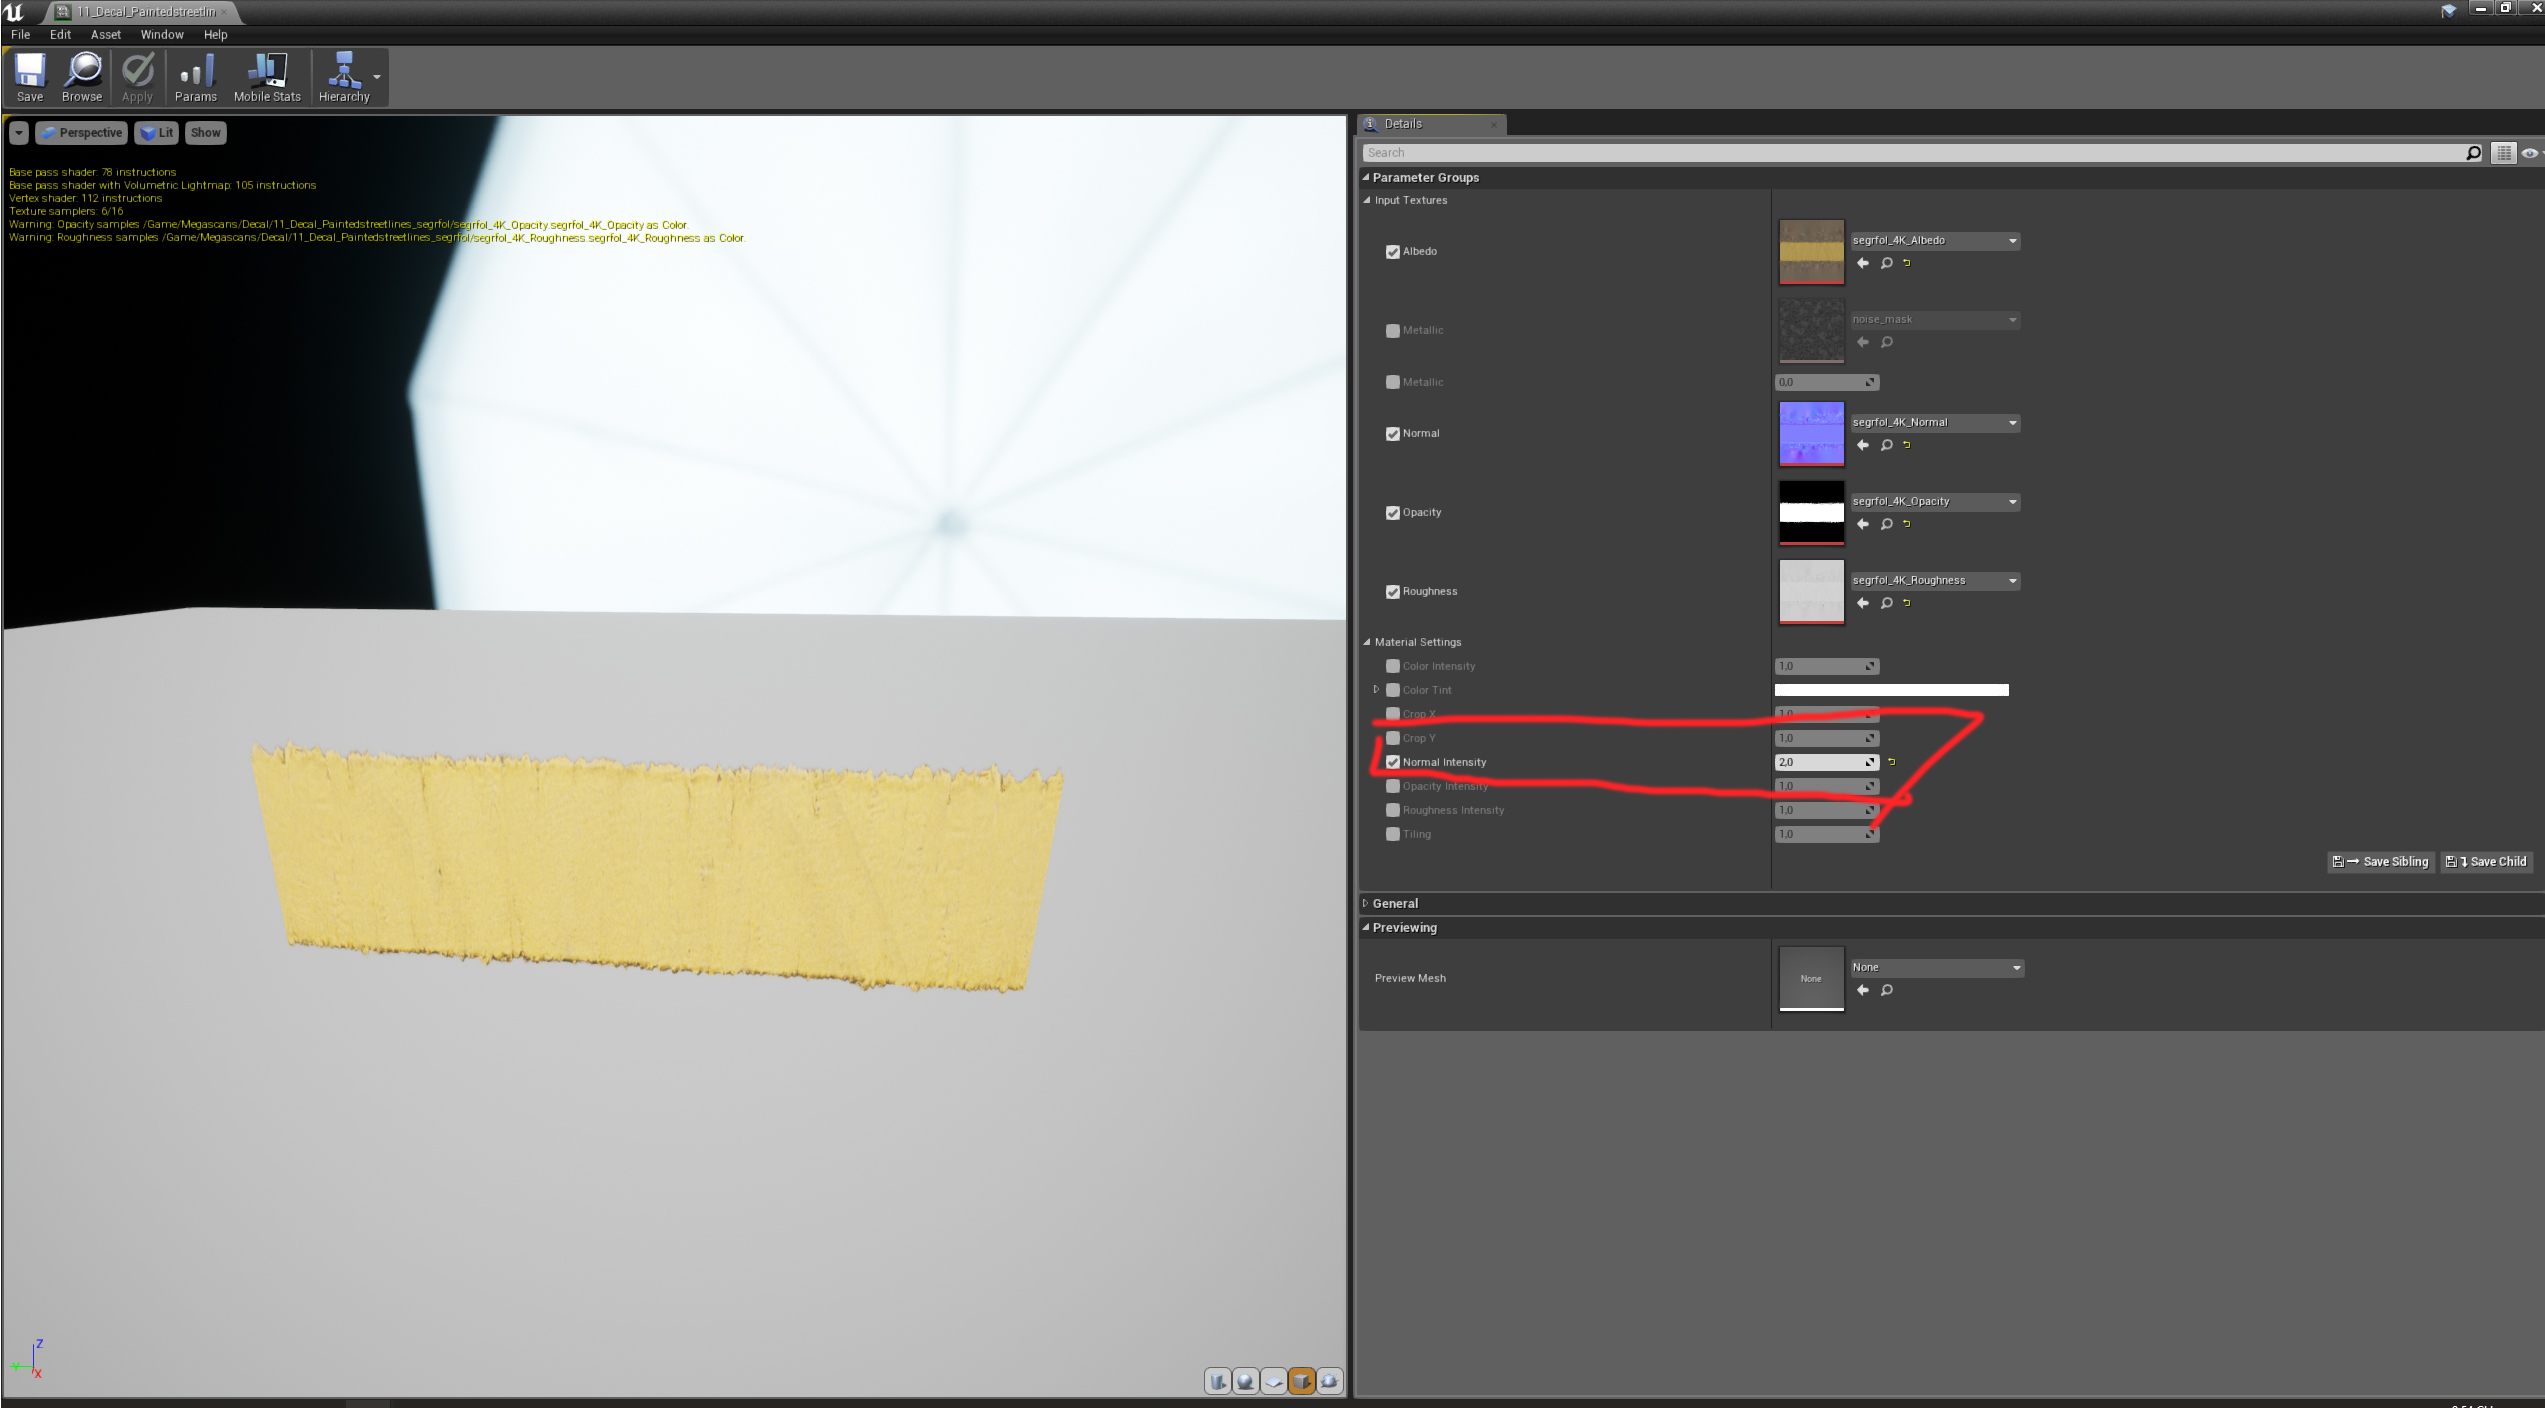
For most assets, I tend to increase the Normal Intensity to reduce “flatness” and make the material itself standout a bit more.
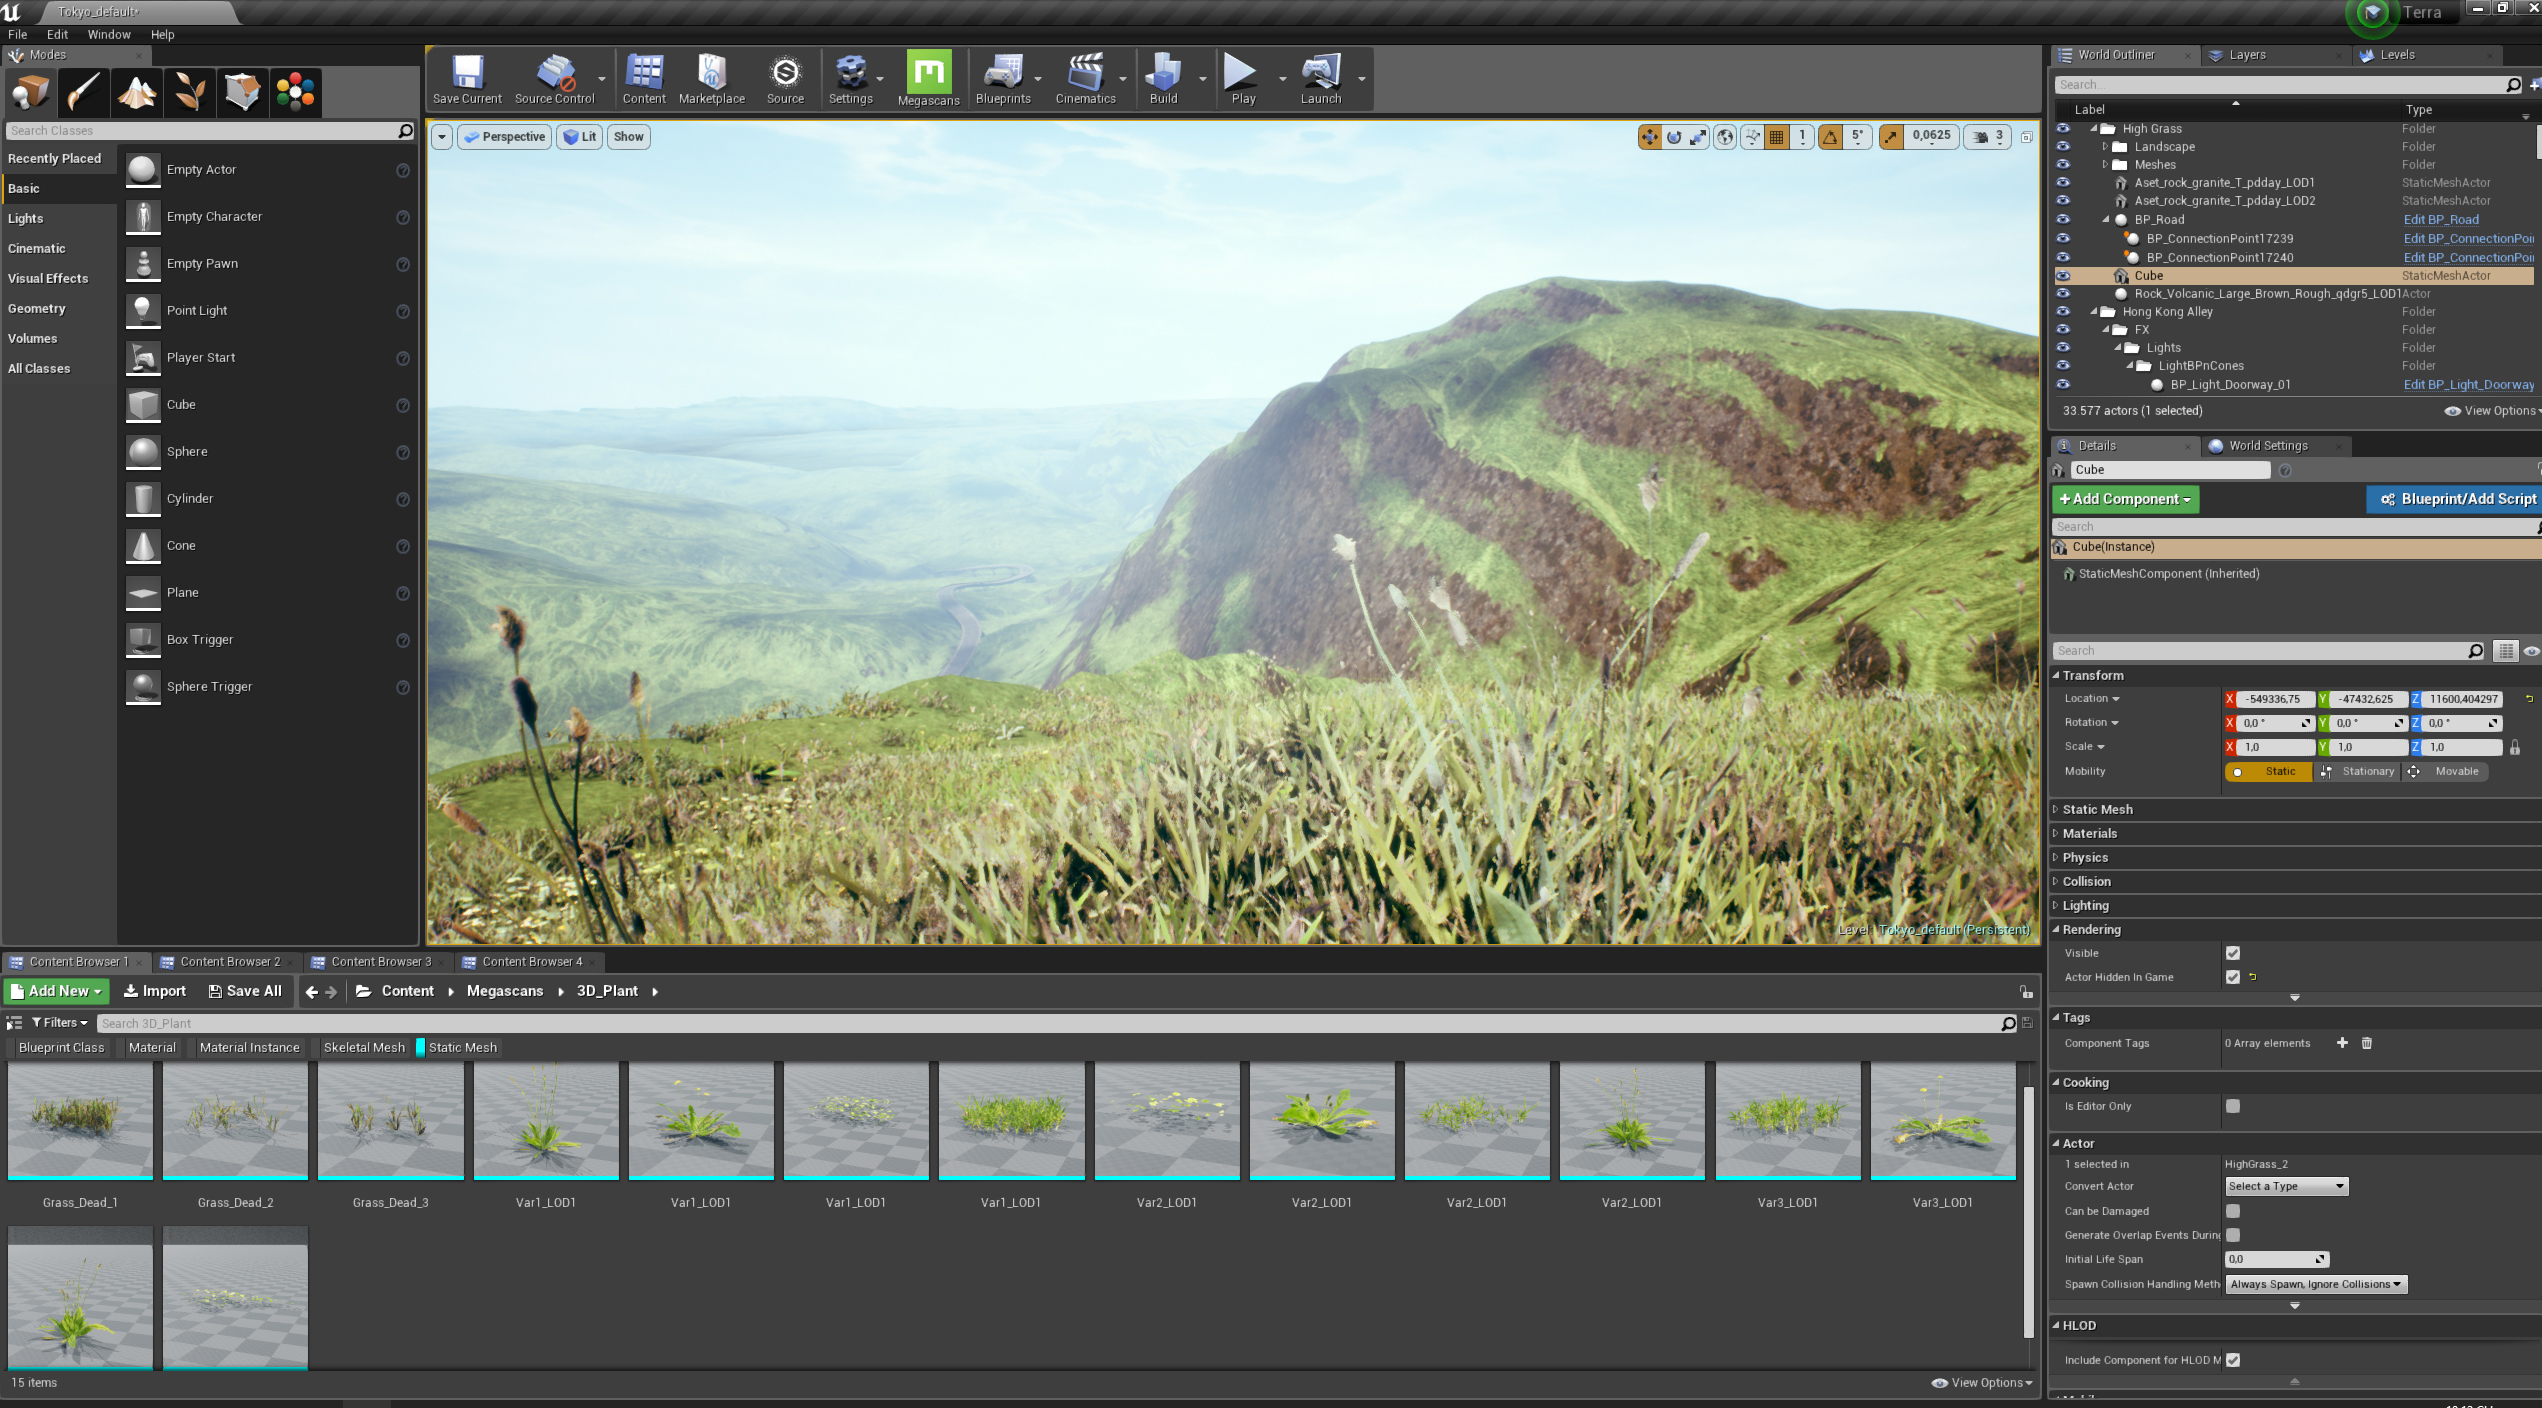
(Mountain grass)
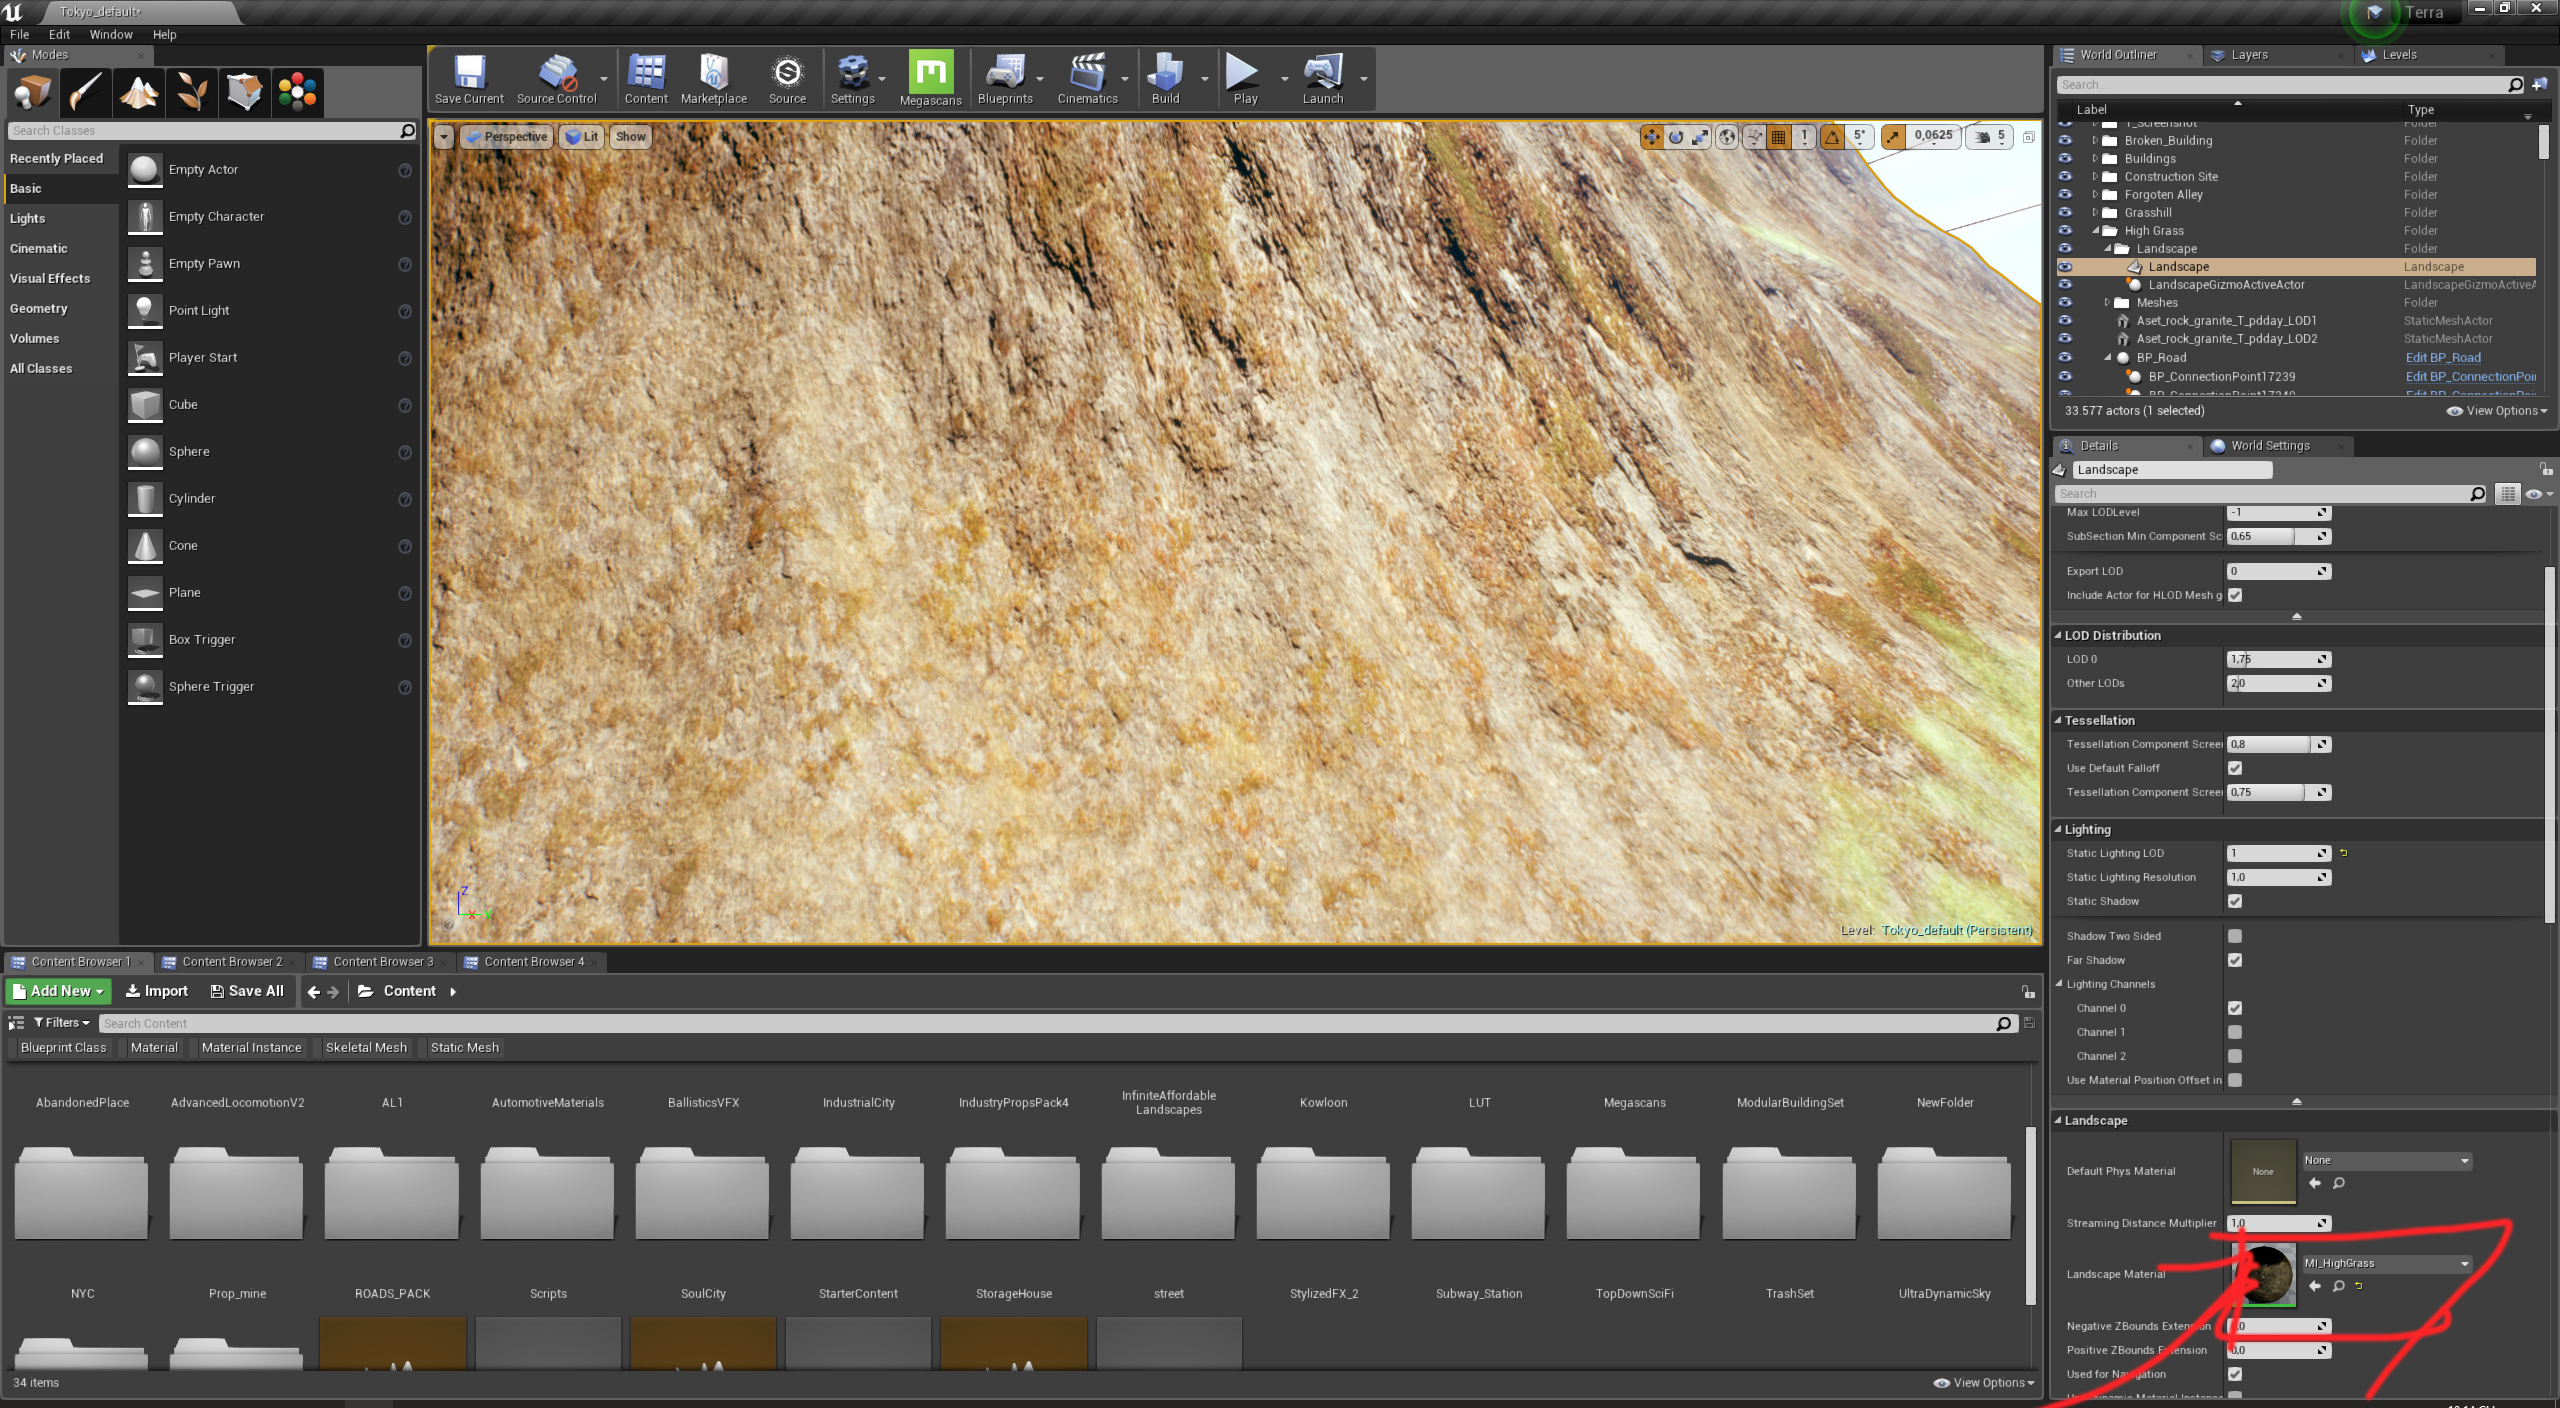
(Landscape material)
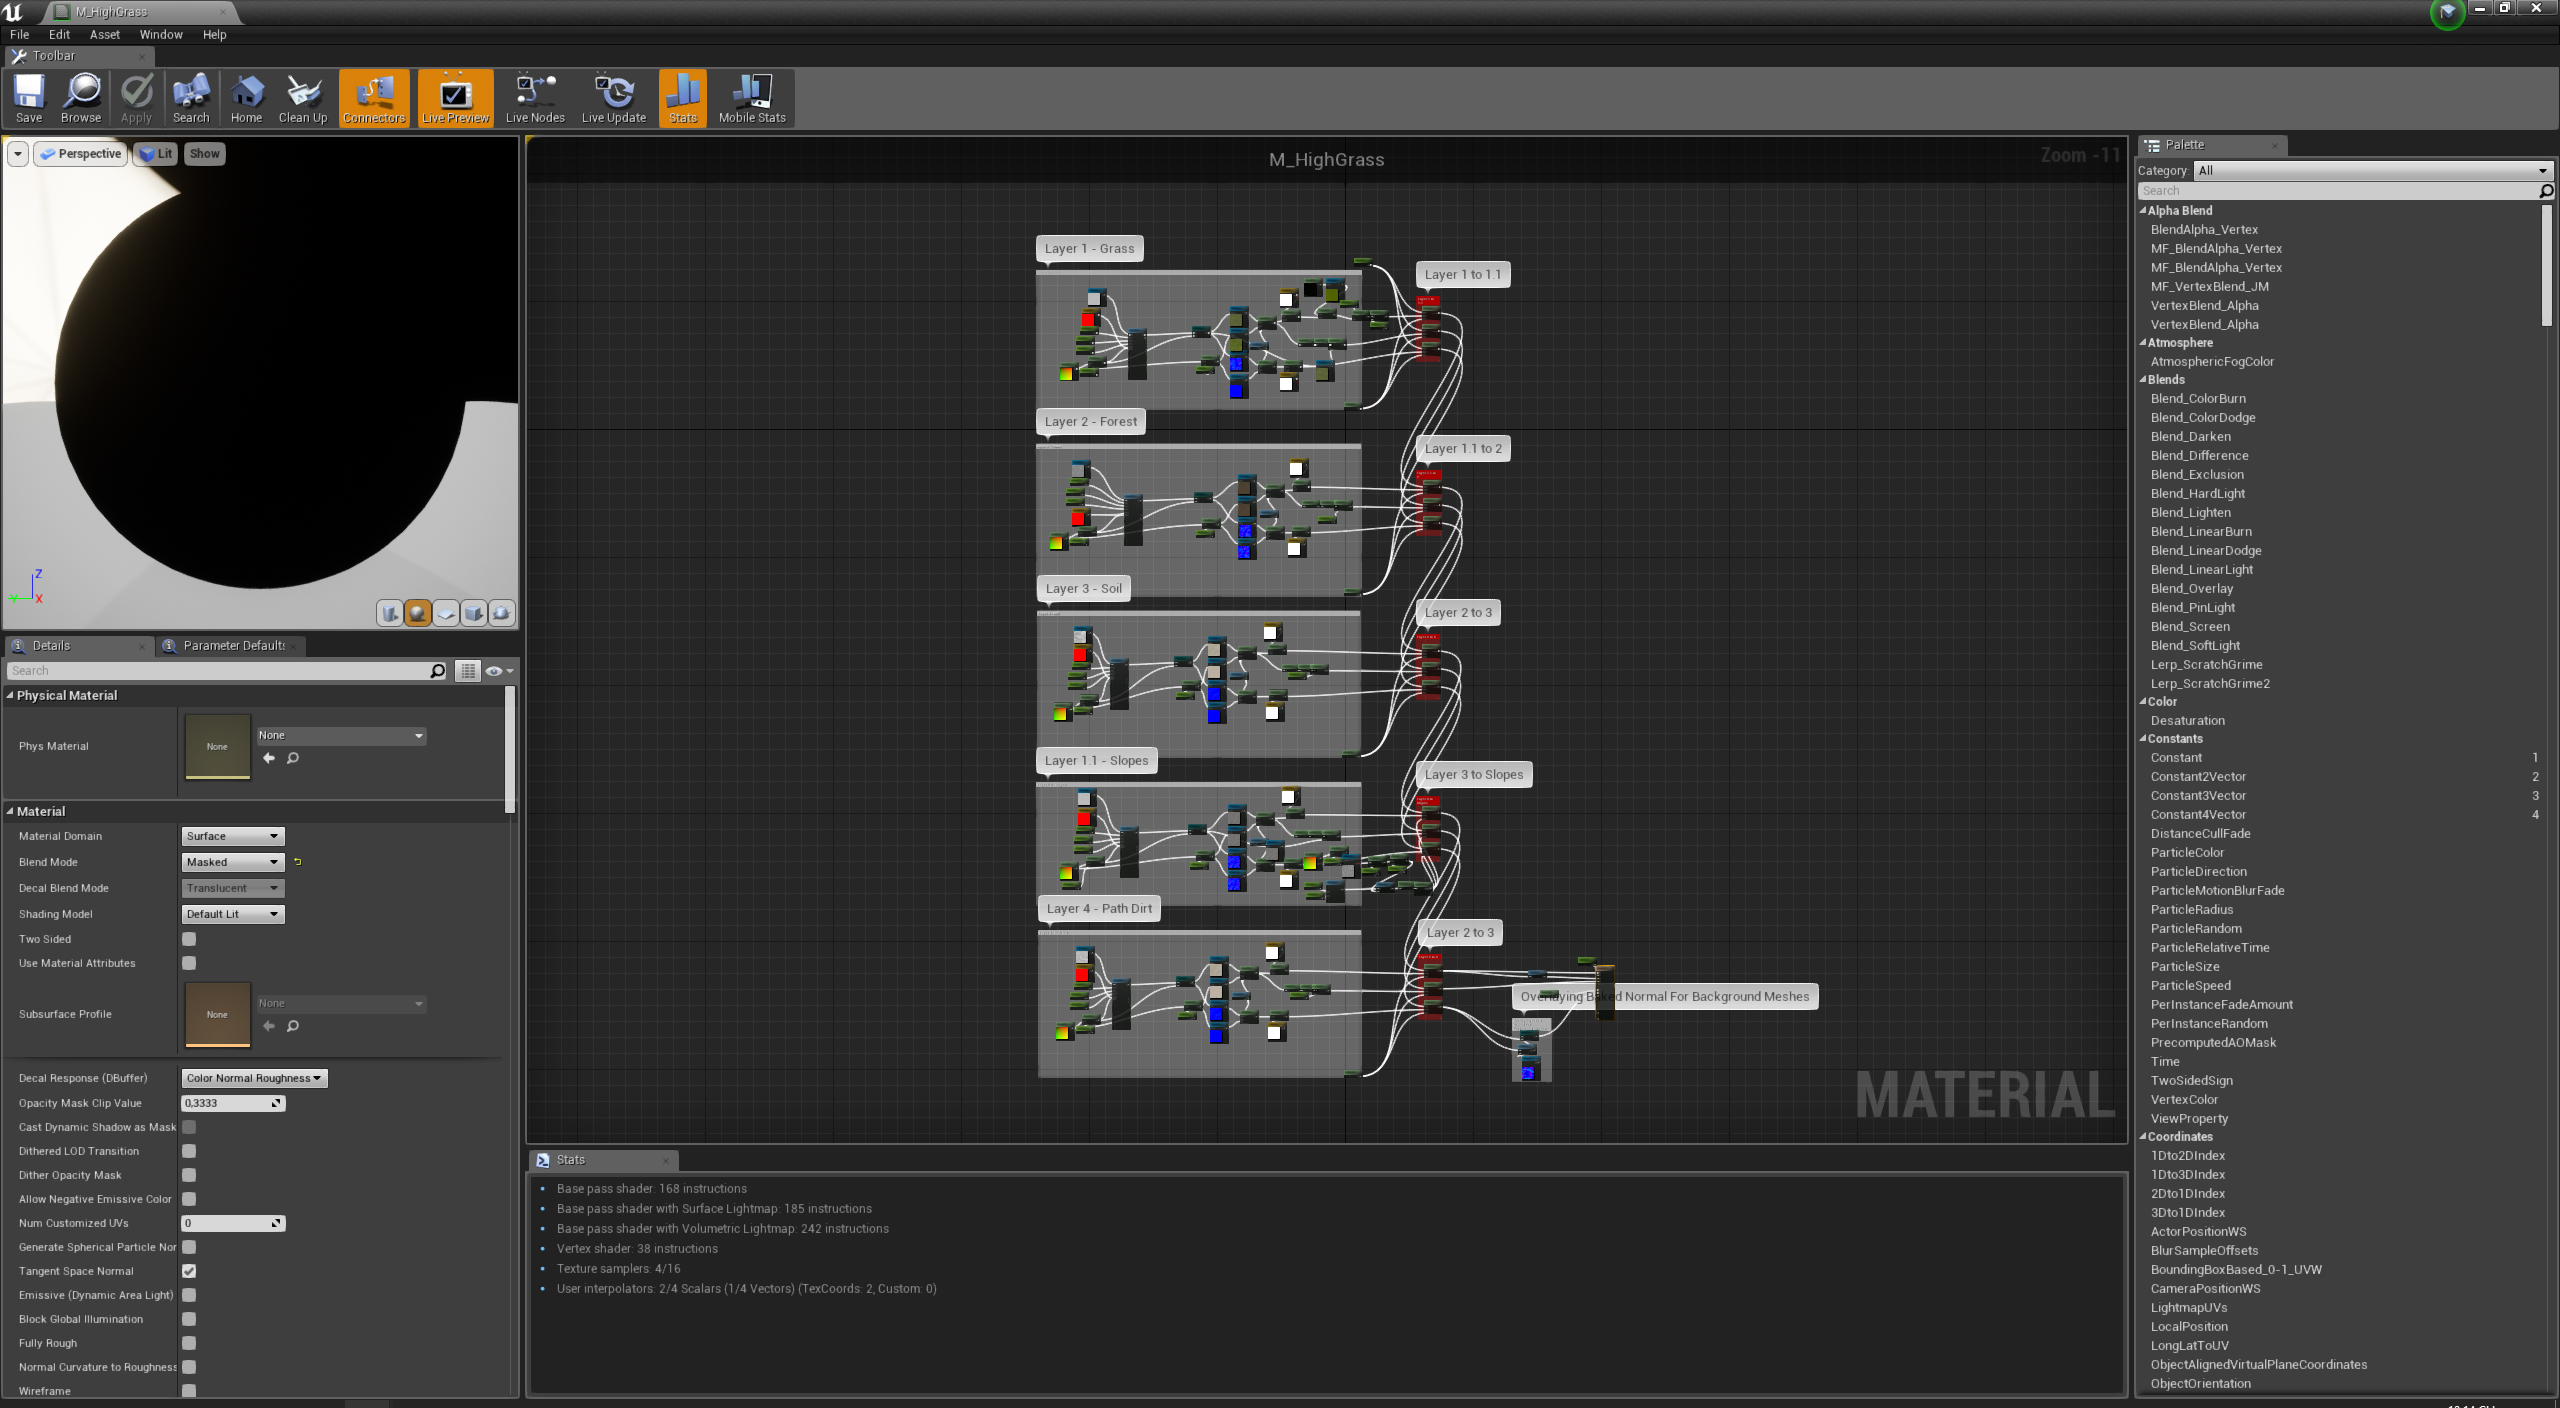
(Landscape material blend)
Basically, you can blend many materials together based on the Vertex Paint of the landscape using the “Sample” Node of landscape material, and then plug in Megascans textures by hand.
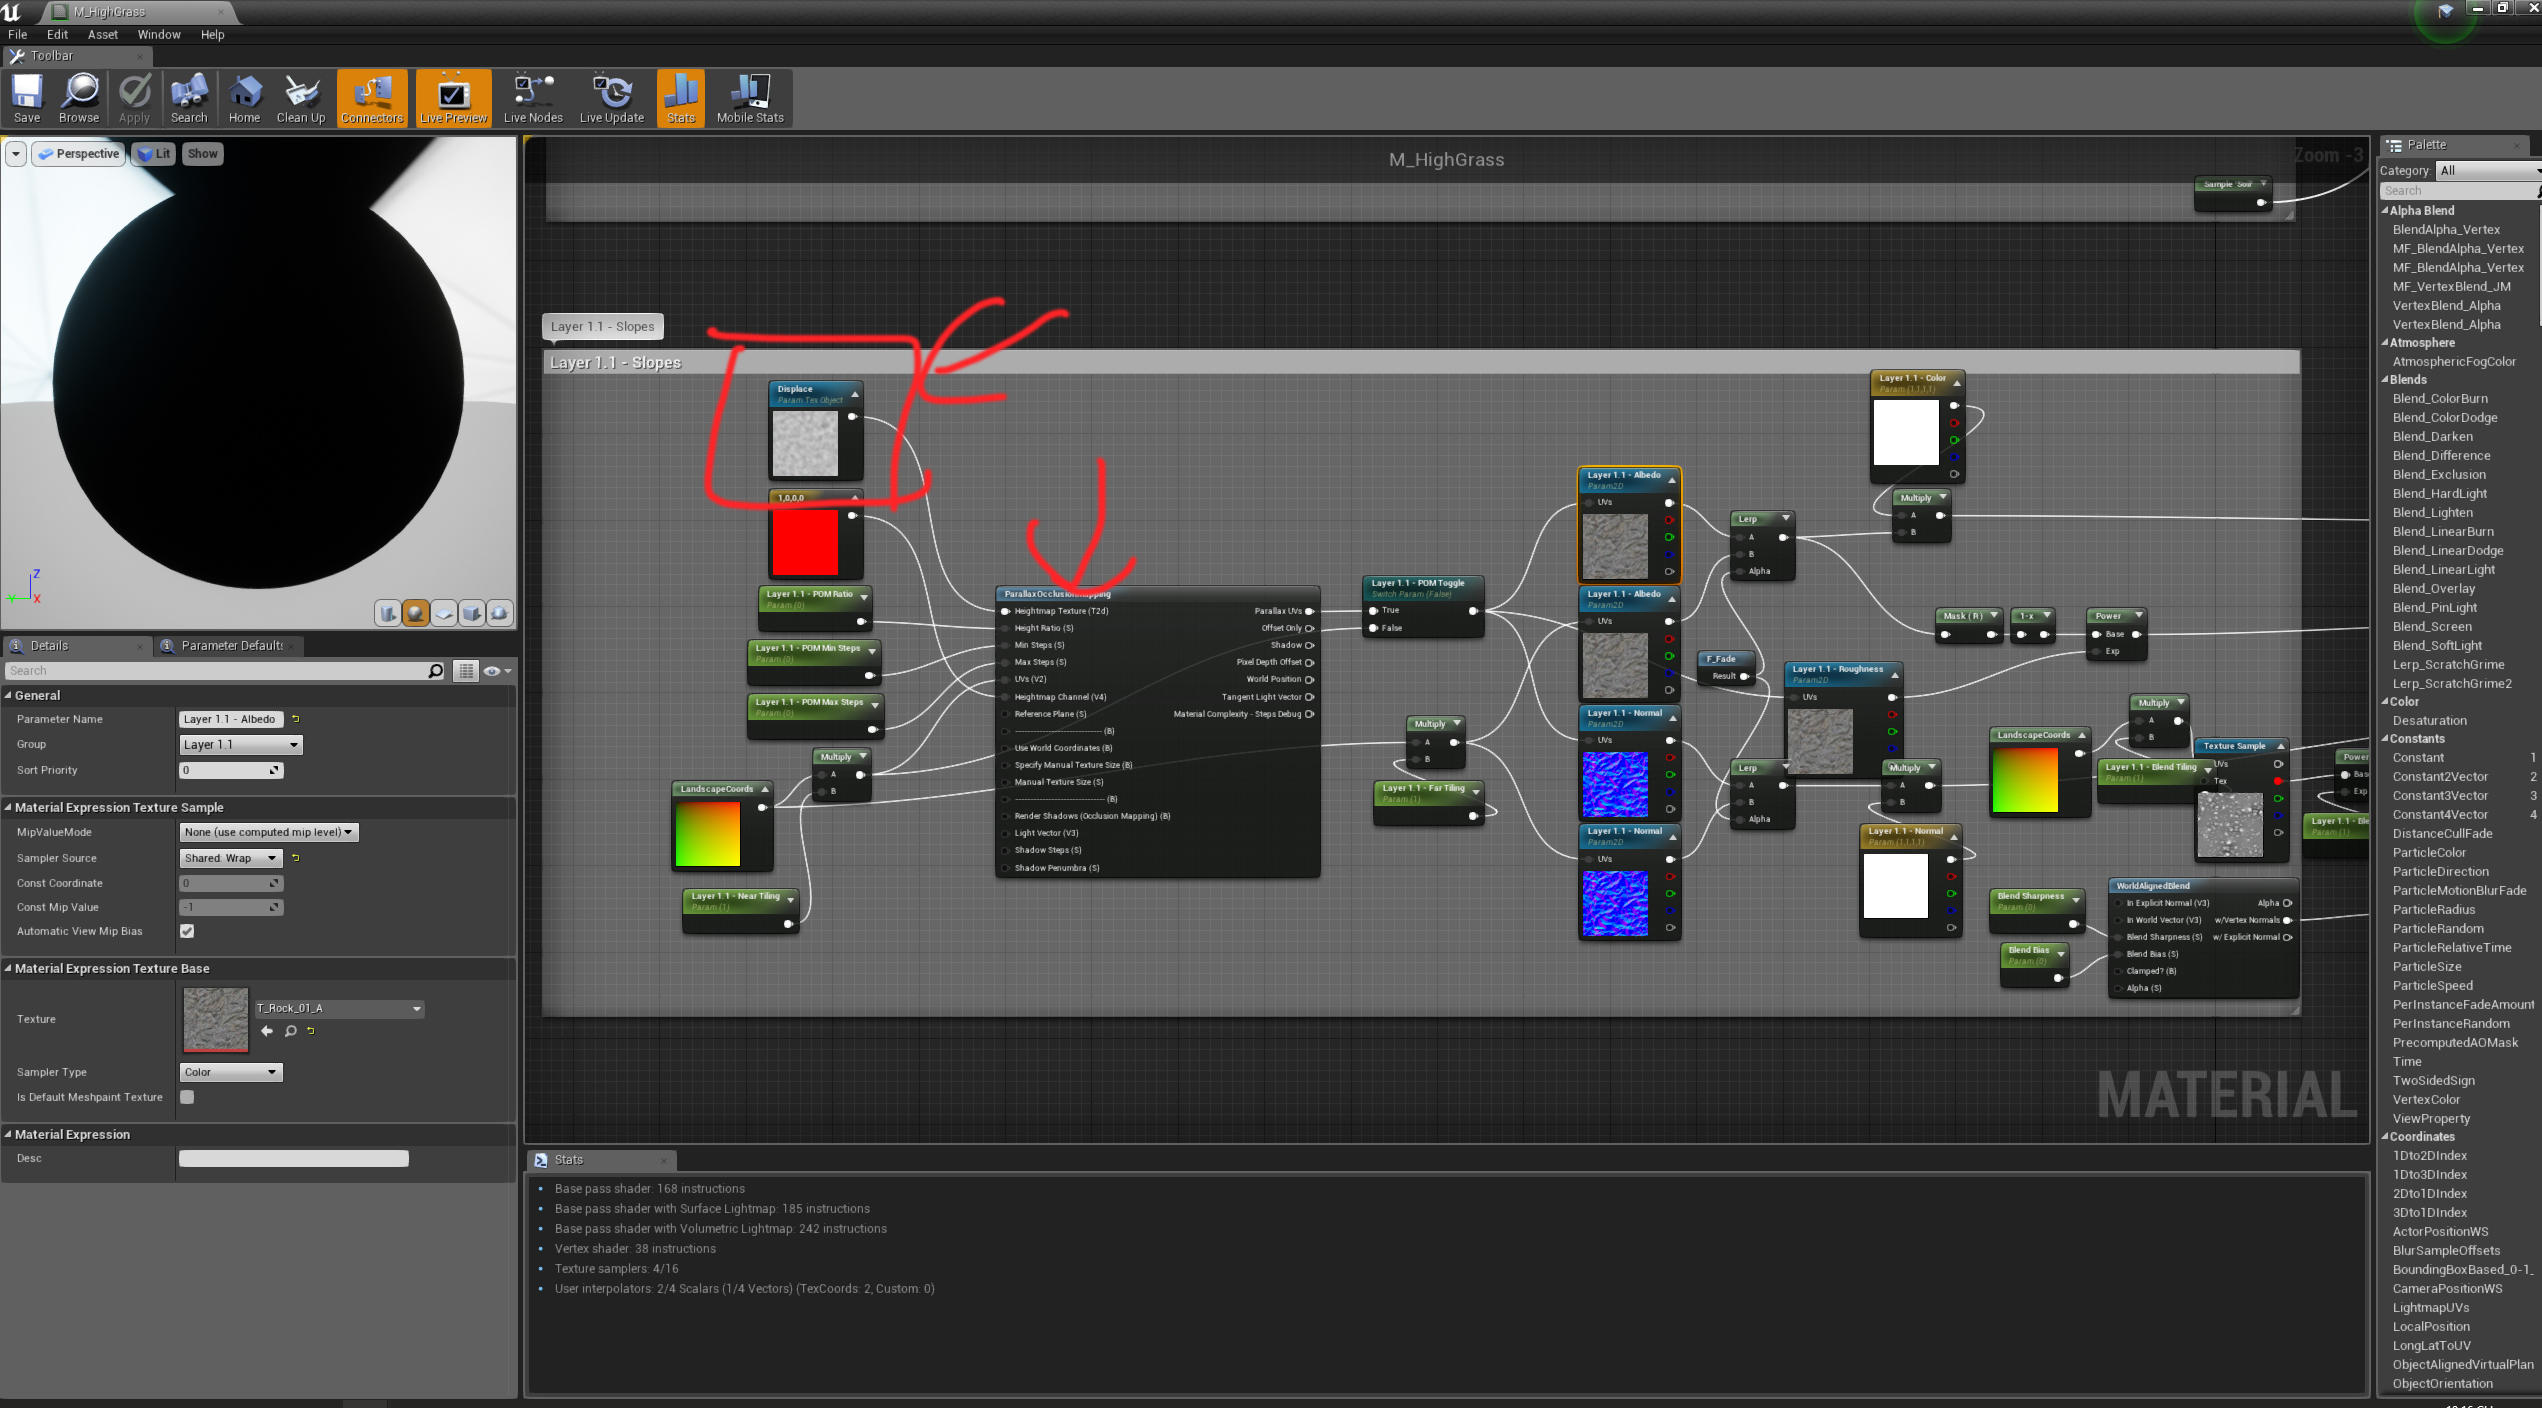
Parallax Node can be used to increase the depth of the material and deliver that high poly feel using the Displacement Map that comes along with all materials from Quixel.
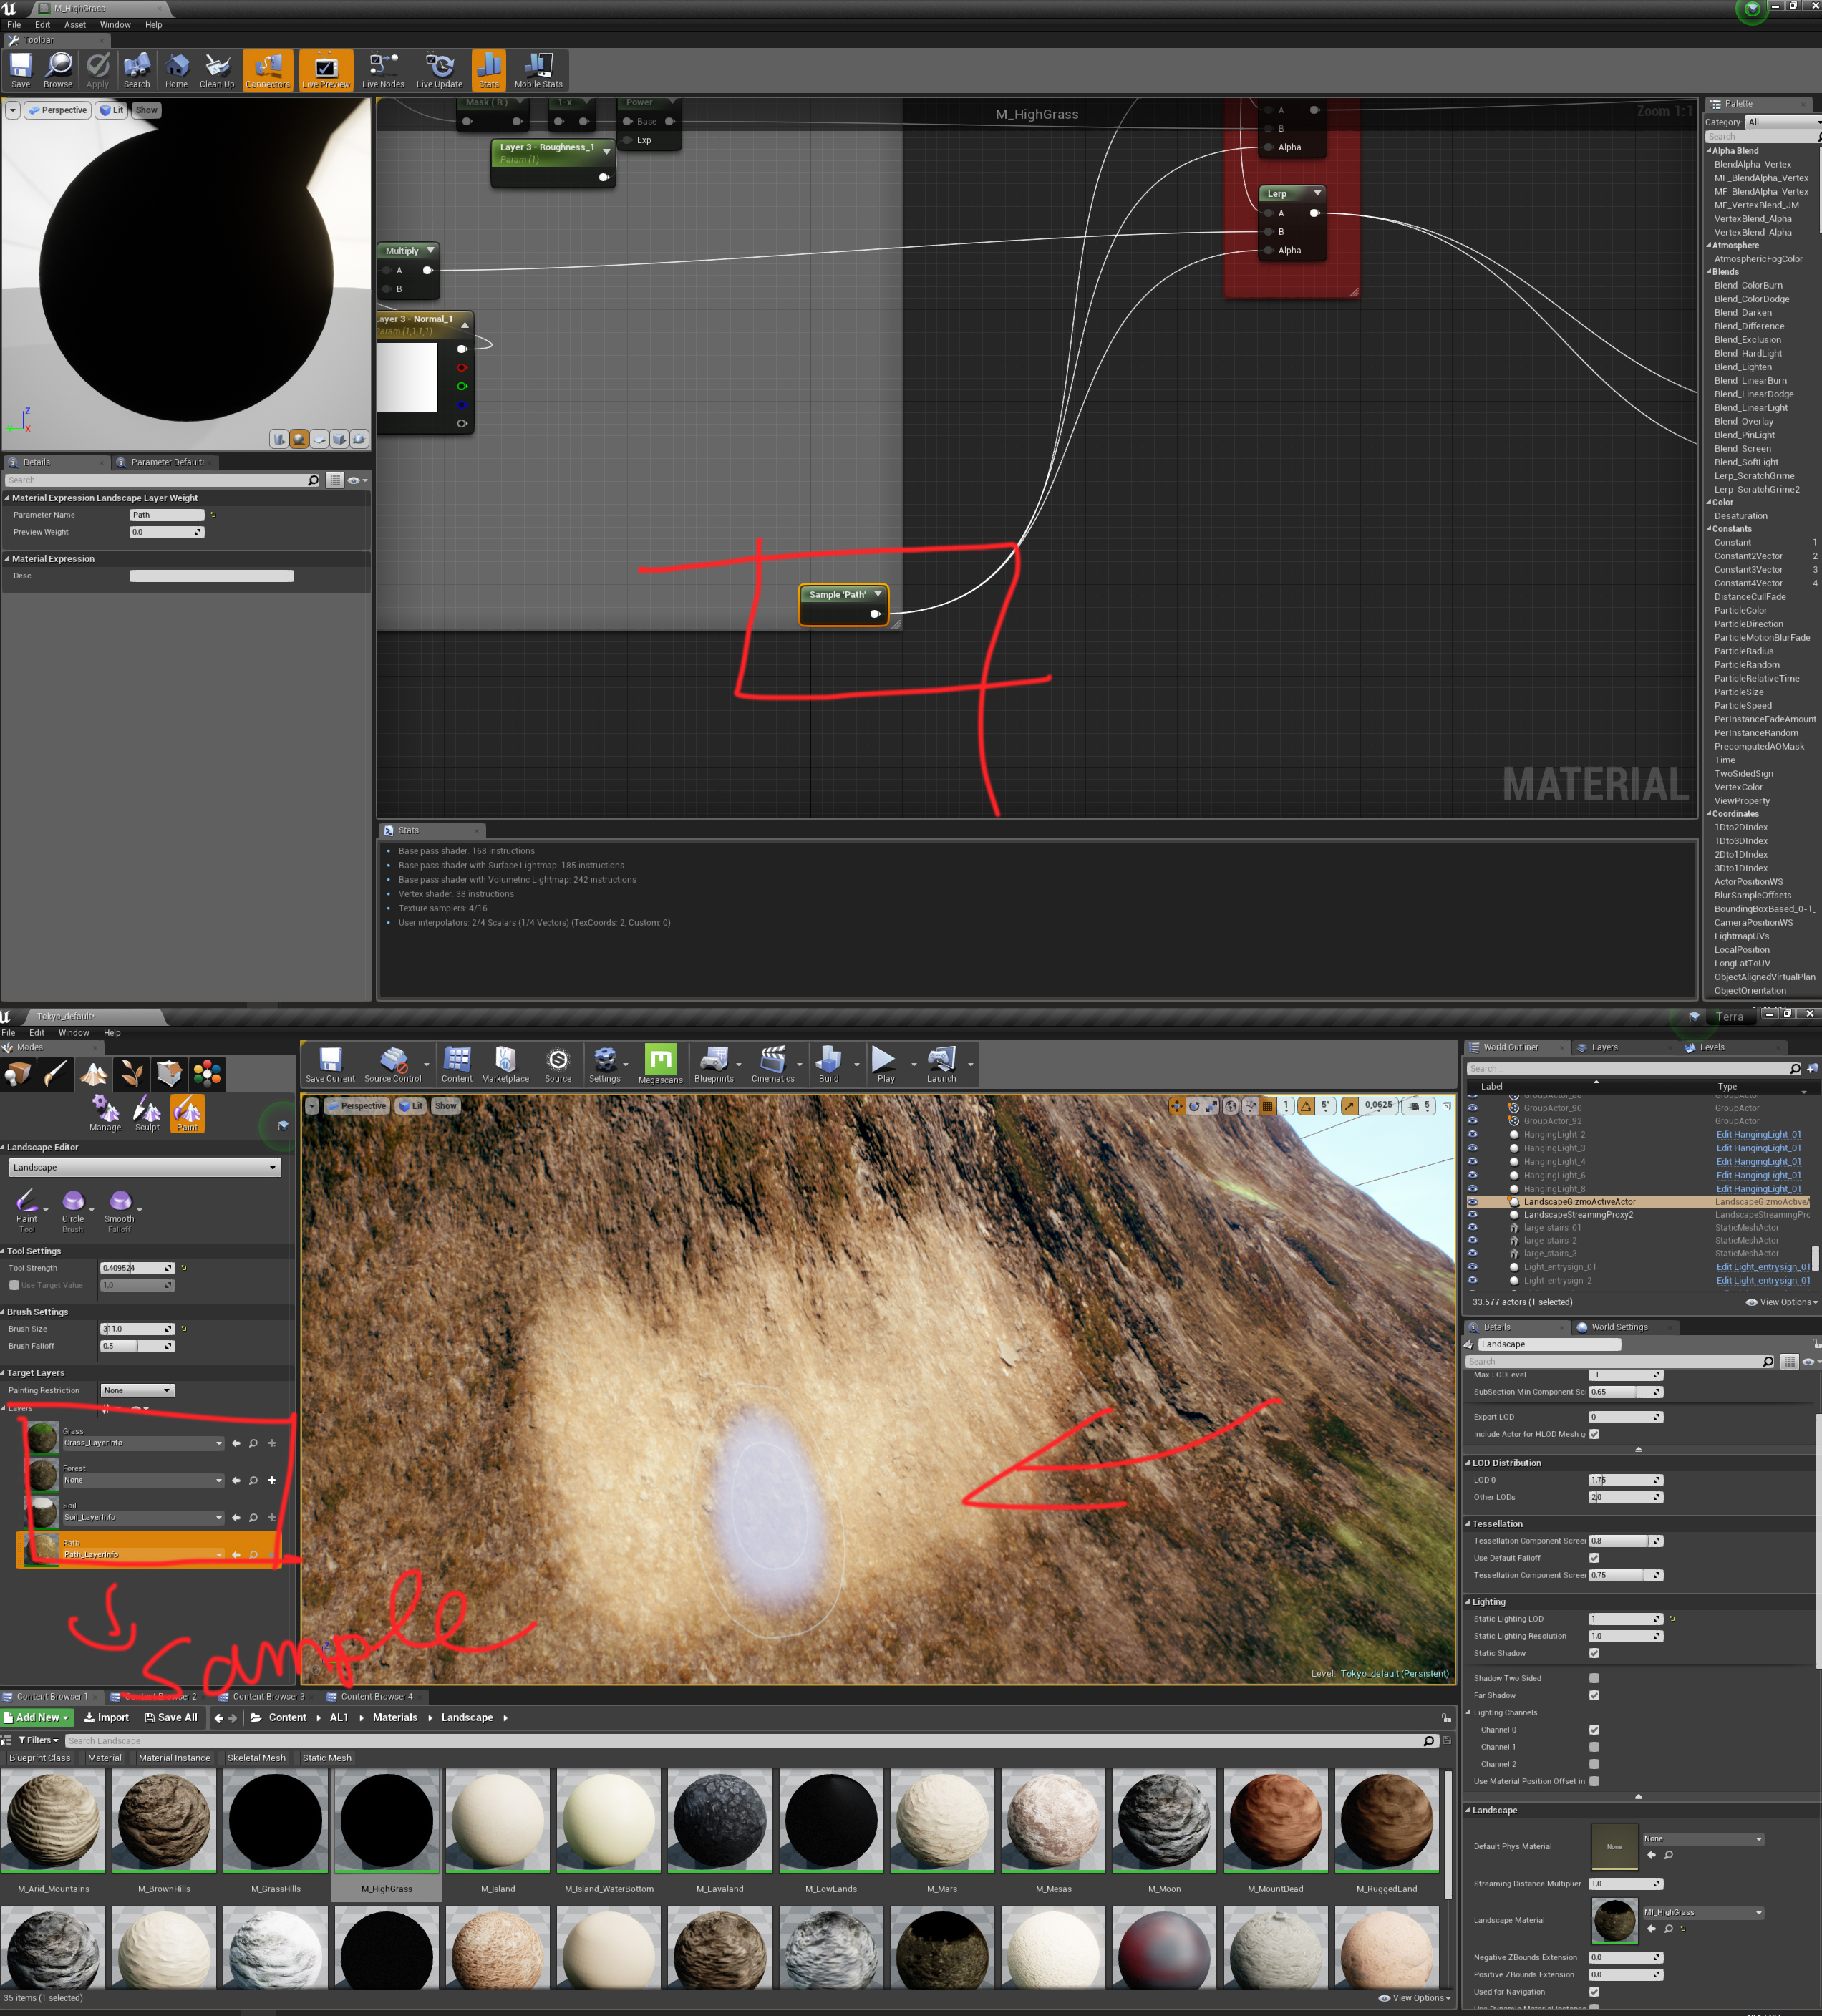
When you add in a “Sample” Node, a new Layer will appear in the foliage texture paint and you can blend many material layers for your landscape.
(Concrete Dirty and Fresh Asphalt blend)
Decals:
Decals are a very powerful feature in UE4 that you can use to quickly, easily, and non-destructively, add details into your scene. I used around 10,000 decals of many types across the scene. Conveniently, Megascans has a huge decal library to choose from.
Here are some examples:
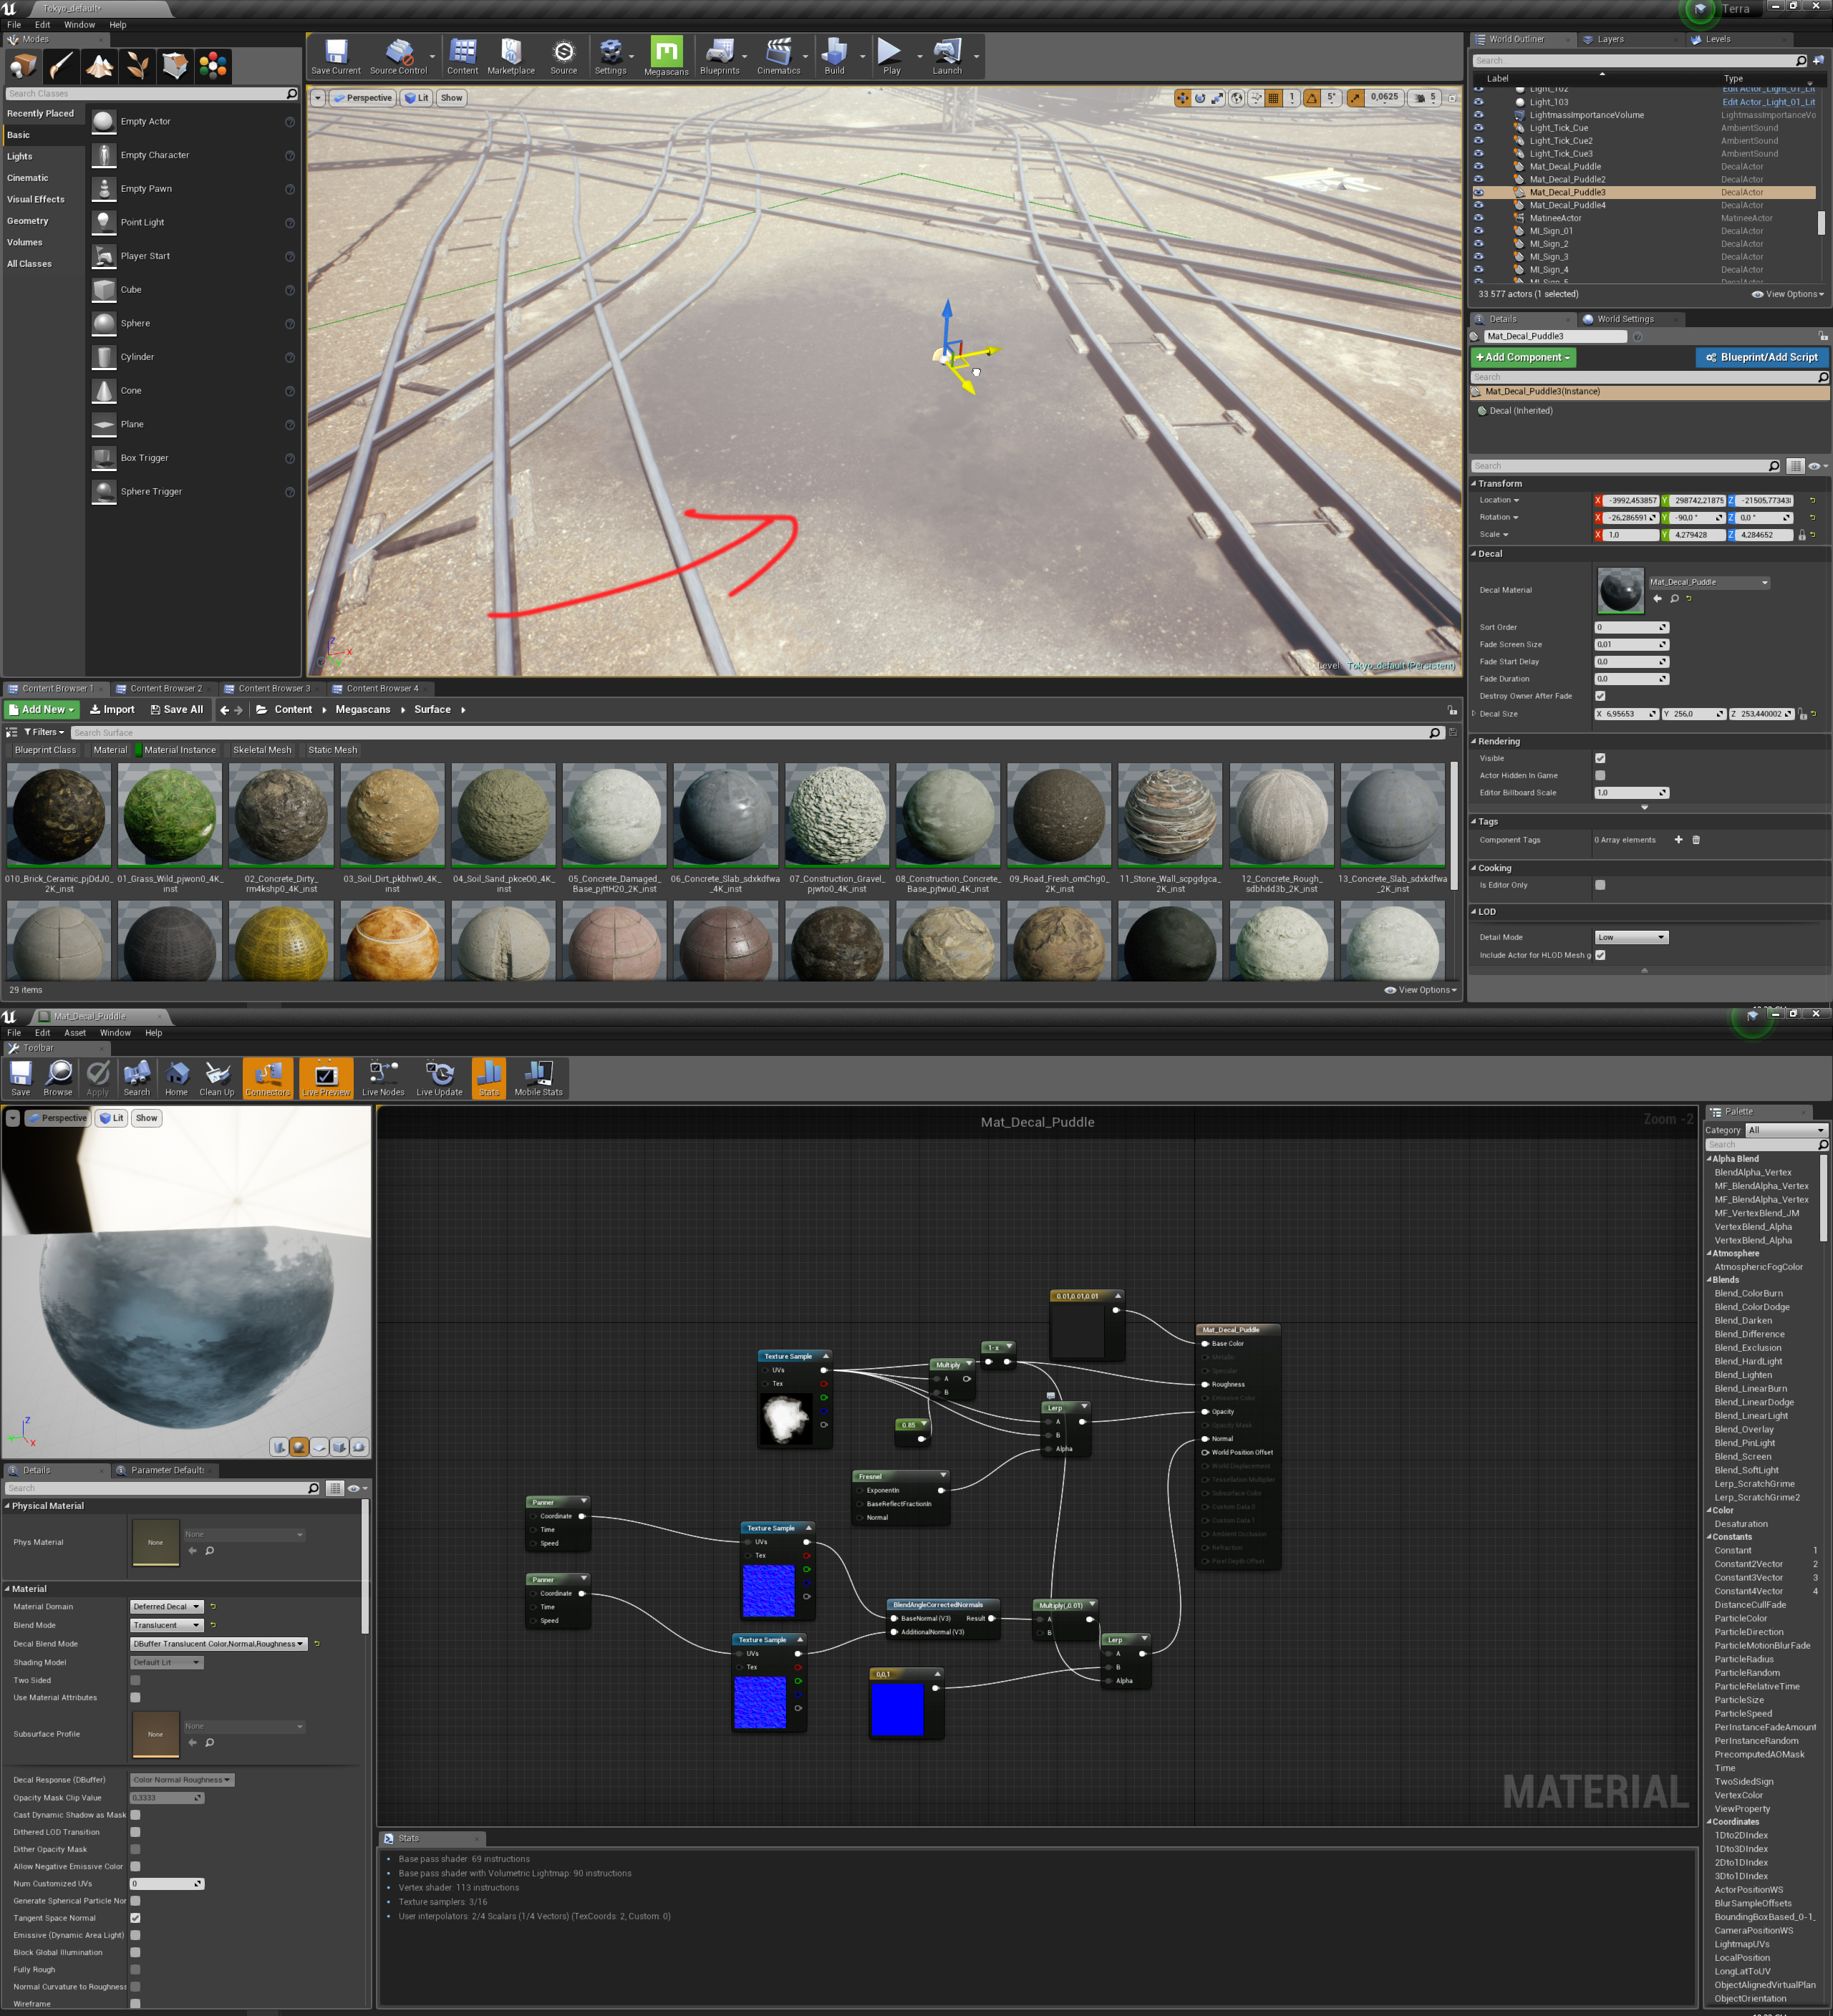
(Water puddle decals)
This is not actually a scan from Quixel, but it gives a good example of what you can do with decals. You can even add in Parallax decals to get depth effects like bullet holes.
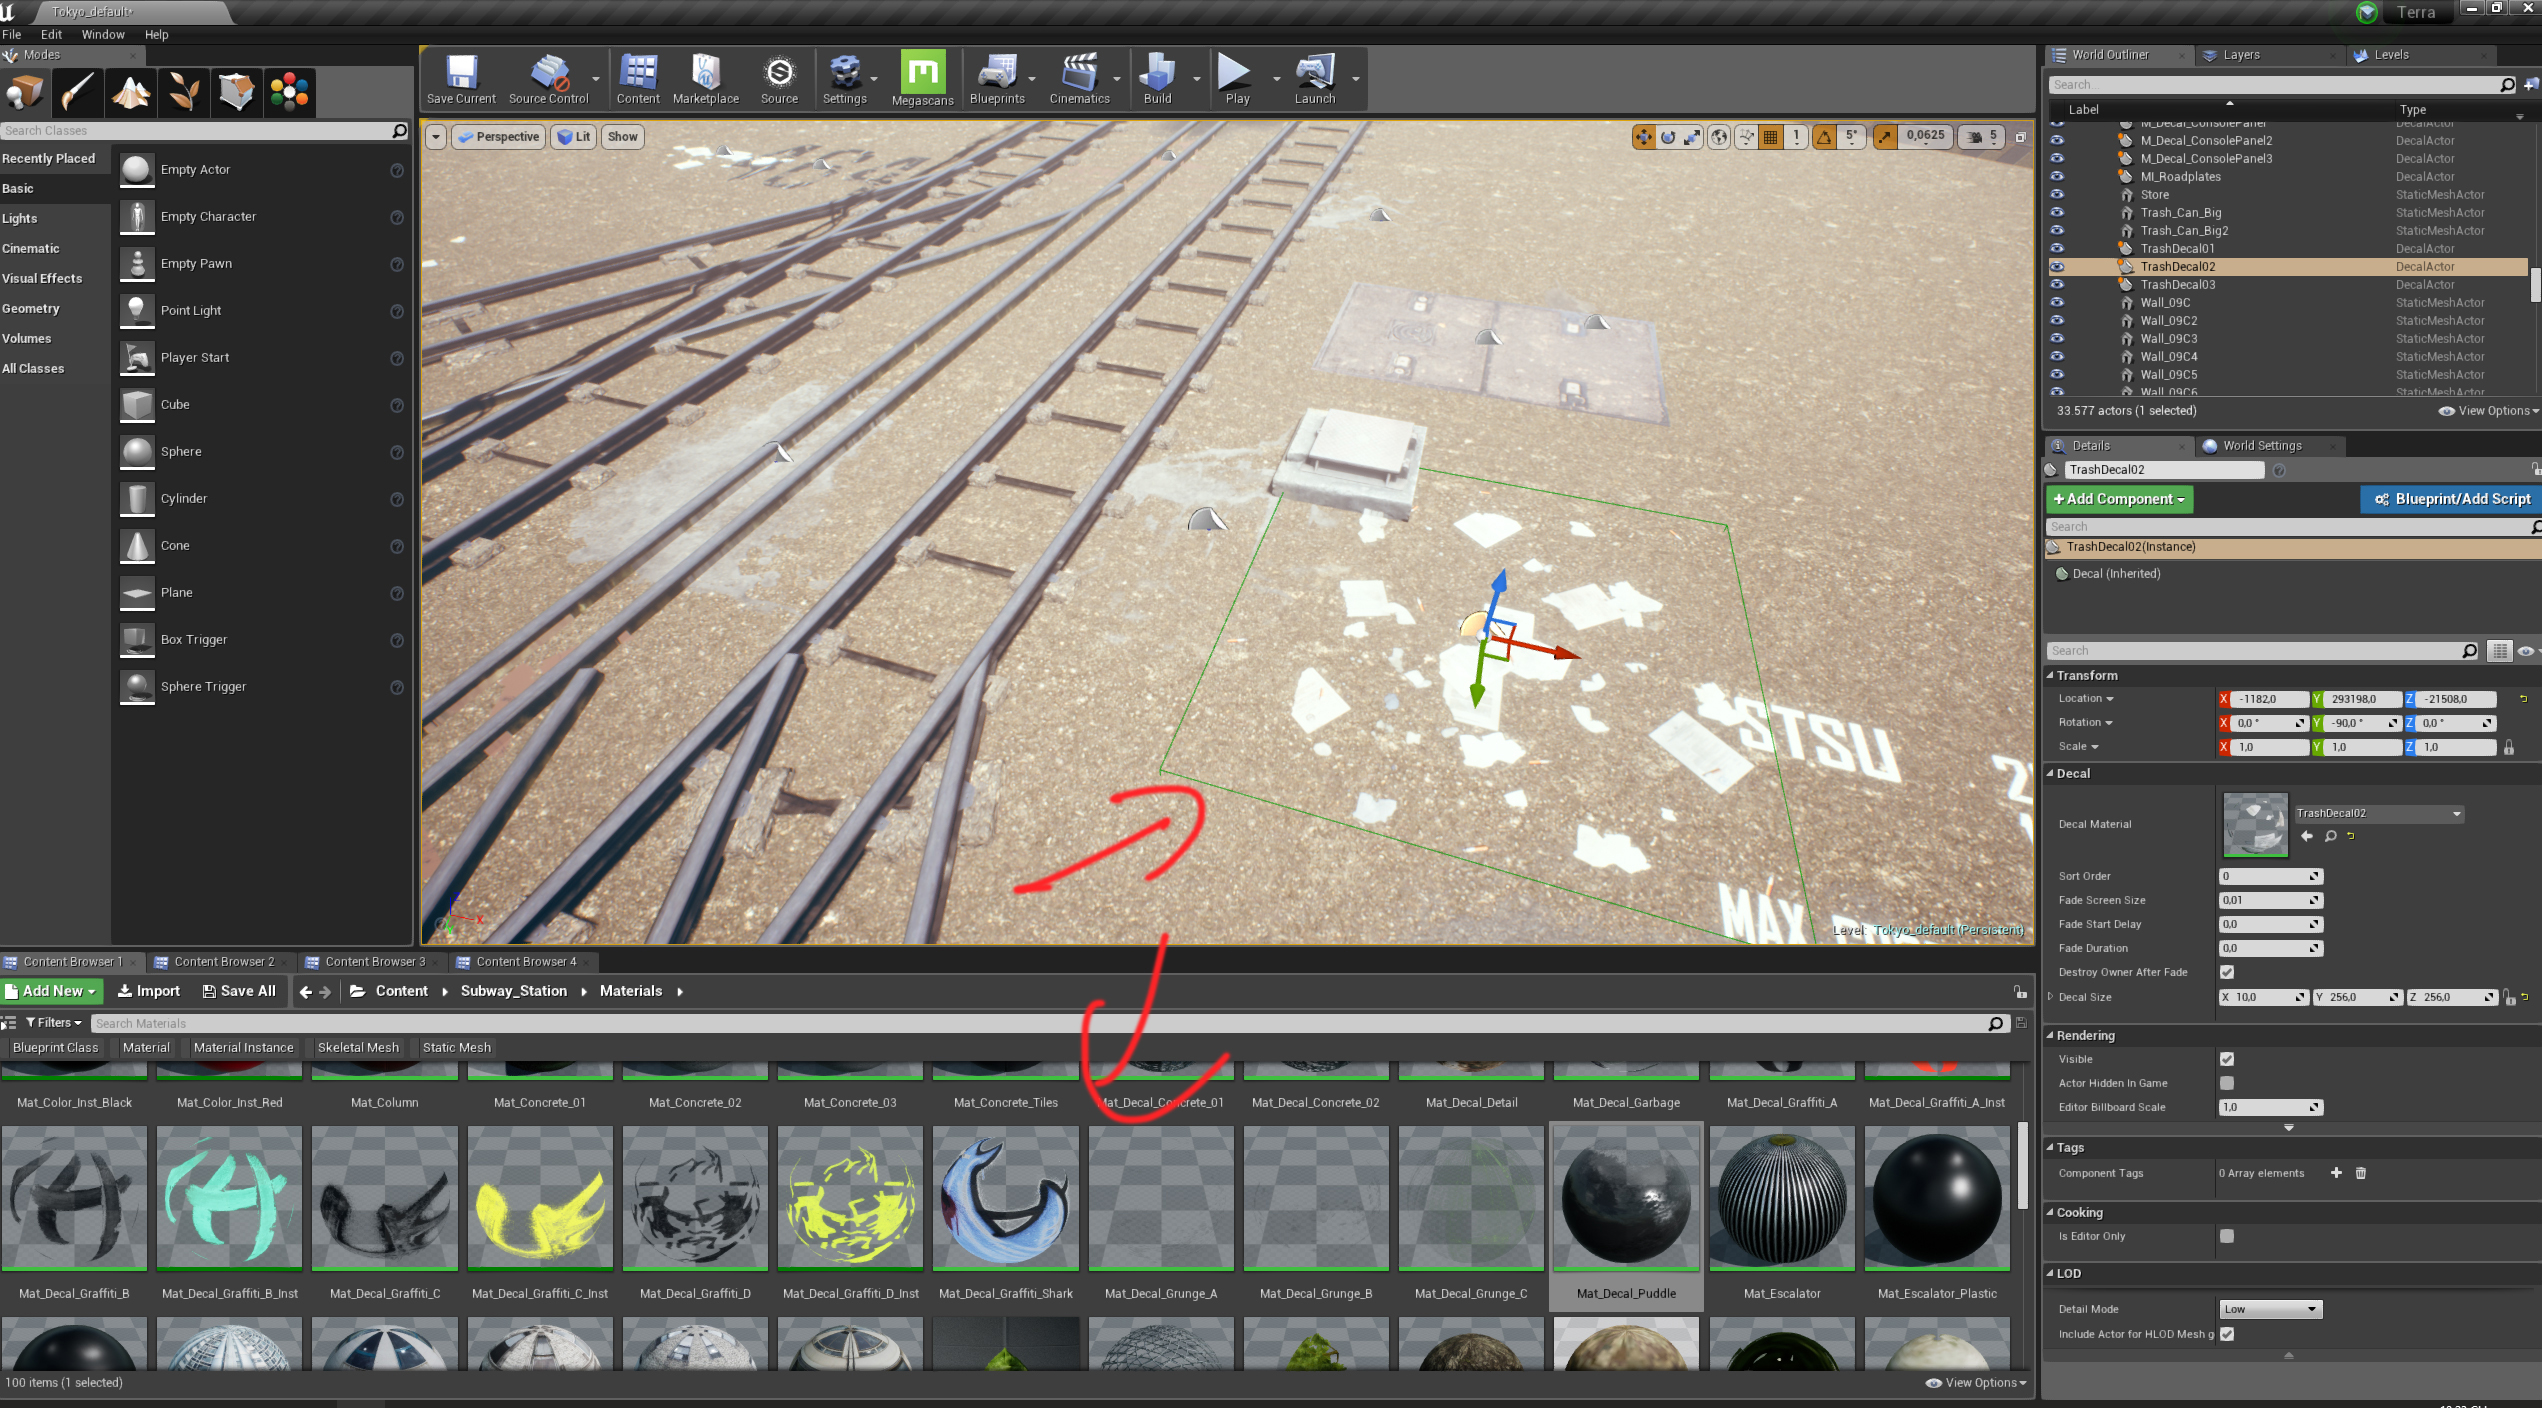
(Trash decal)
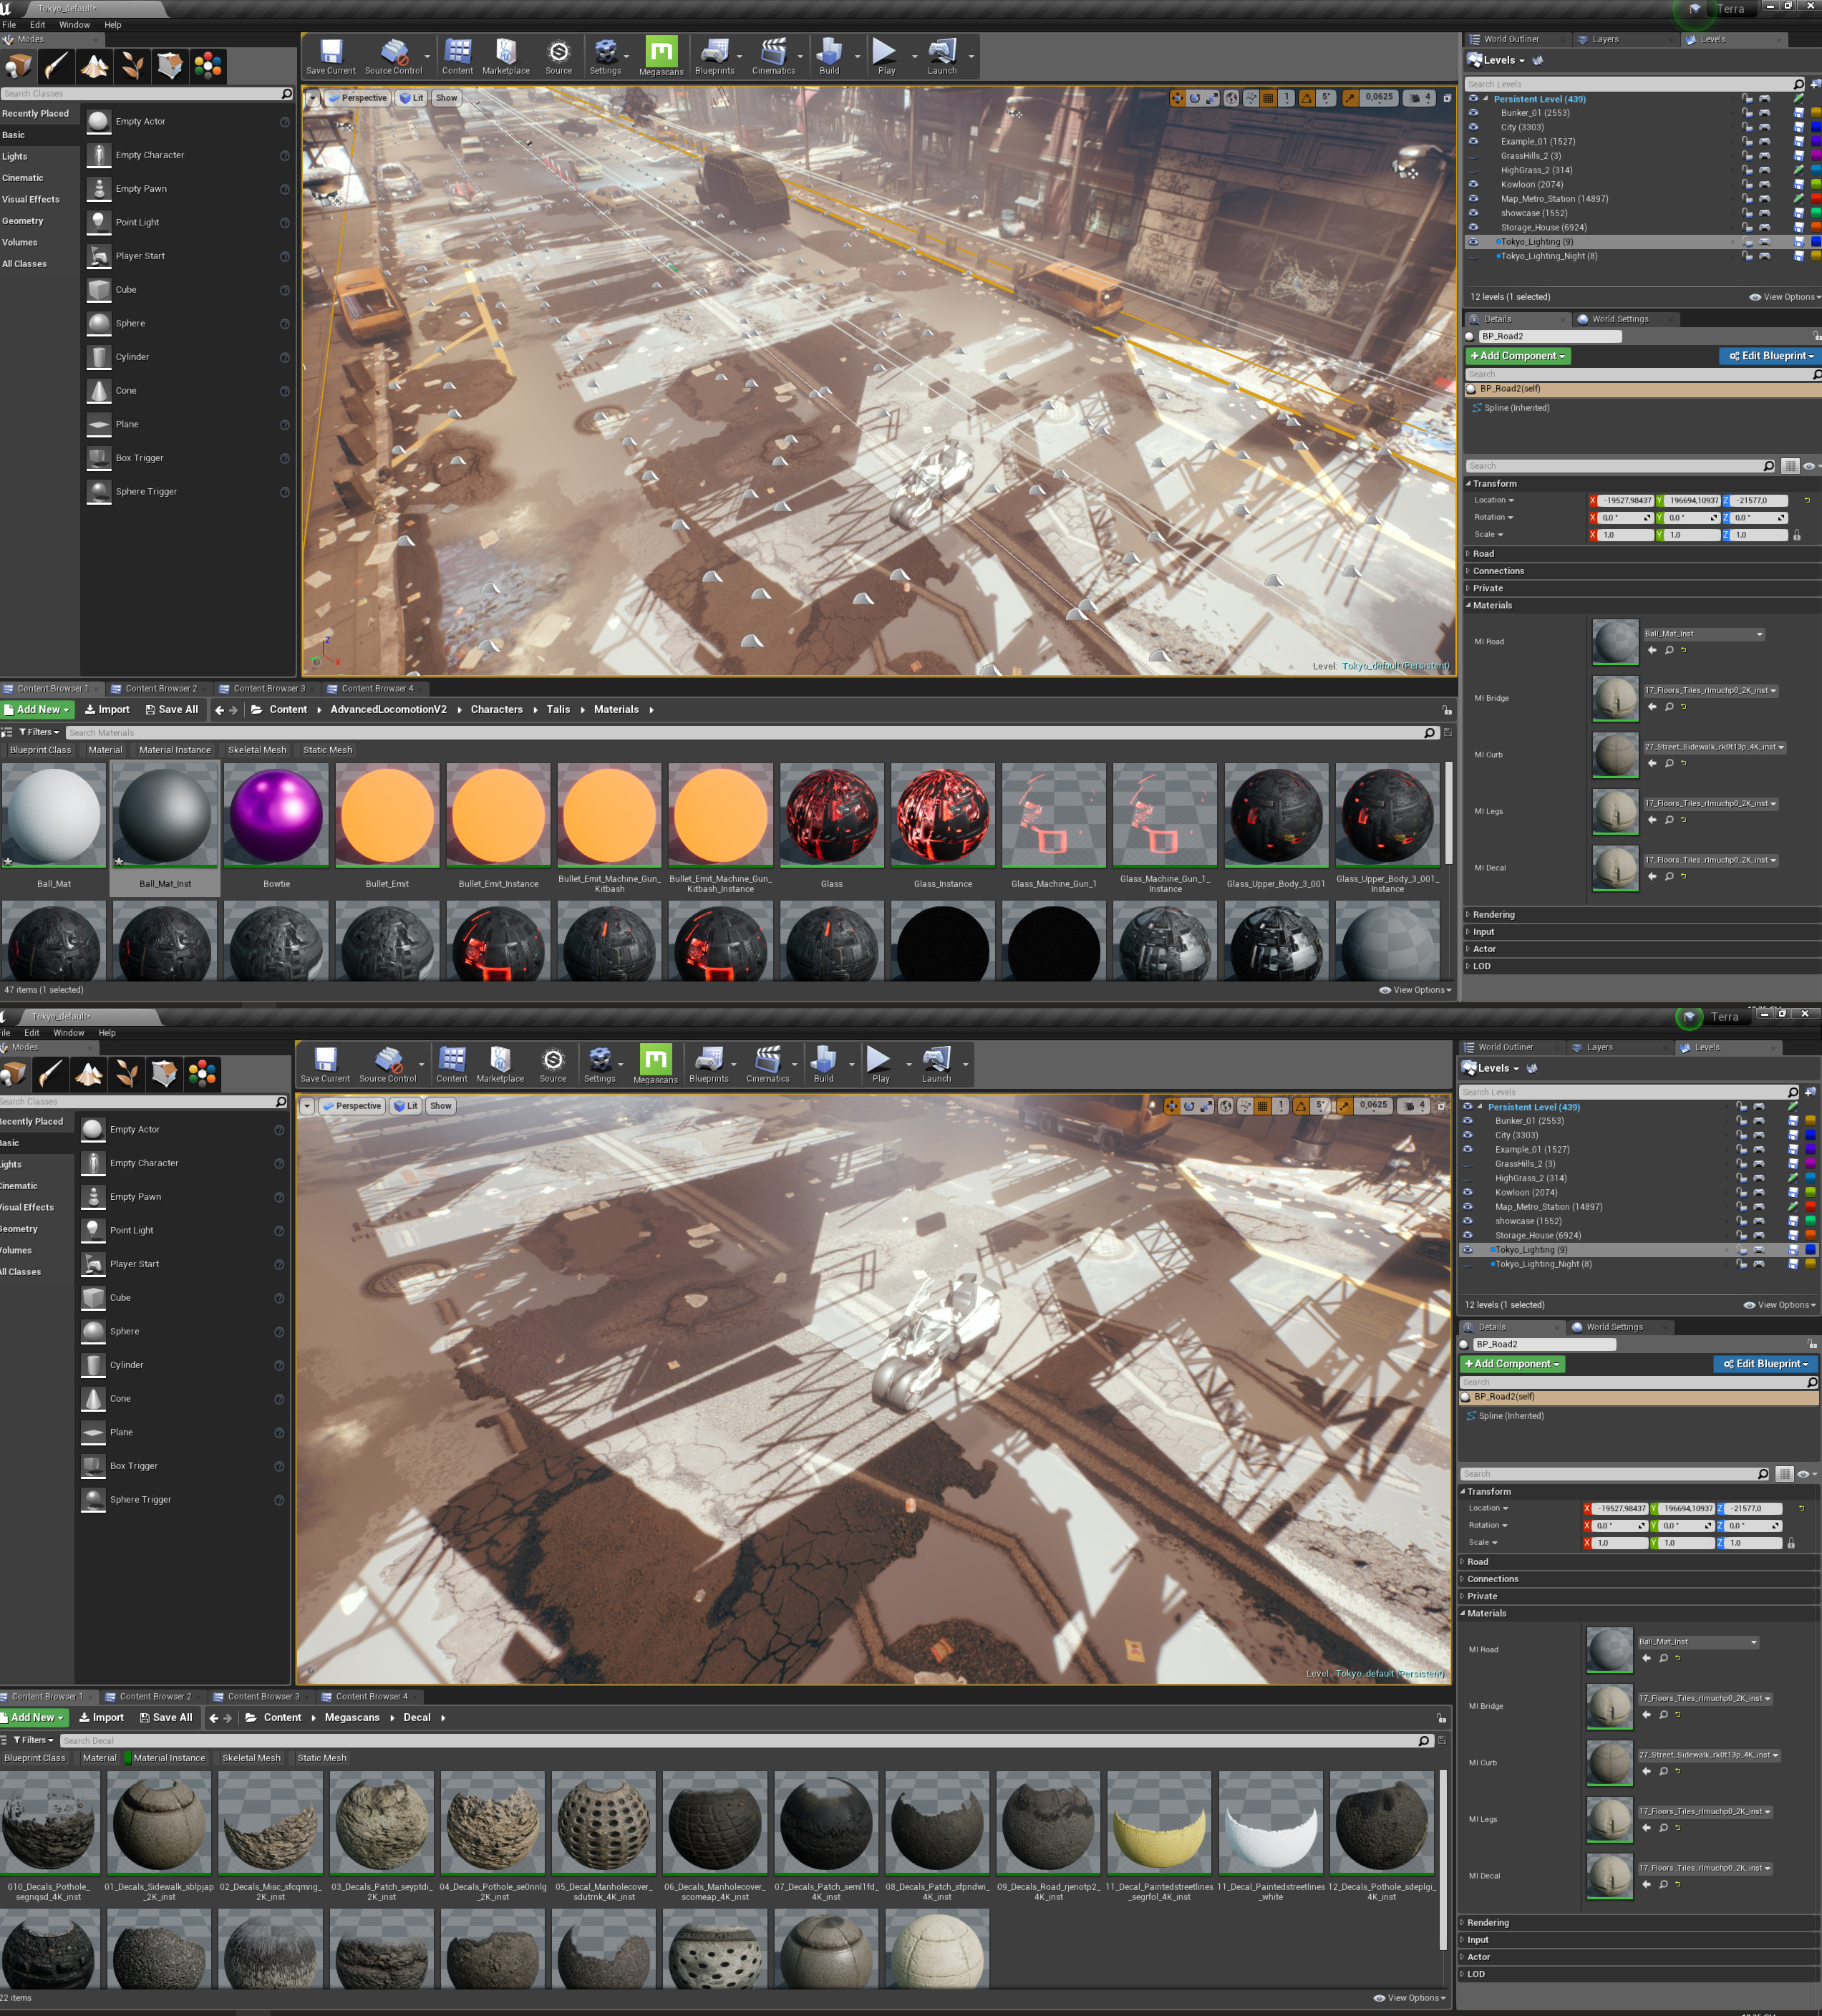
Surface and decal scan usage:
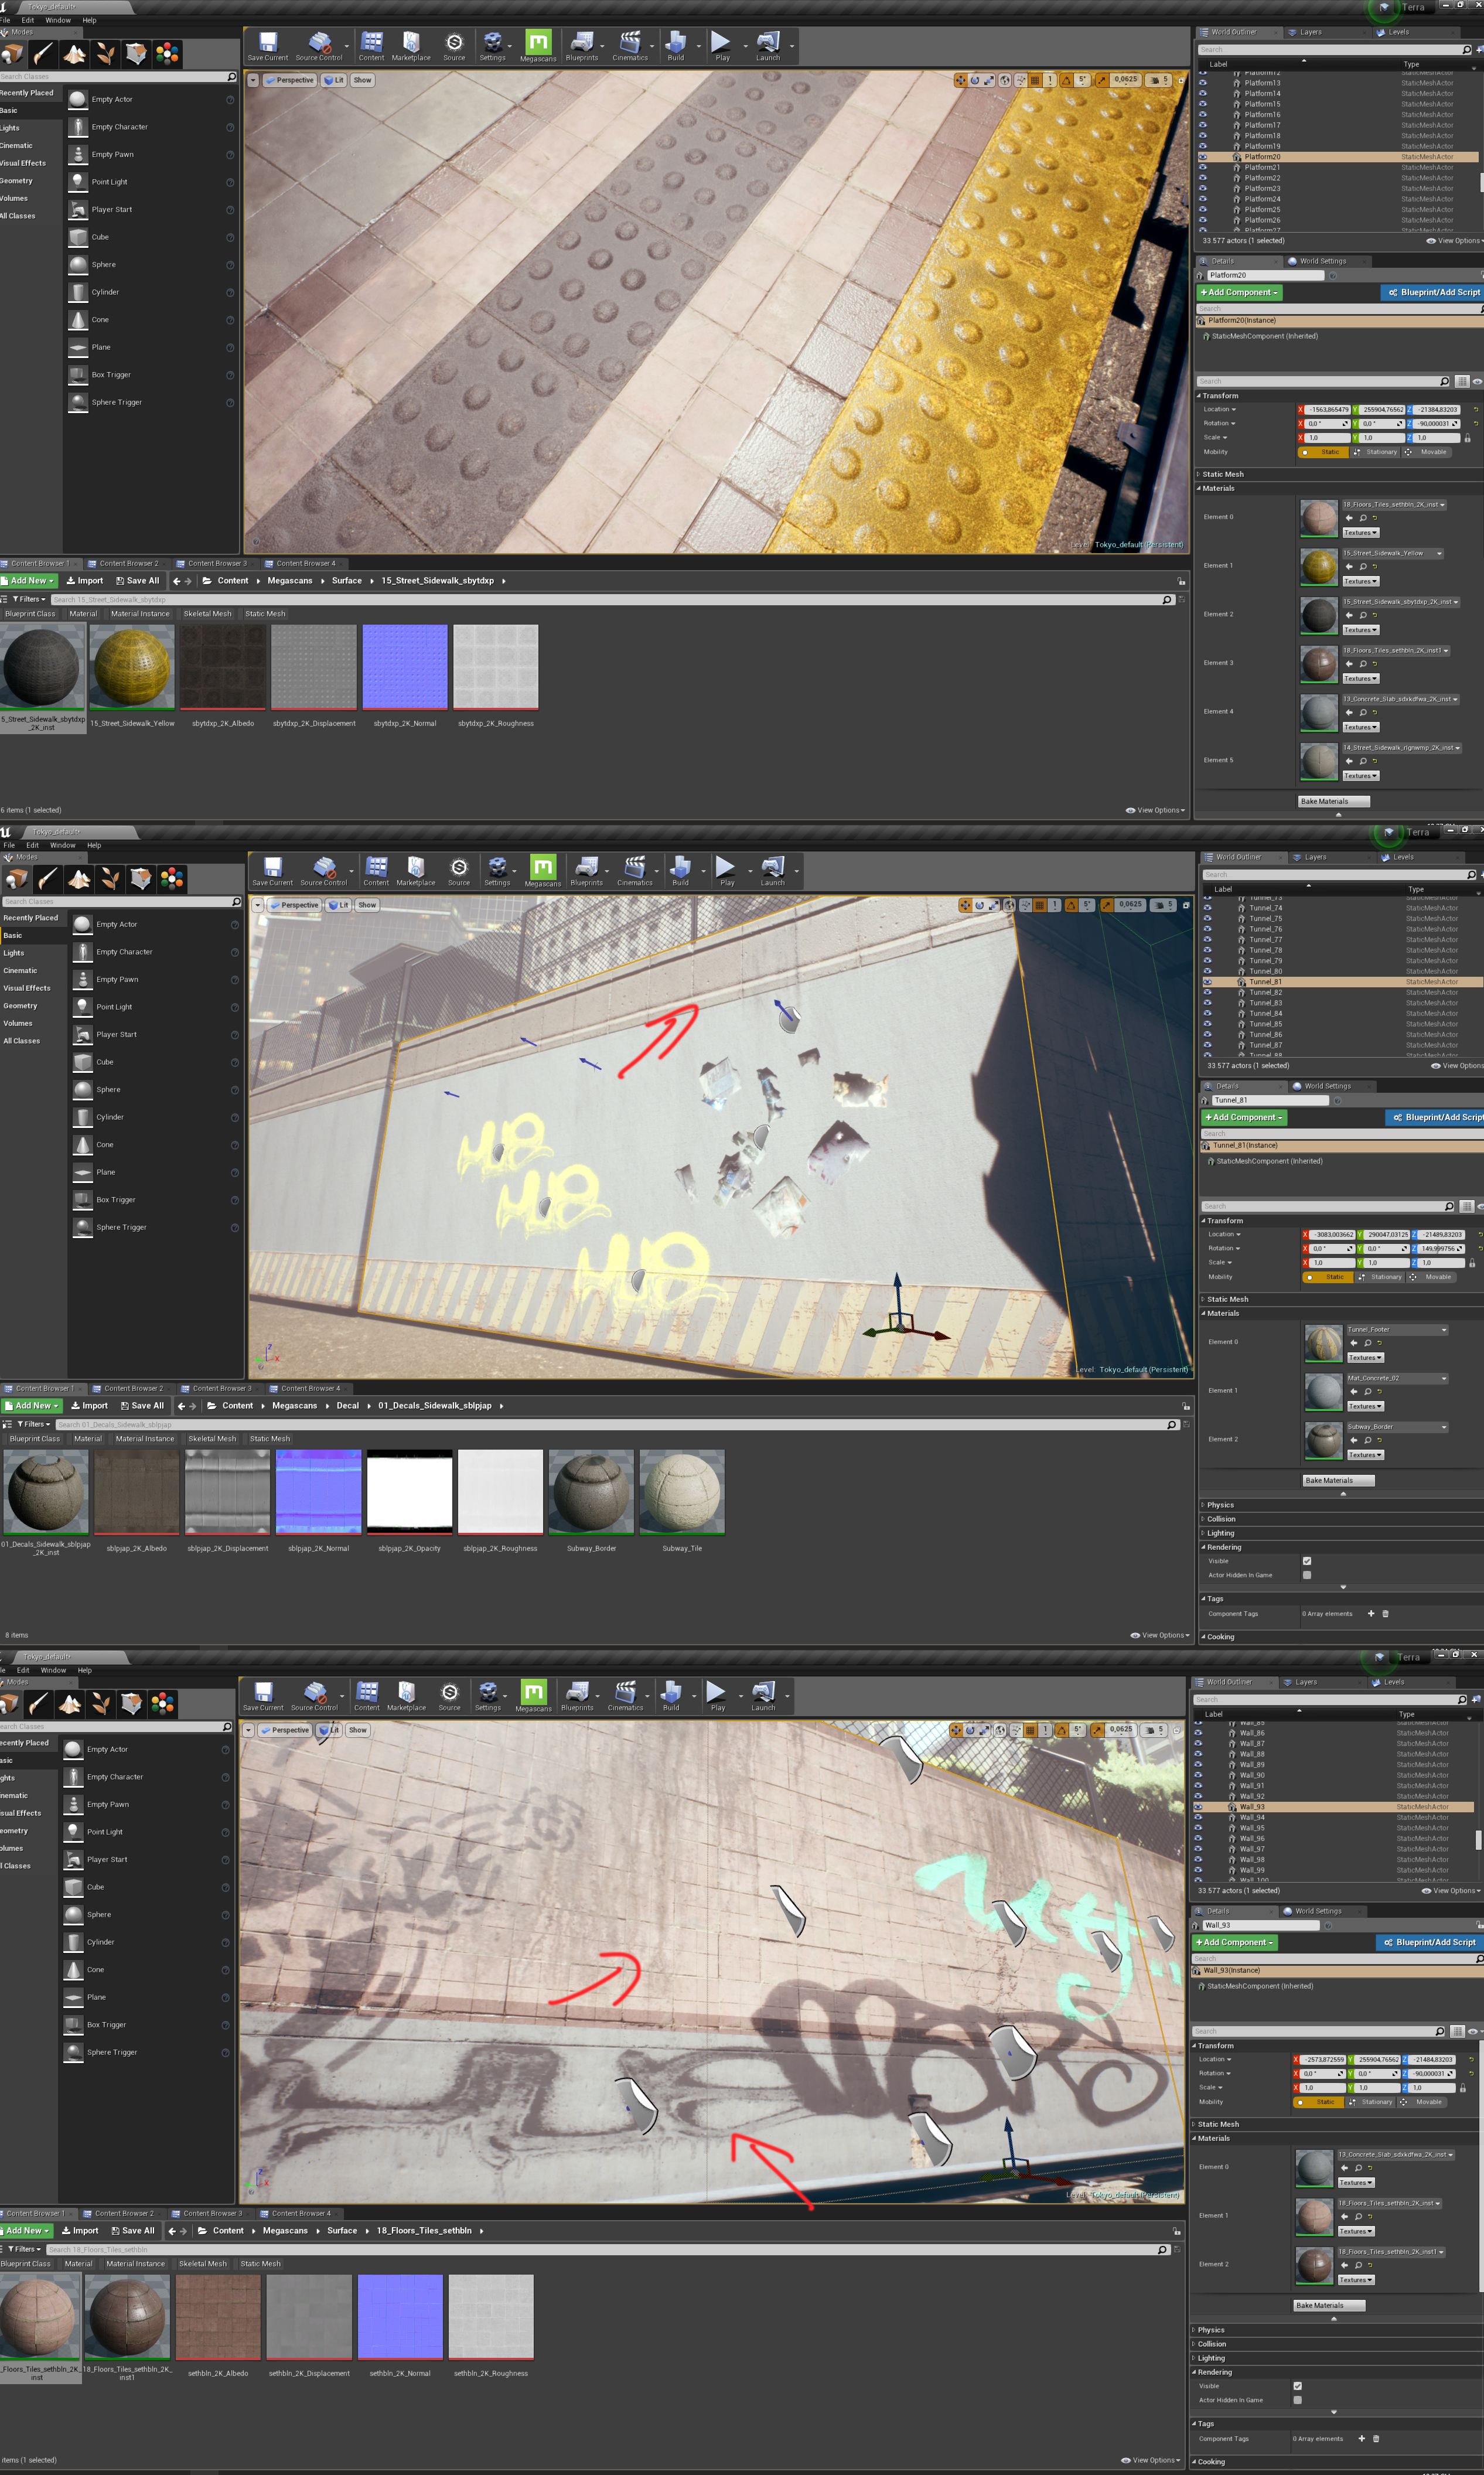
(Train station, street sidewalk, decal sidewalk, floor tile)
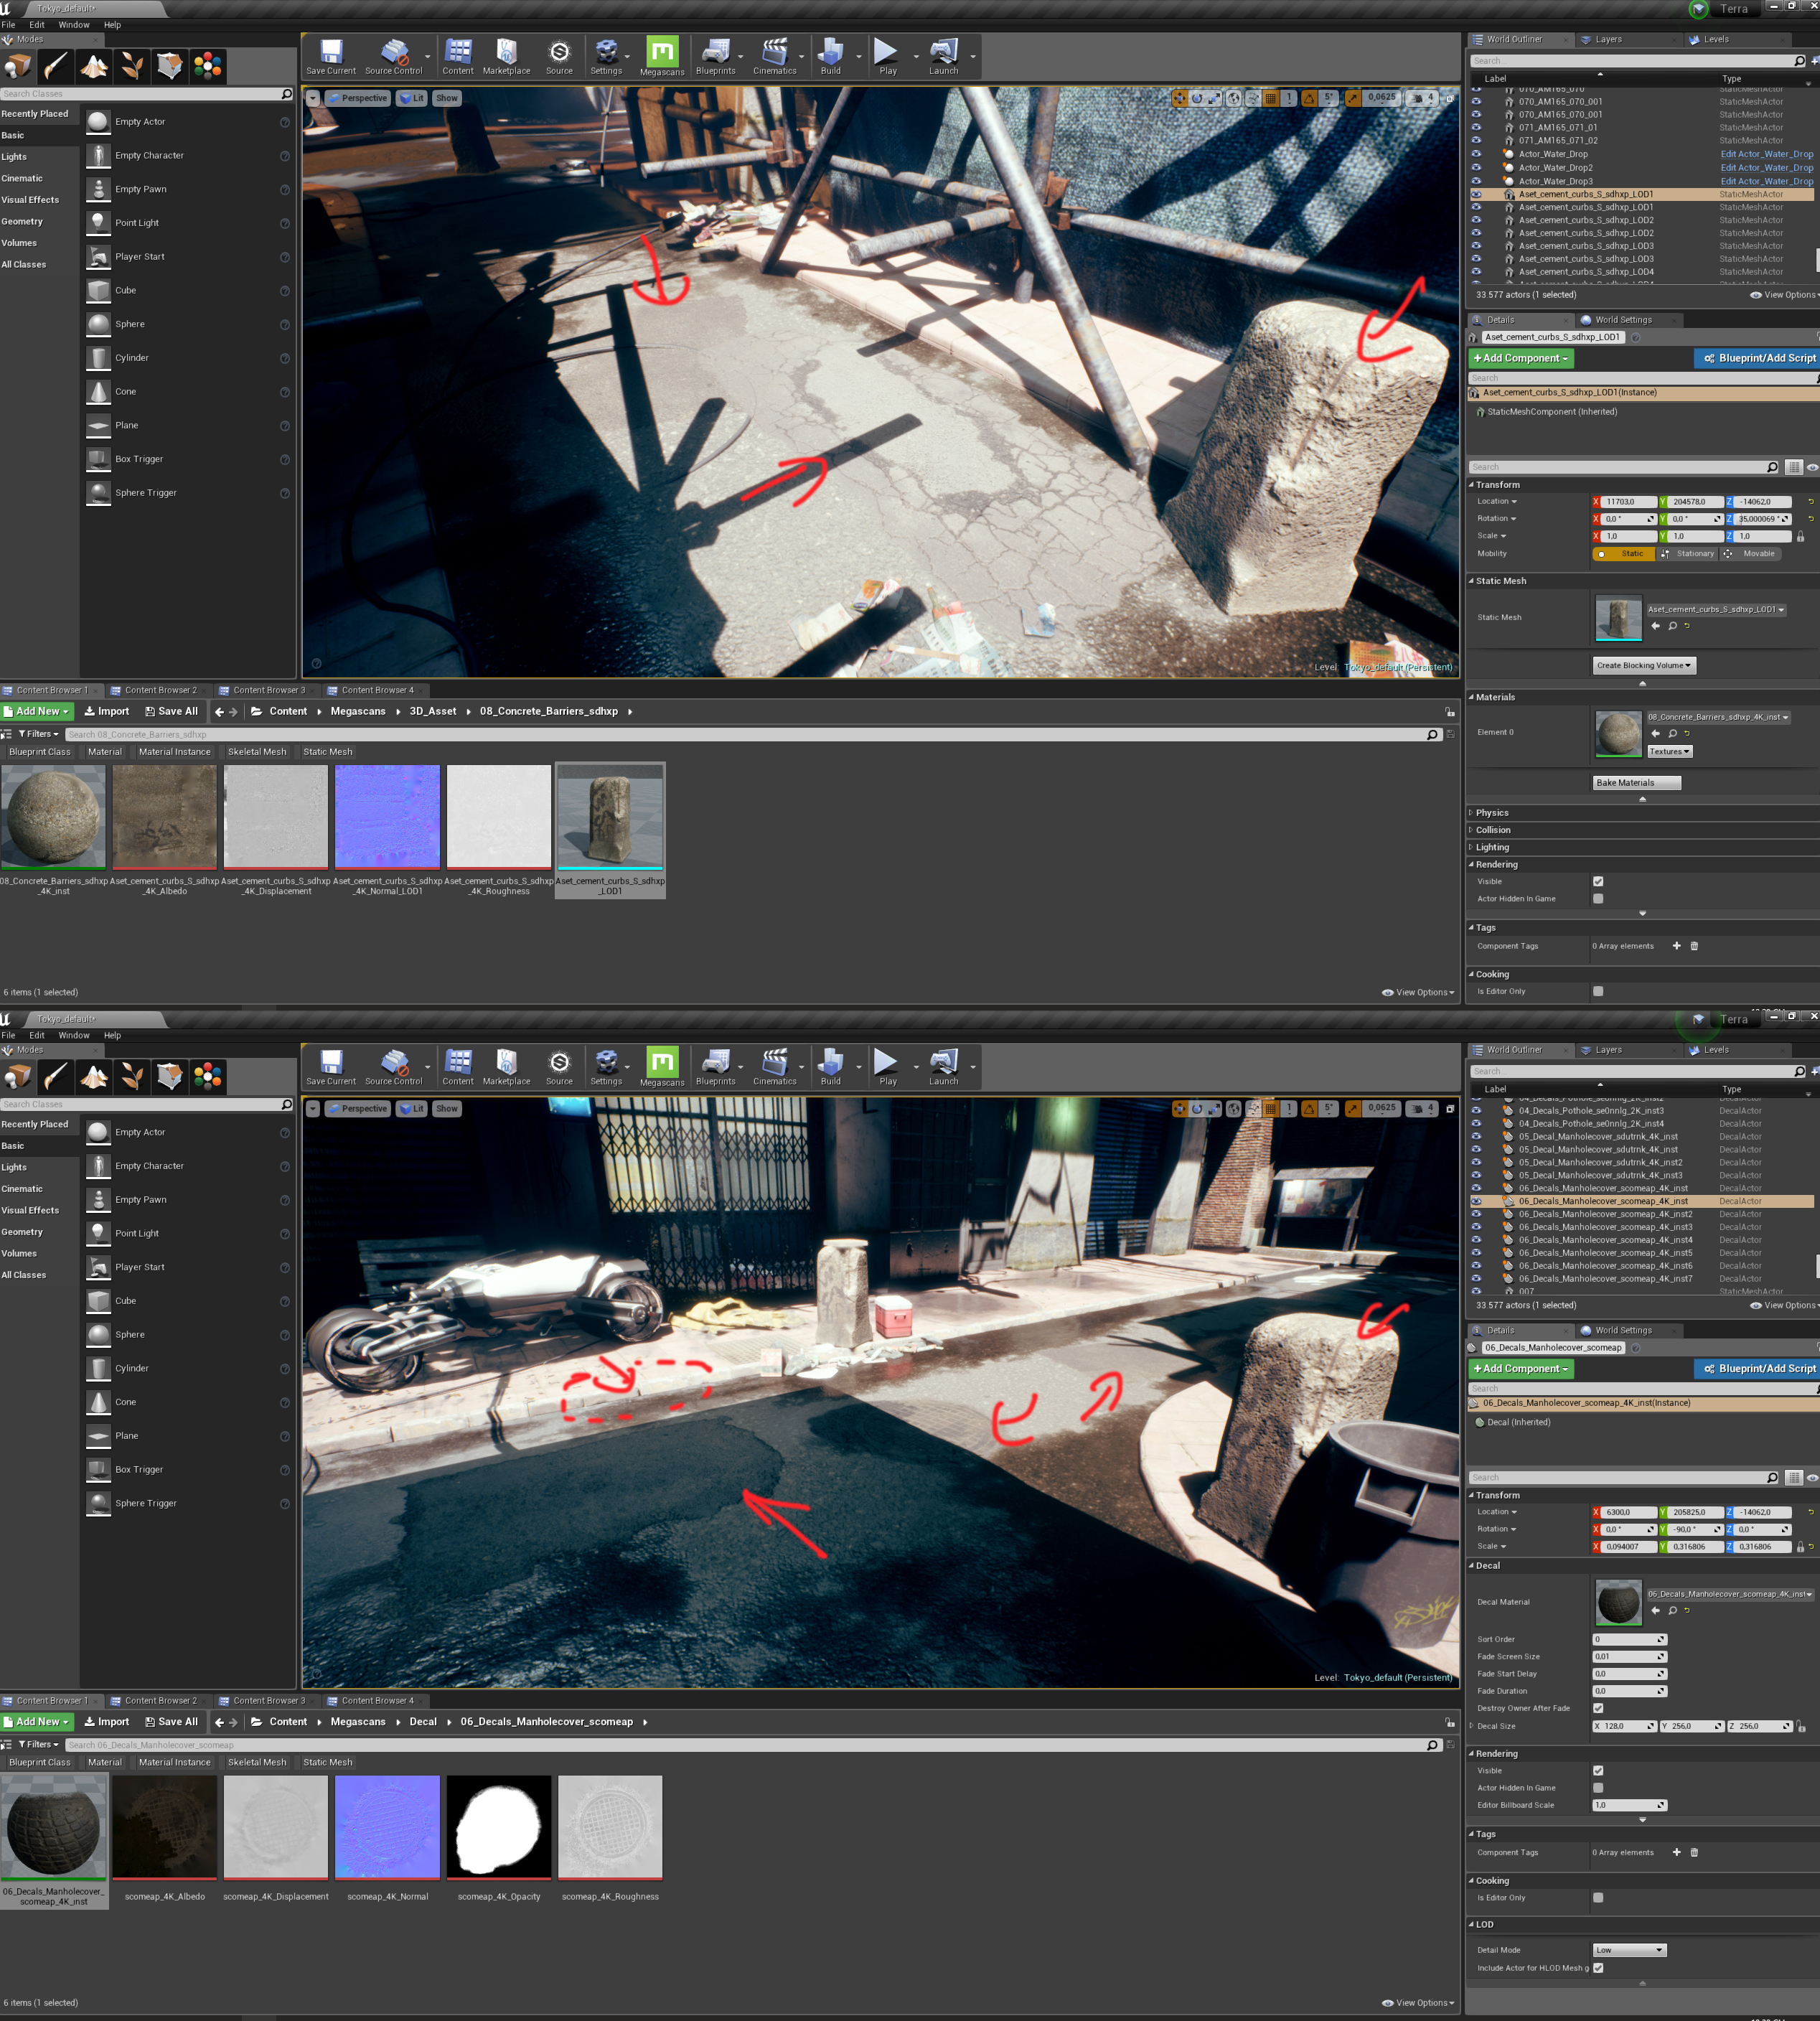
(Alley, concrete barrier 3D, many road decals such as manhole cover, potholes, patches, etc., mainstreet’s road)
I used the road construction script from Unreal Marketplace to make the base mesh of the road, then replace the default material that comes with Megascans surfaces, like Fresh Asphalt and Floor Tile.
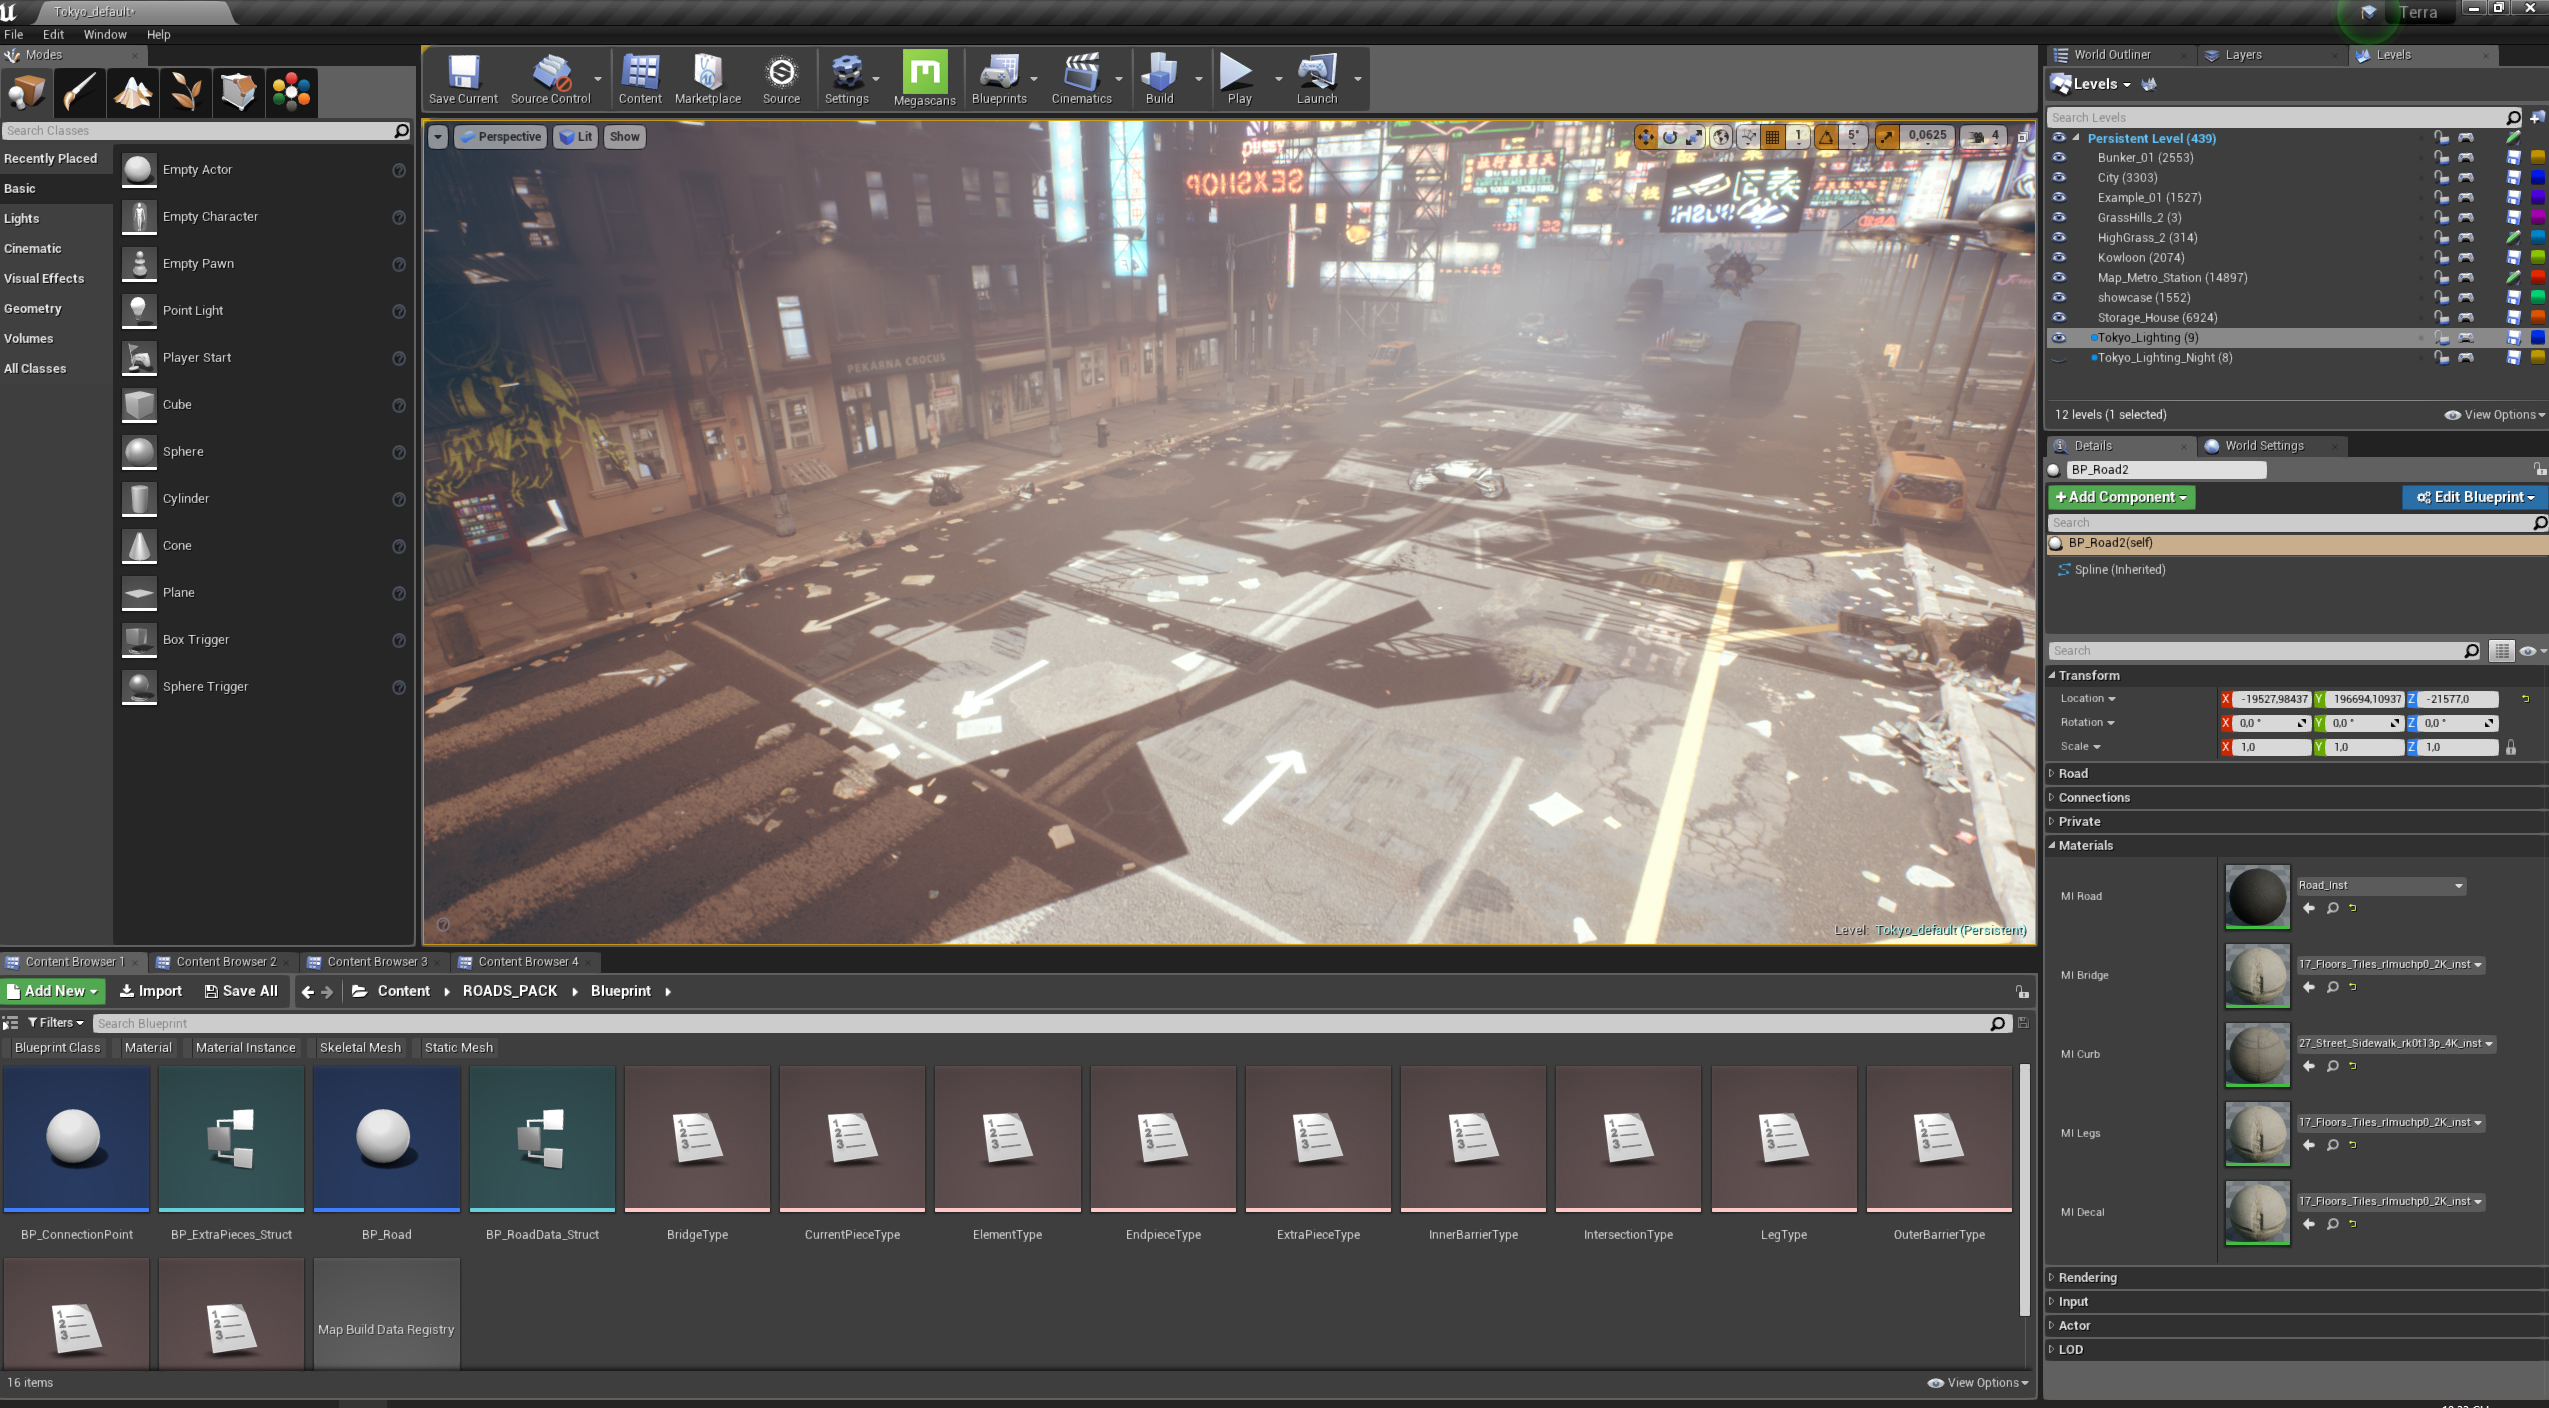
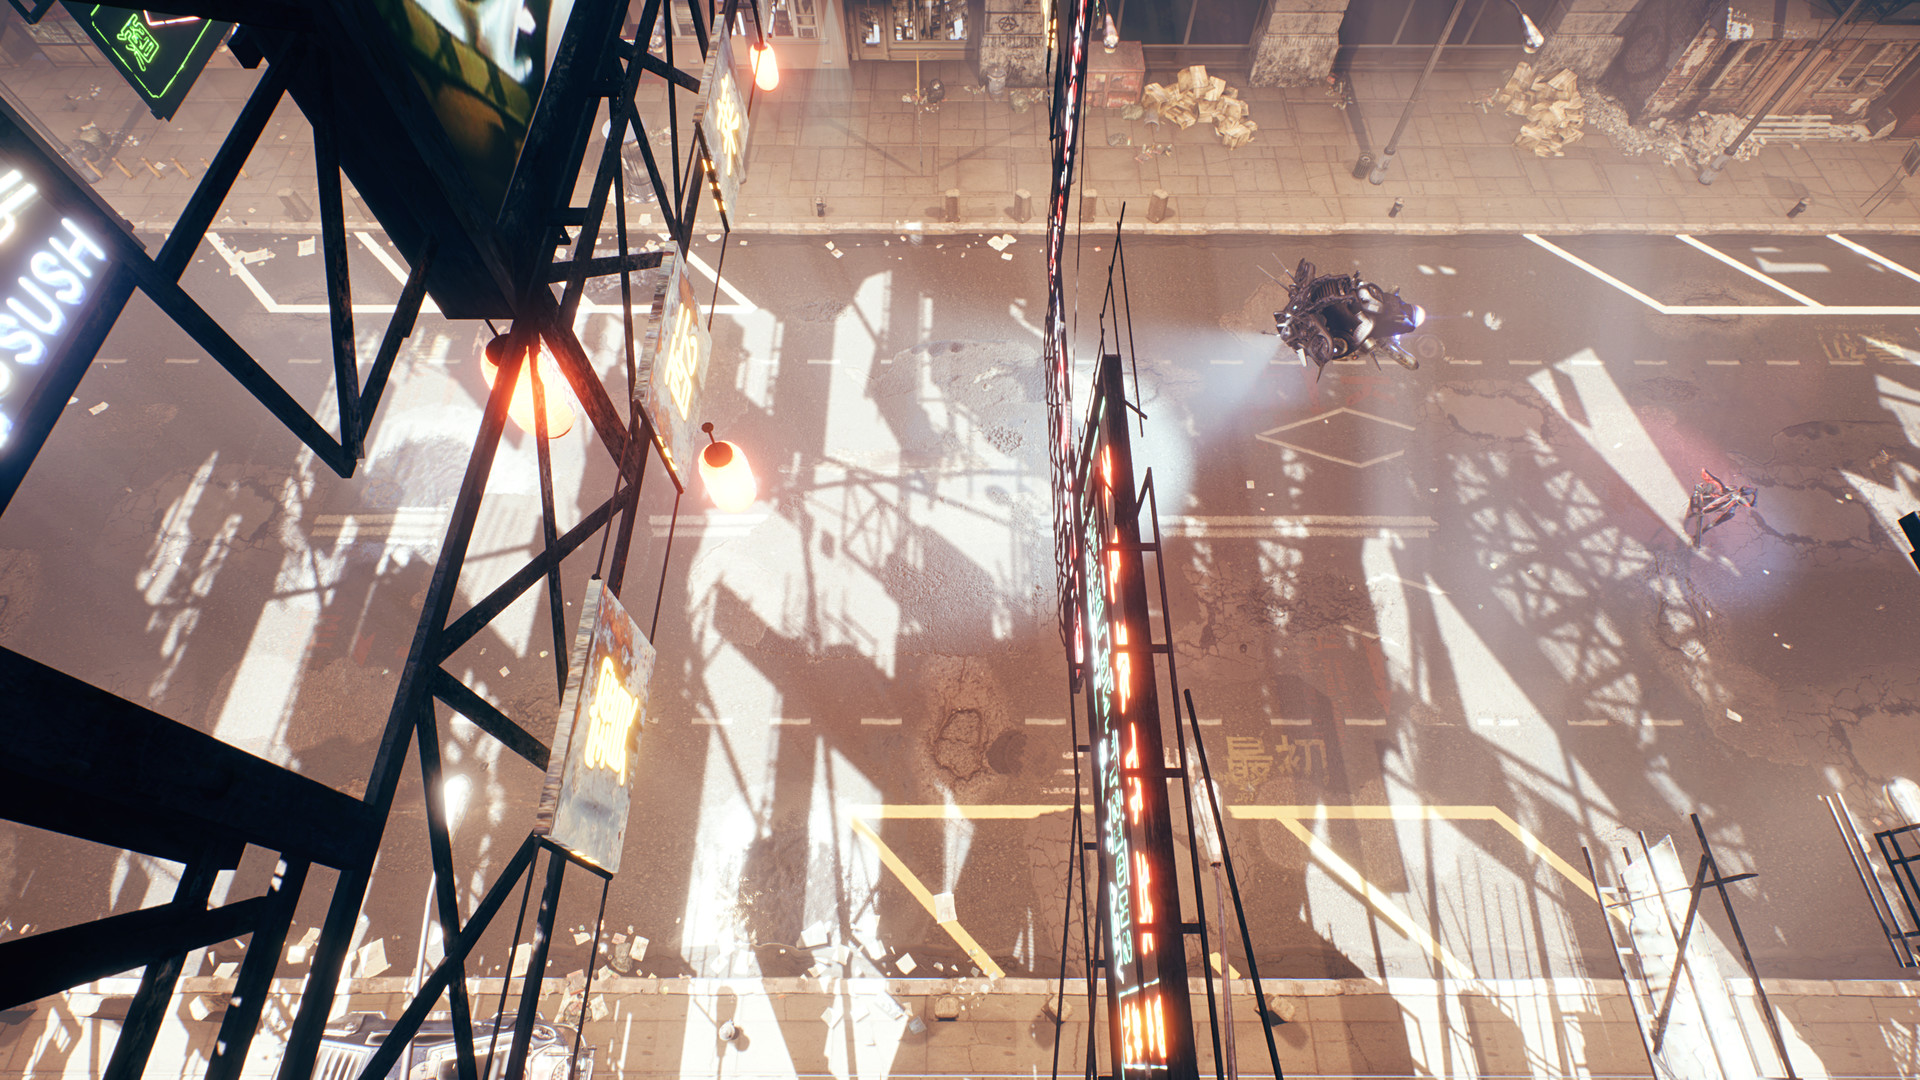
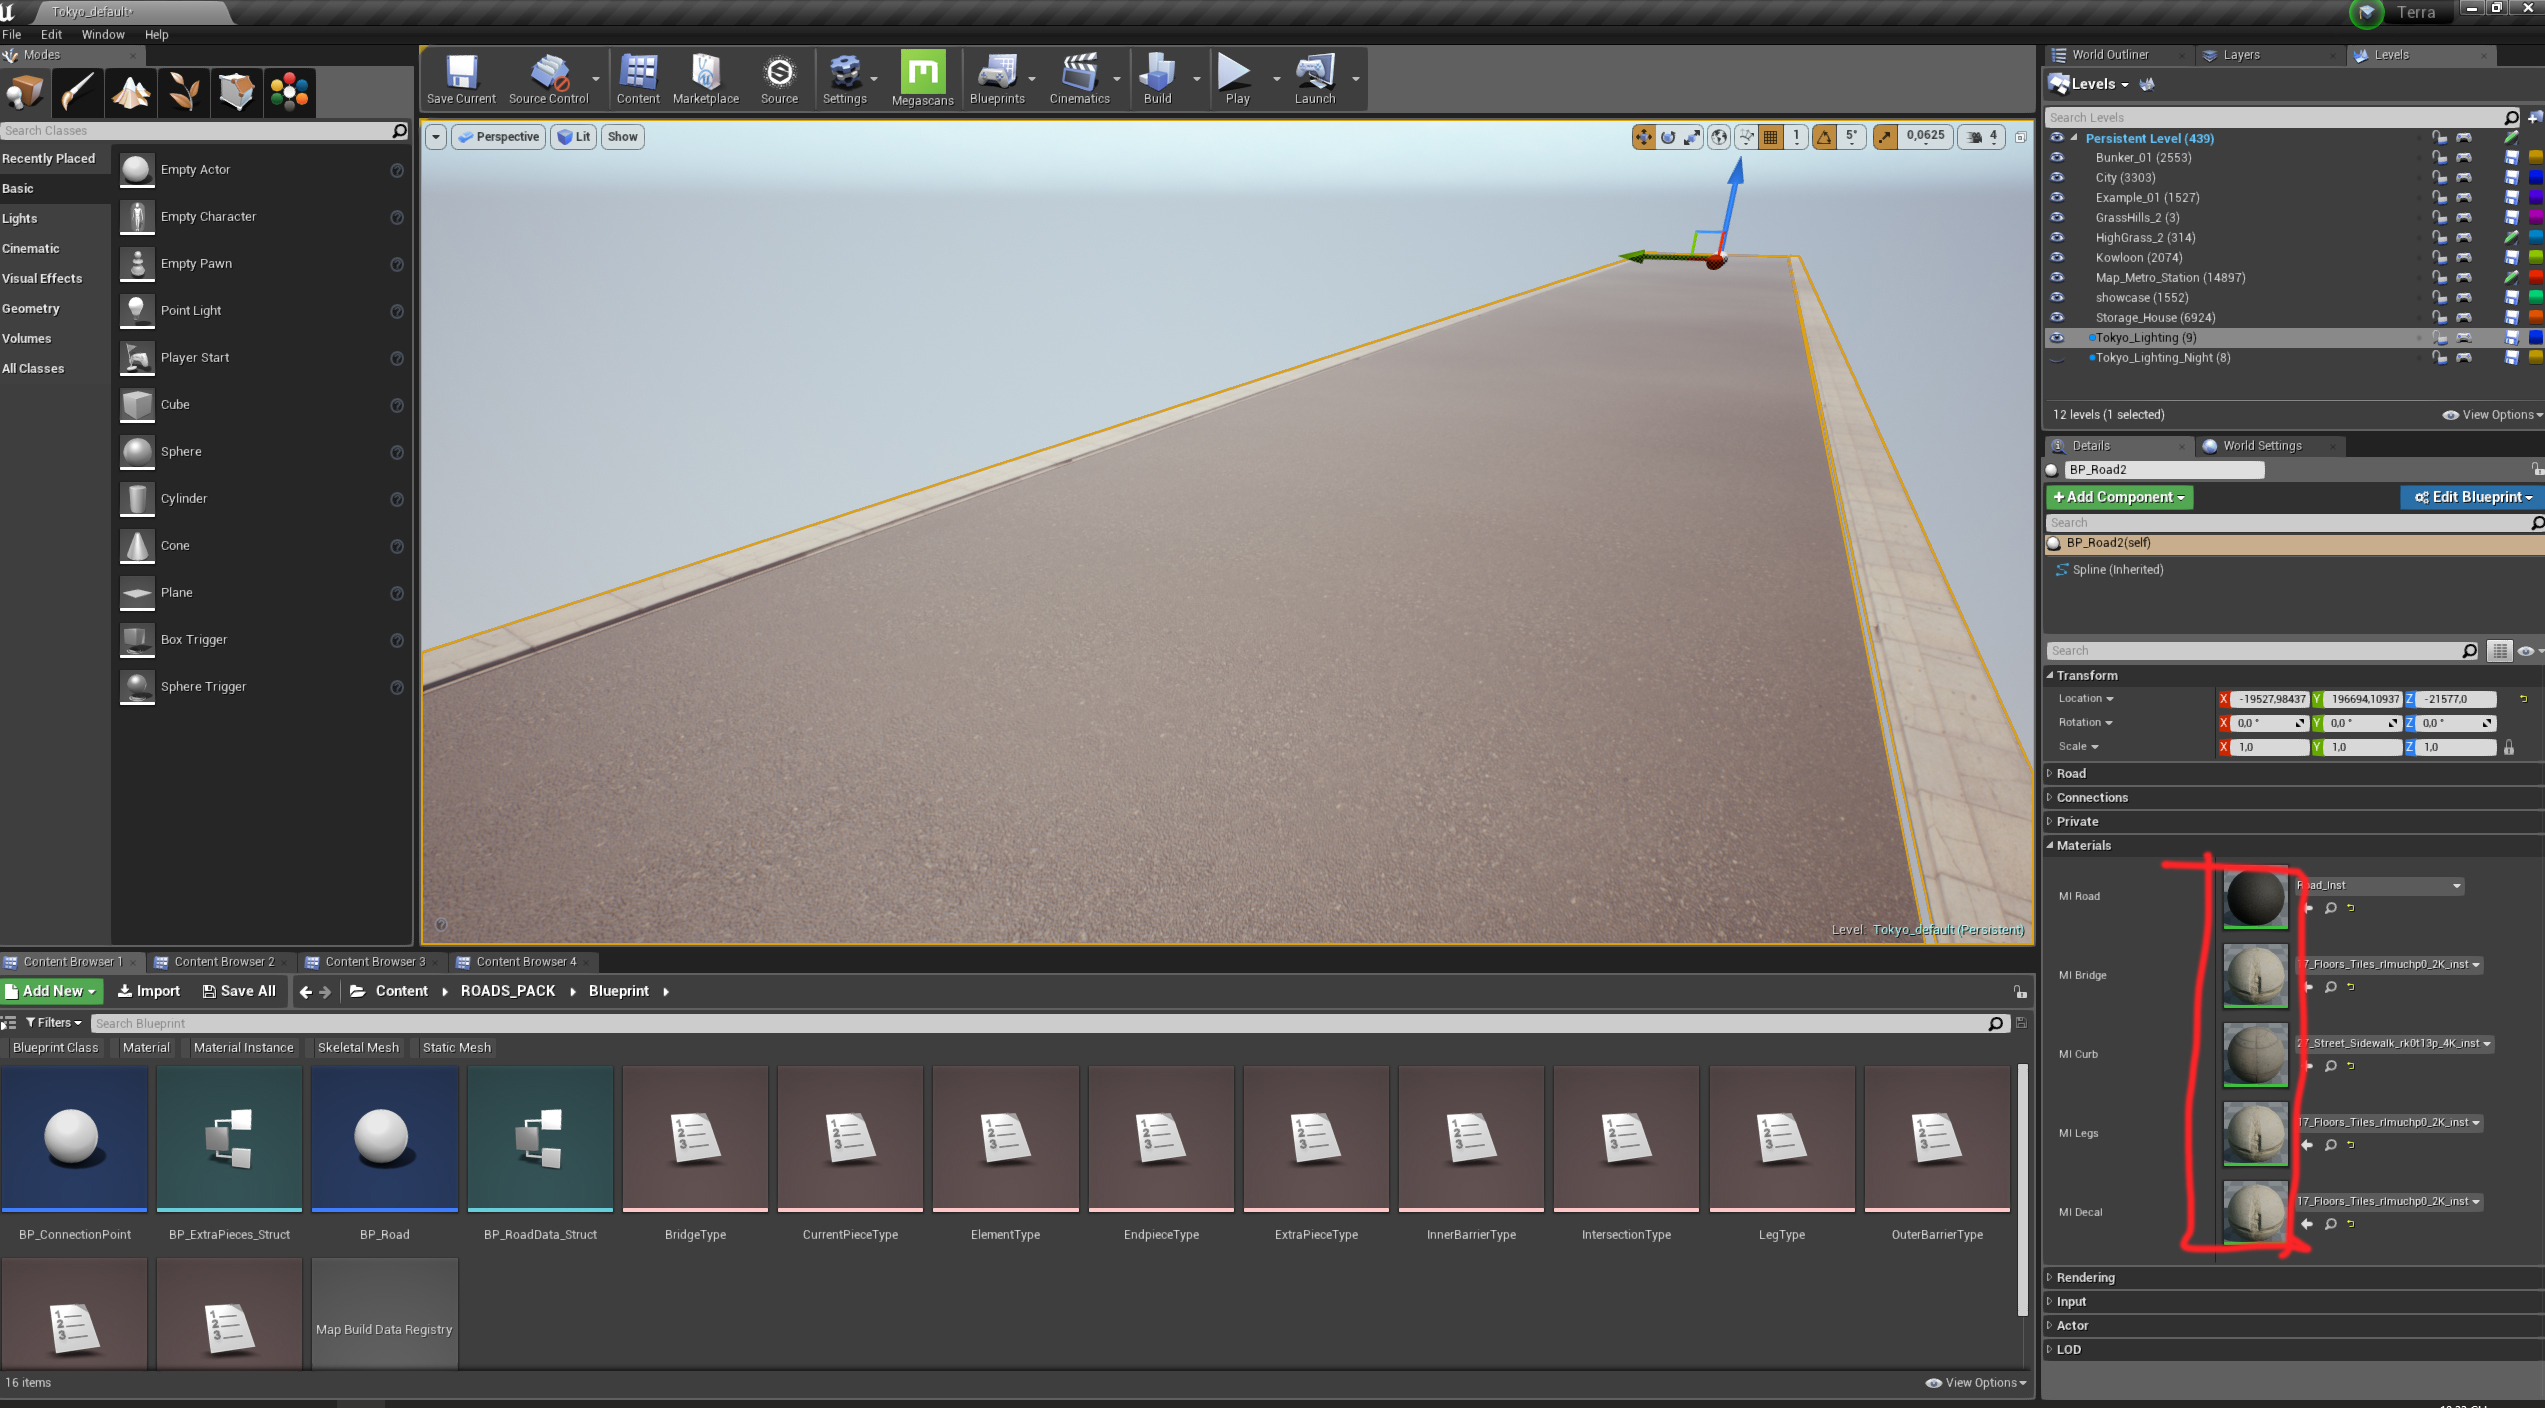
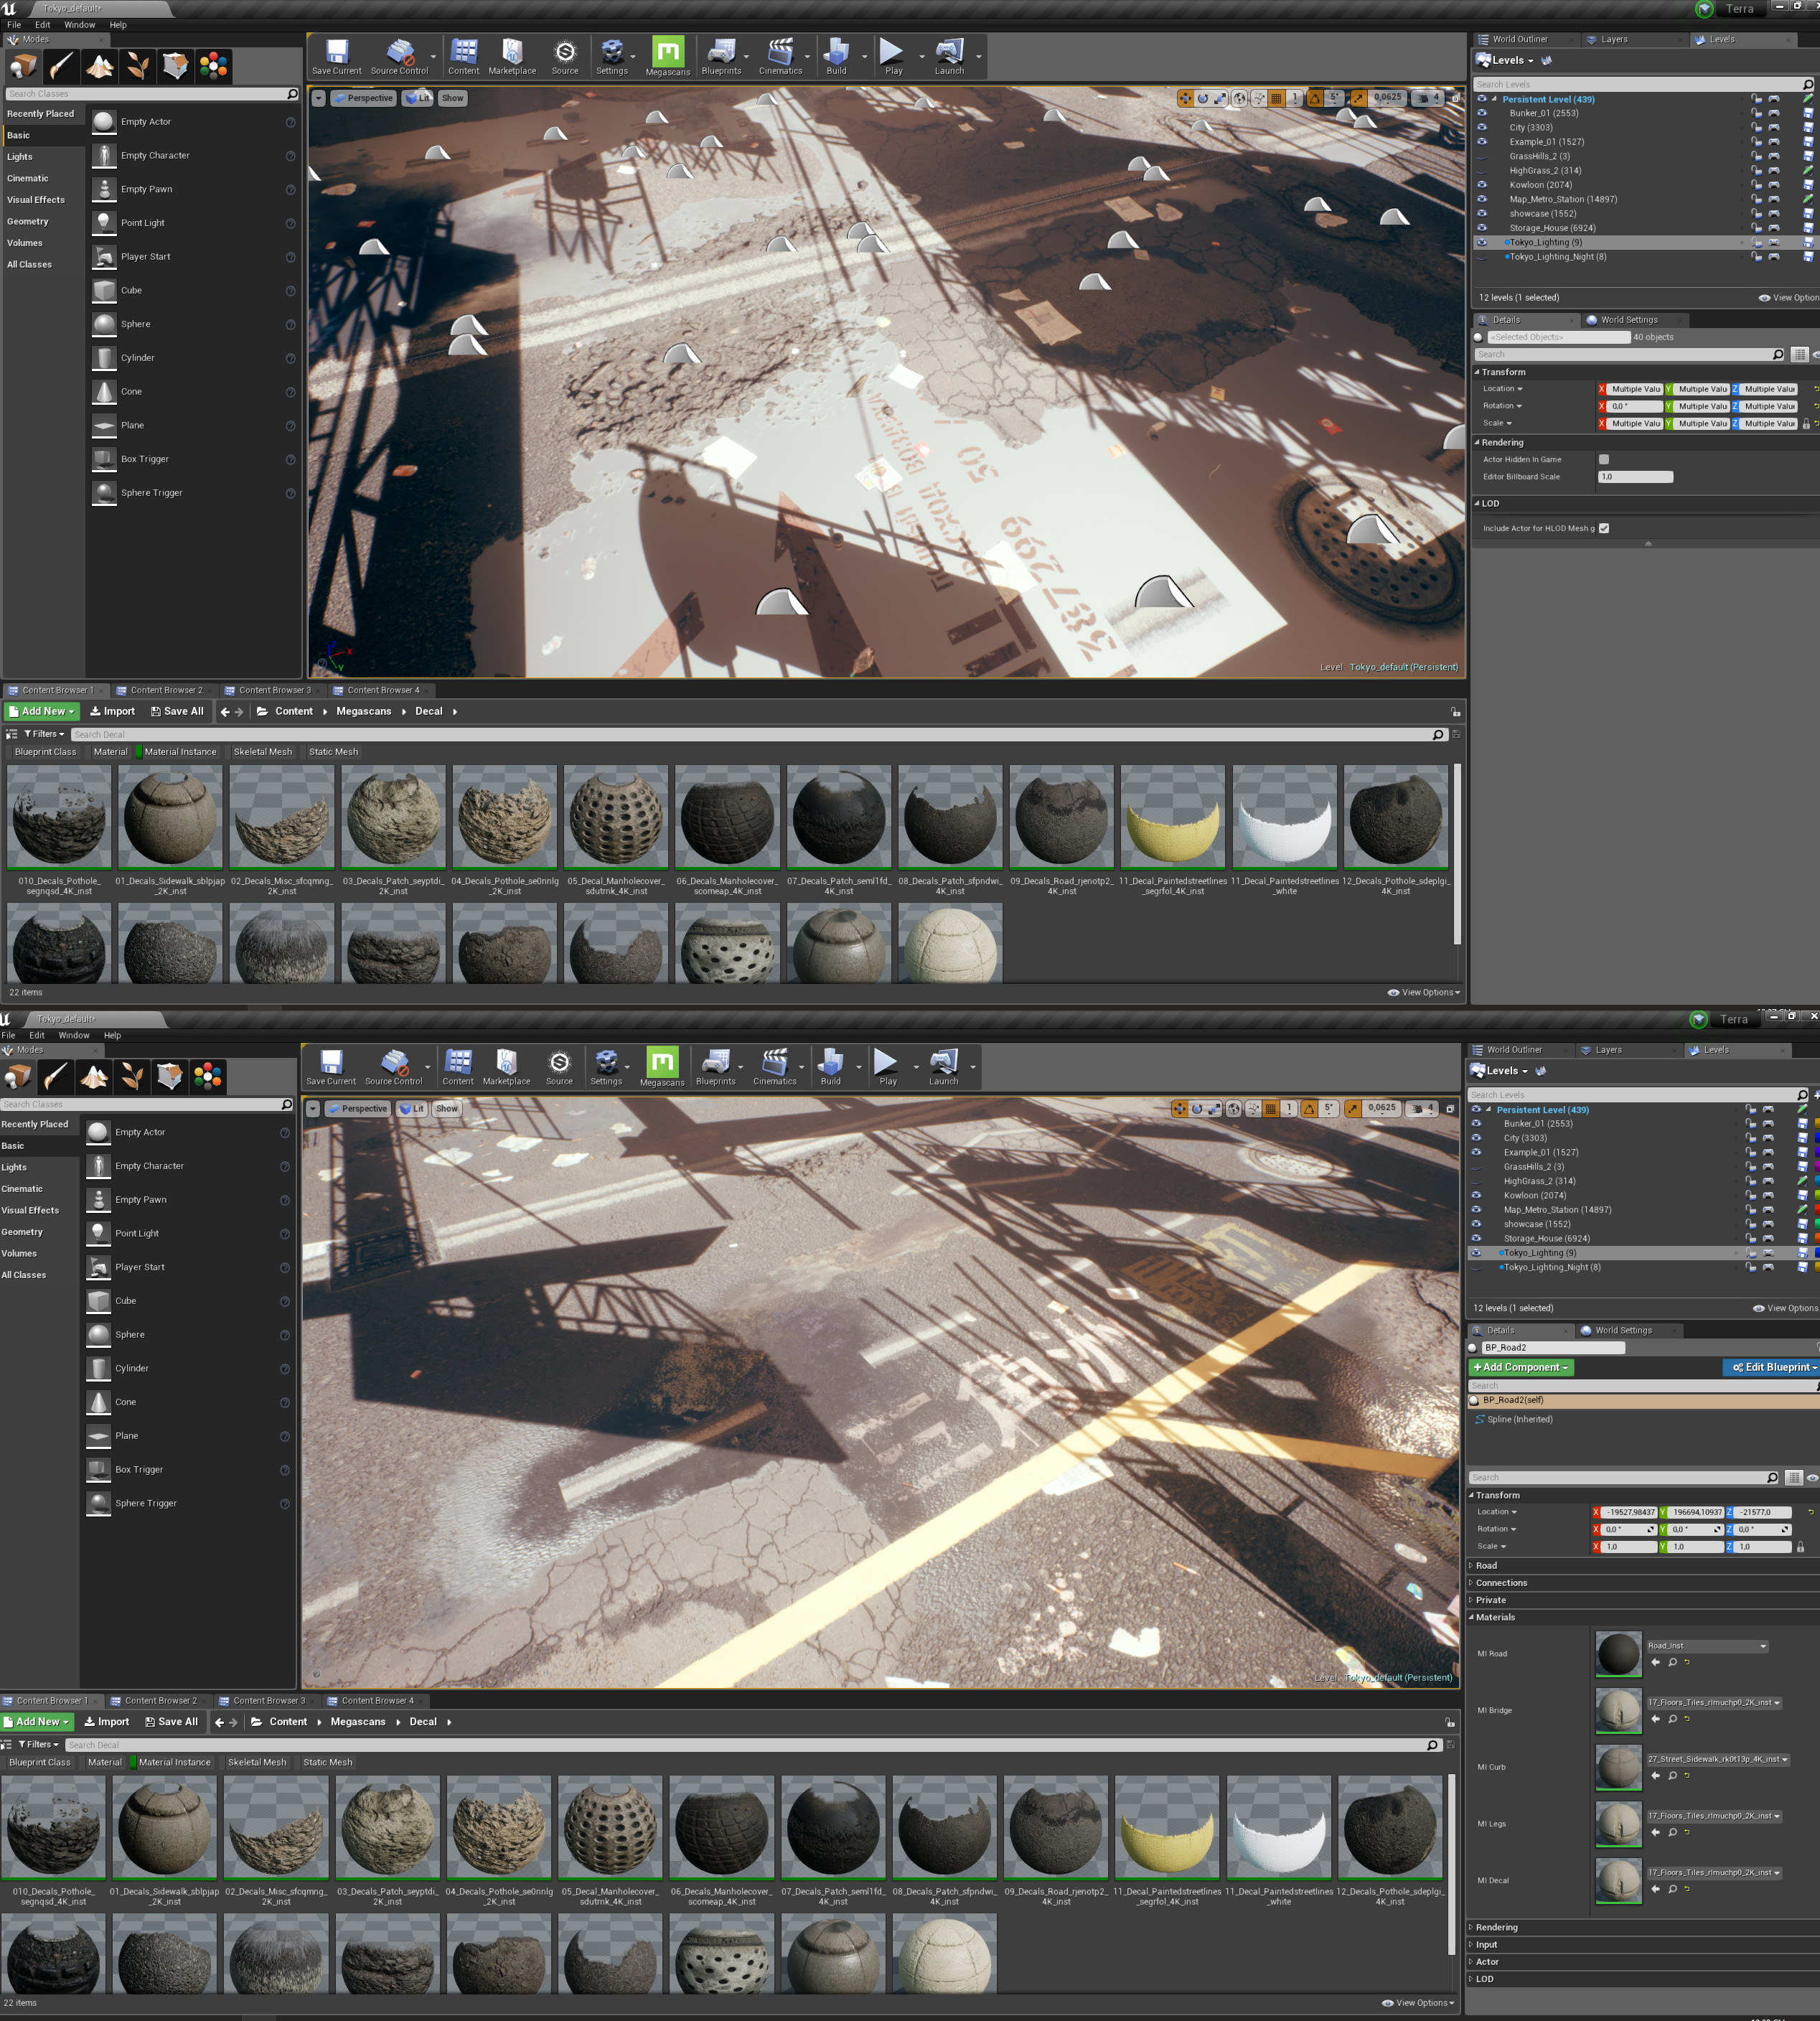
Final Result Overview:
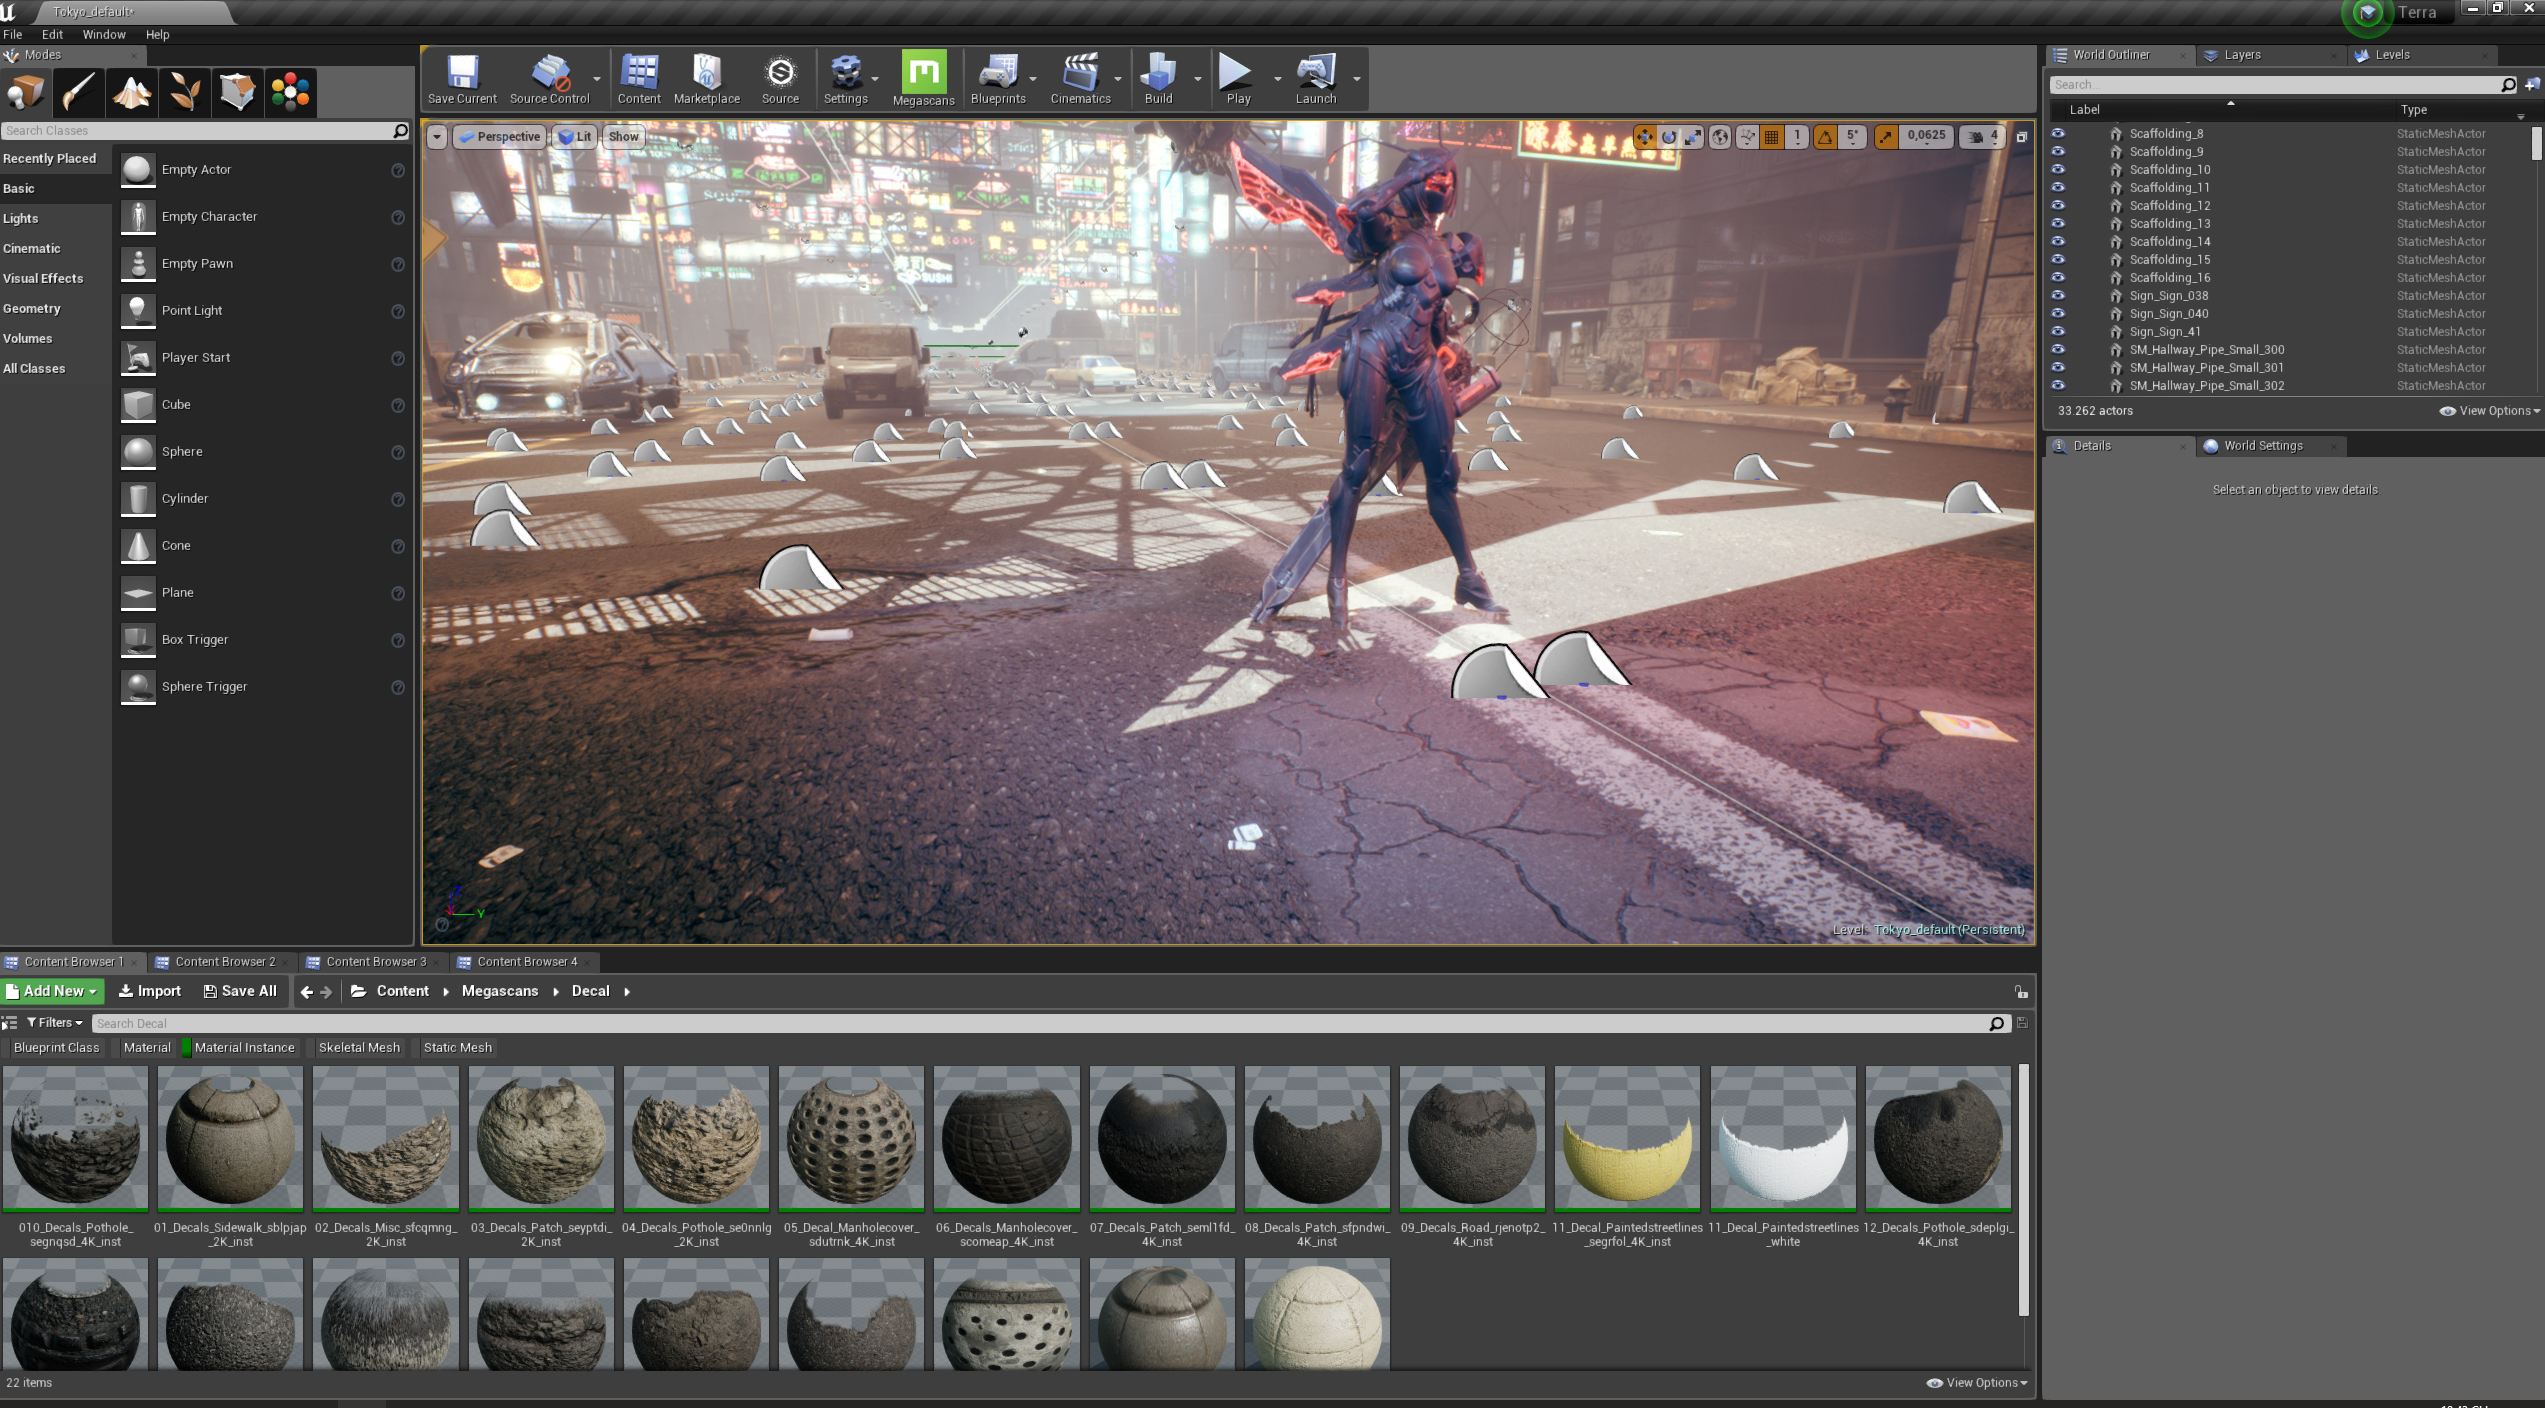
(Final result with widgets)
You can see that I used a lot of decals to create the street details. Obviously, you can use Photoshop to compile a mega-large texture like 50Kx200K textures or something. But it would cost a lot of time and suffering to do so — and on top of that — it would tax the engine heavily. So decals are pretty much the only way to go here.
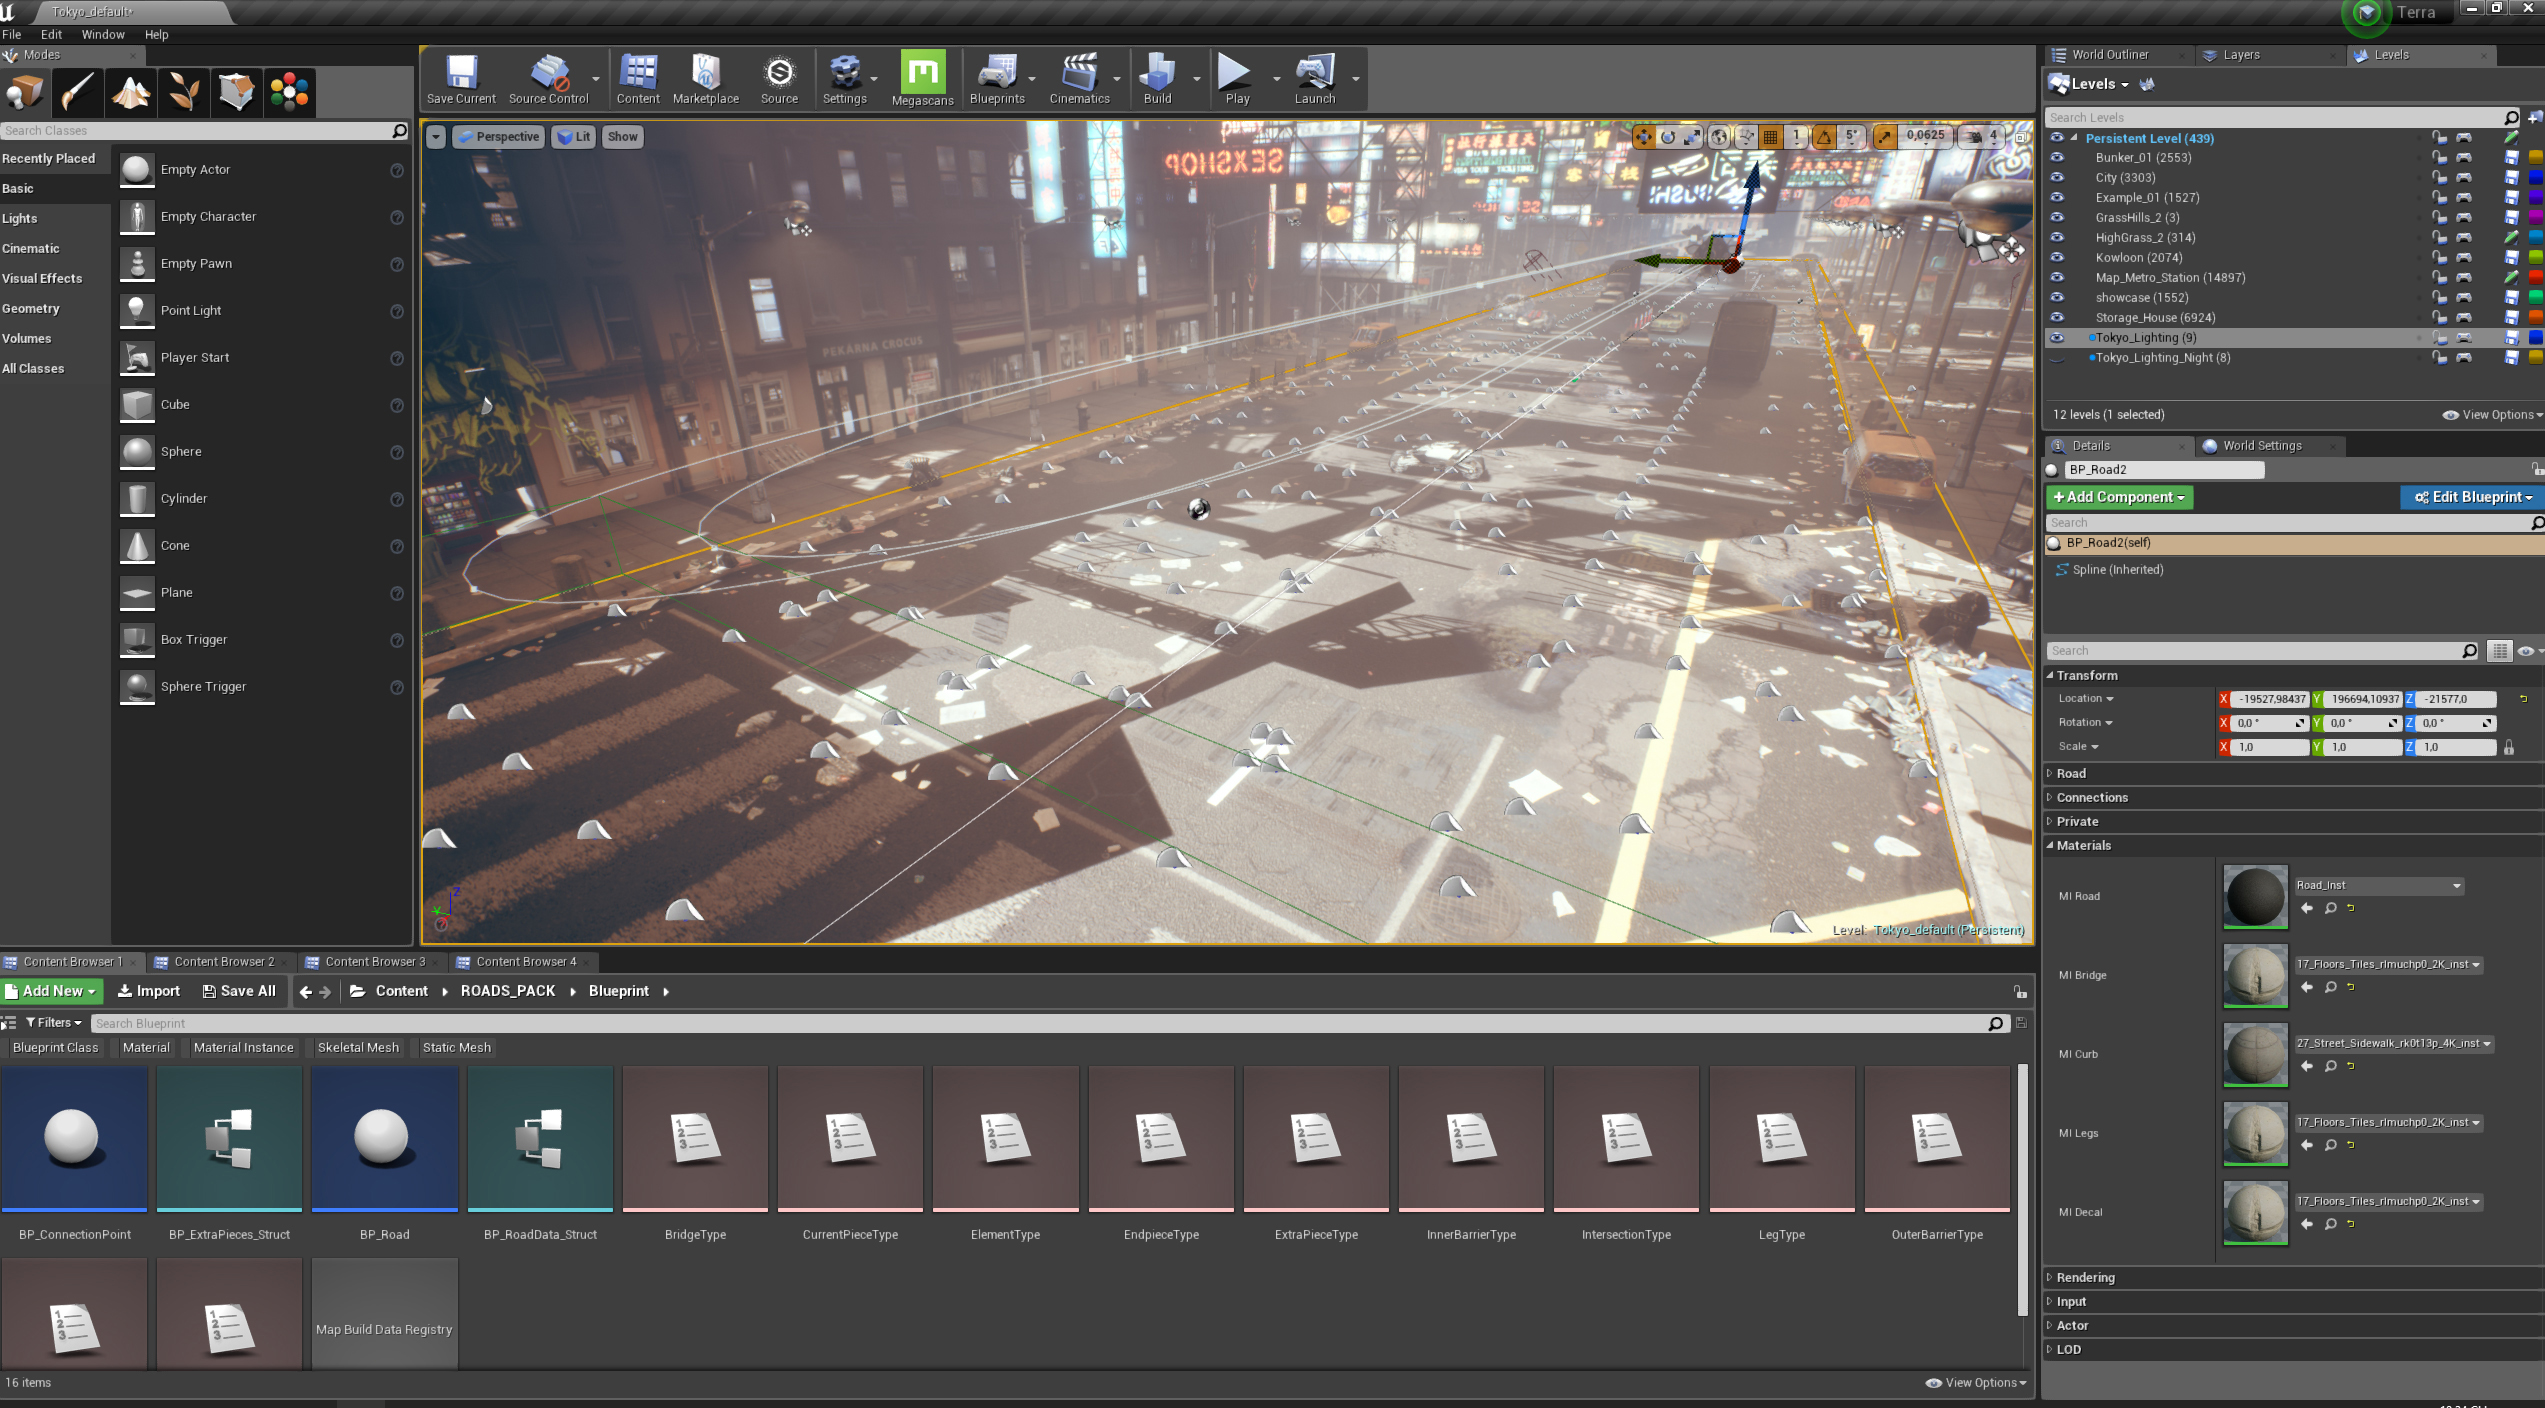
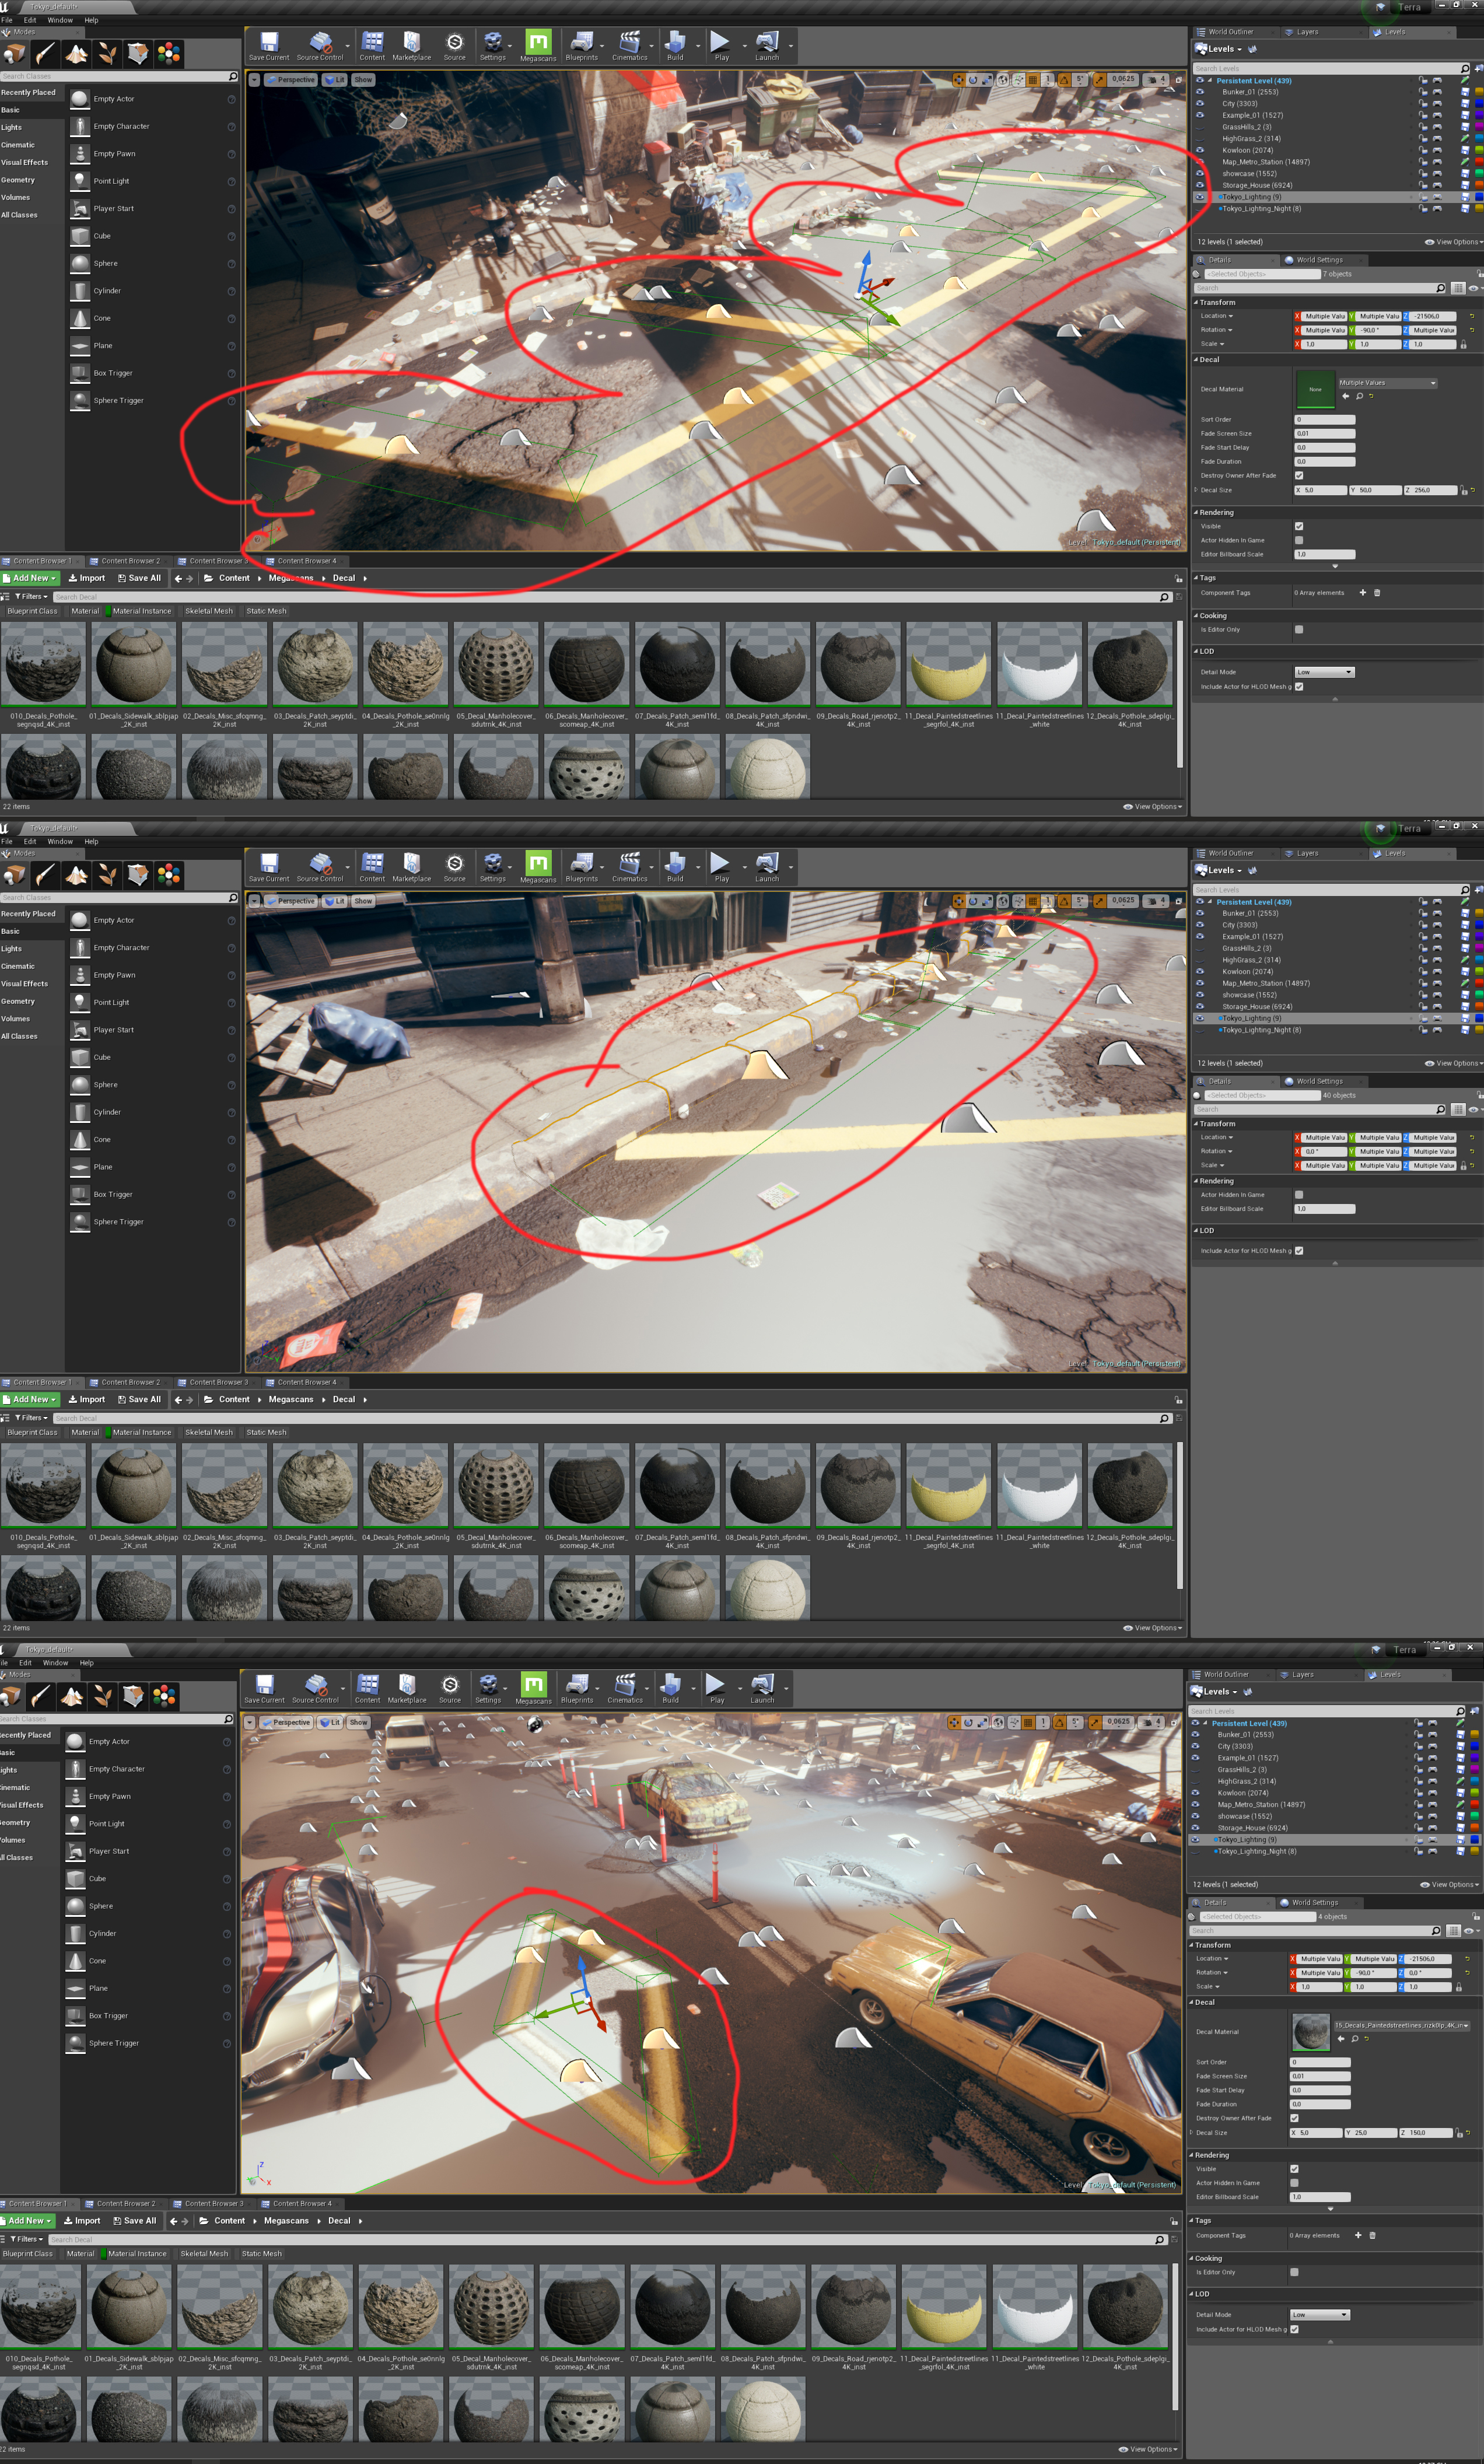
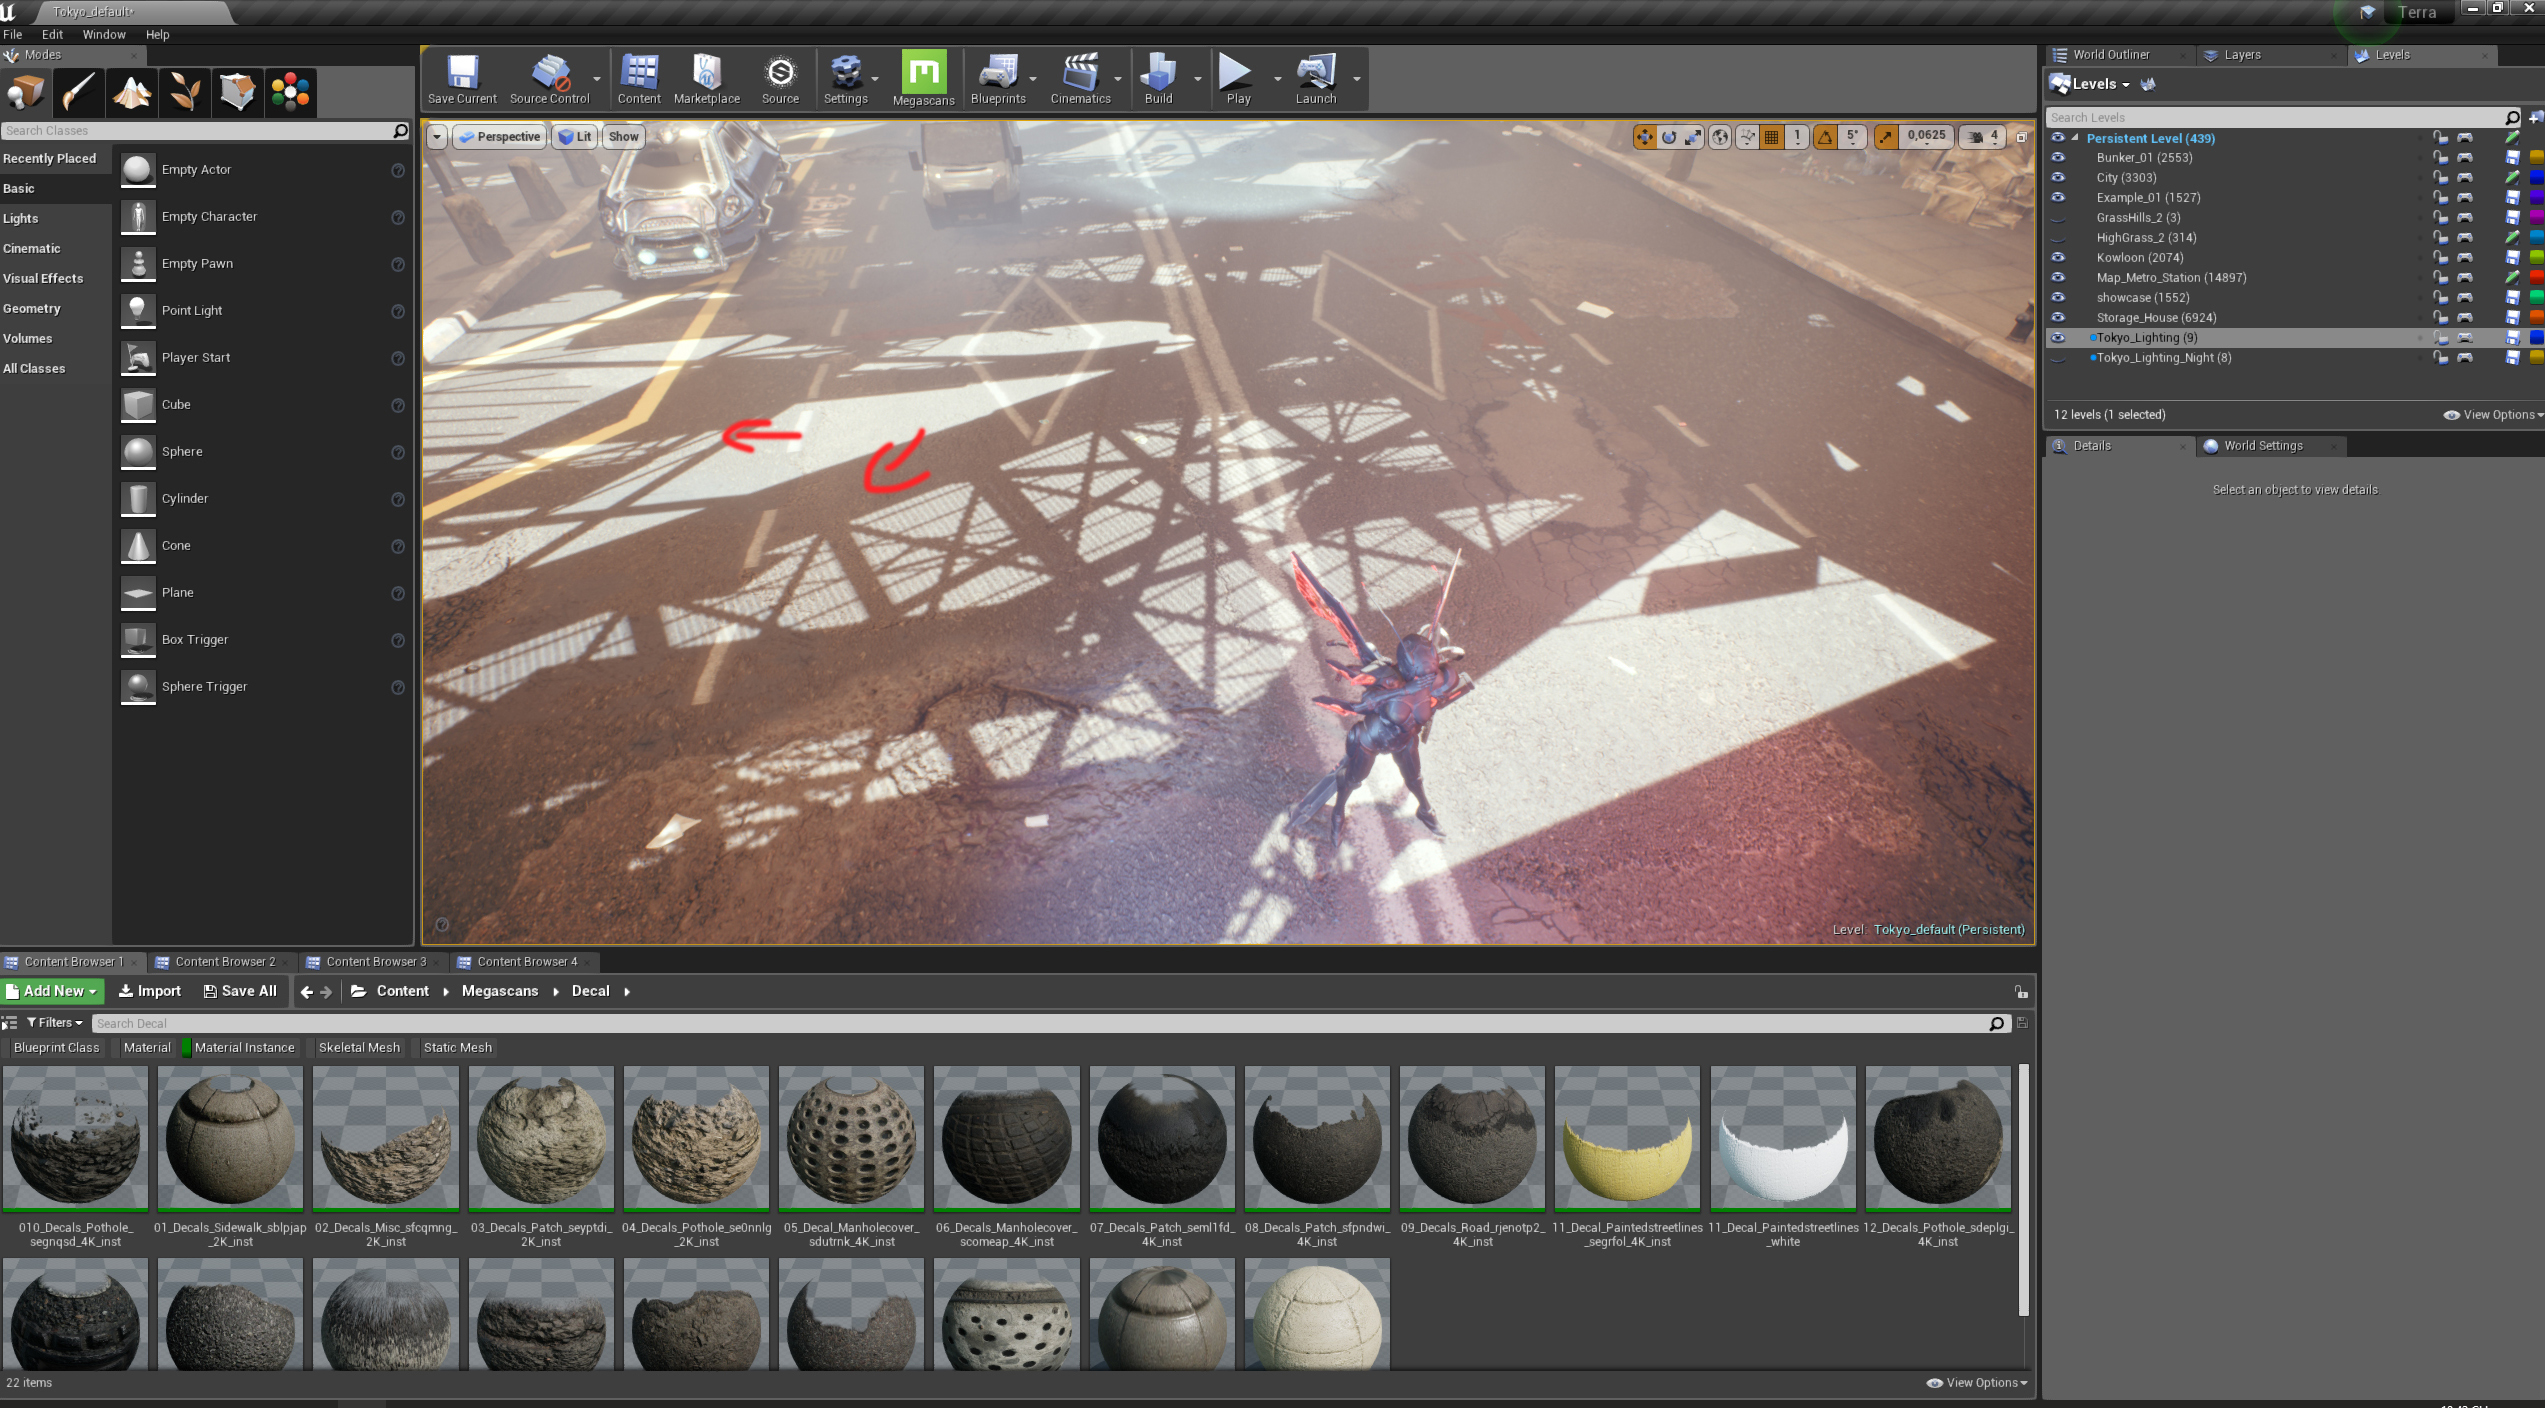
Here I cleared out the base material of the road so you can see the effect of the decals. I split the road into some category to focus on and work on individually:
+ Manhole cover — these are the easiest to nail down, so you should go ahead and place them first to avoid overlapping them with other decals in the future.
+ Trash — use the Foliage tool to distribute 2D decal trash and 3D trash randomly.
+ Paint — arrange a single line paint to form the road paint in the middle, as well as instructions on it.
+ Potholes and patches — I made a clump of about 30 potholes and patches over a big area then duplicated them multiple times to create the complexity of the road.
+ Finally, for where the road and the sidewalk meet, I used a long tileable patch and 3D concrete sidewalk curb to fill the space alongside the road.
Decal clumps overview:
Use “Groups” to save decal formations for reuse.
(Close-ups)
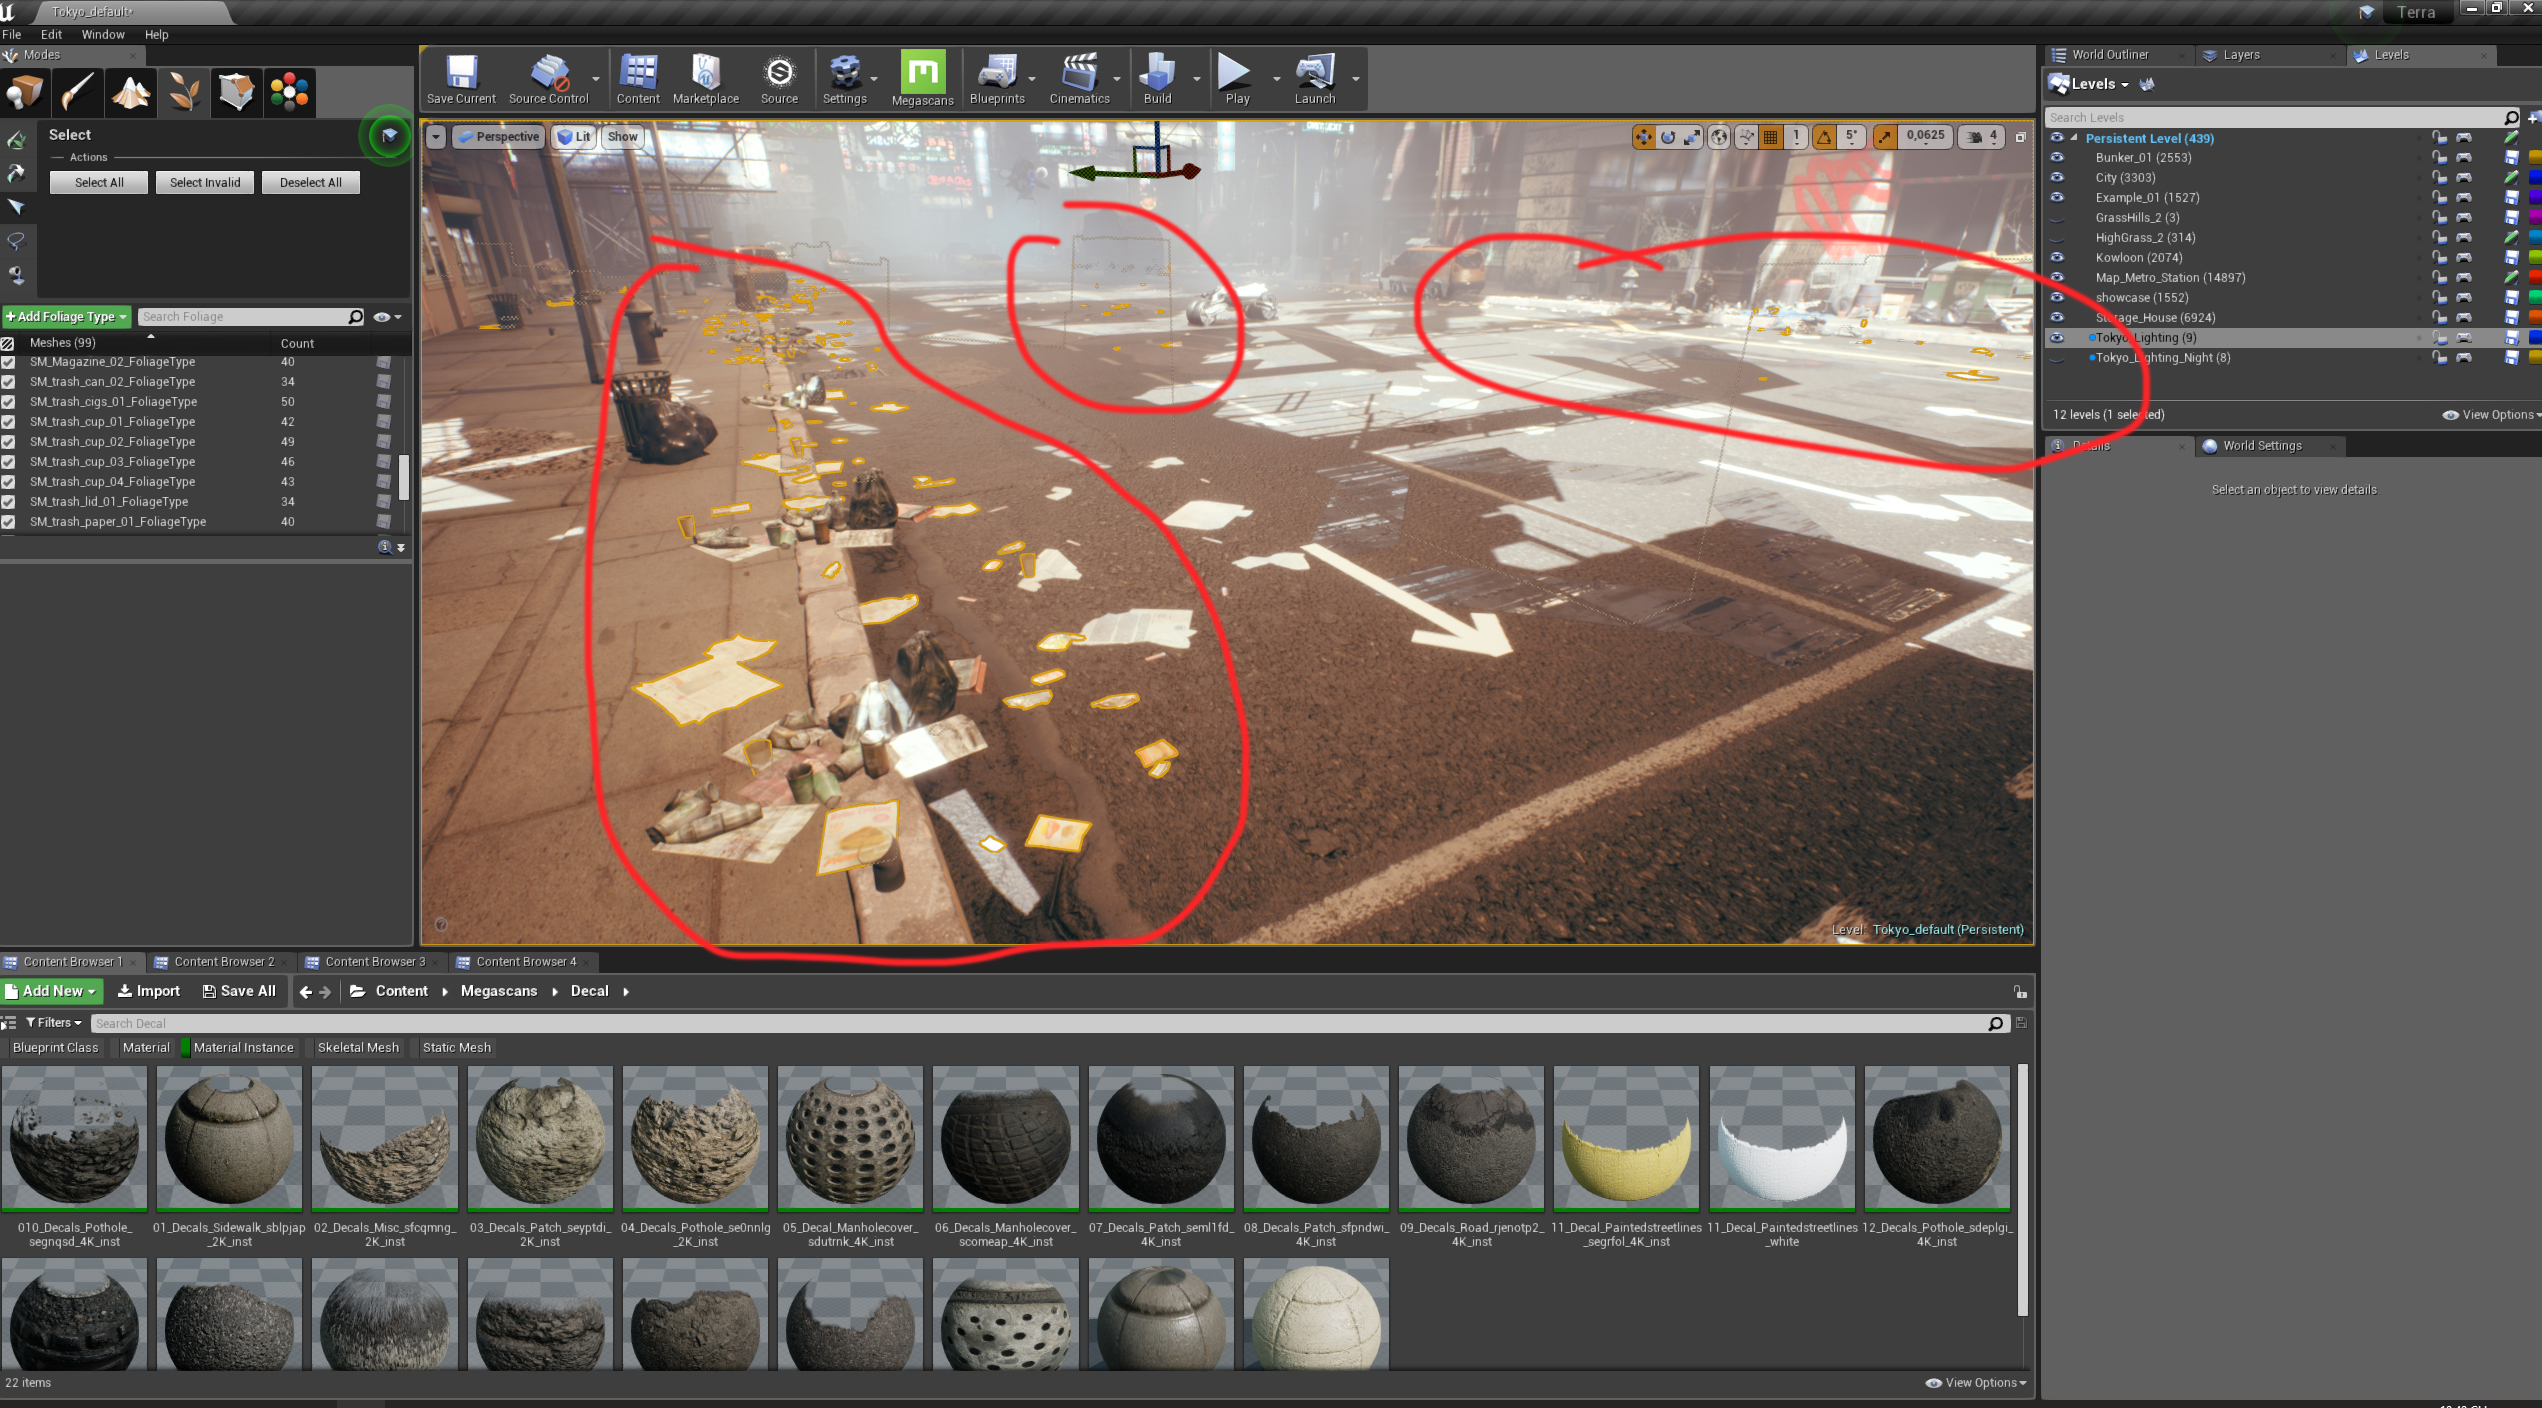
(Trash placement using Foliage)
Lighting and Effects
For lighting, I used dynamic sunlight, HDRi Skylight, and basic Fogs. Have fun with these. Spend a good amount of time setting them up and they will repay you with a nicely lit scene. Talis is usually accompanied with 2 profile lights: red and blue.
Use Ground Shadows from the structures above to break up the road.
(Close-up)
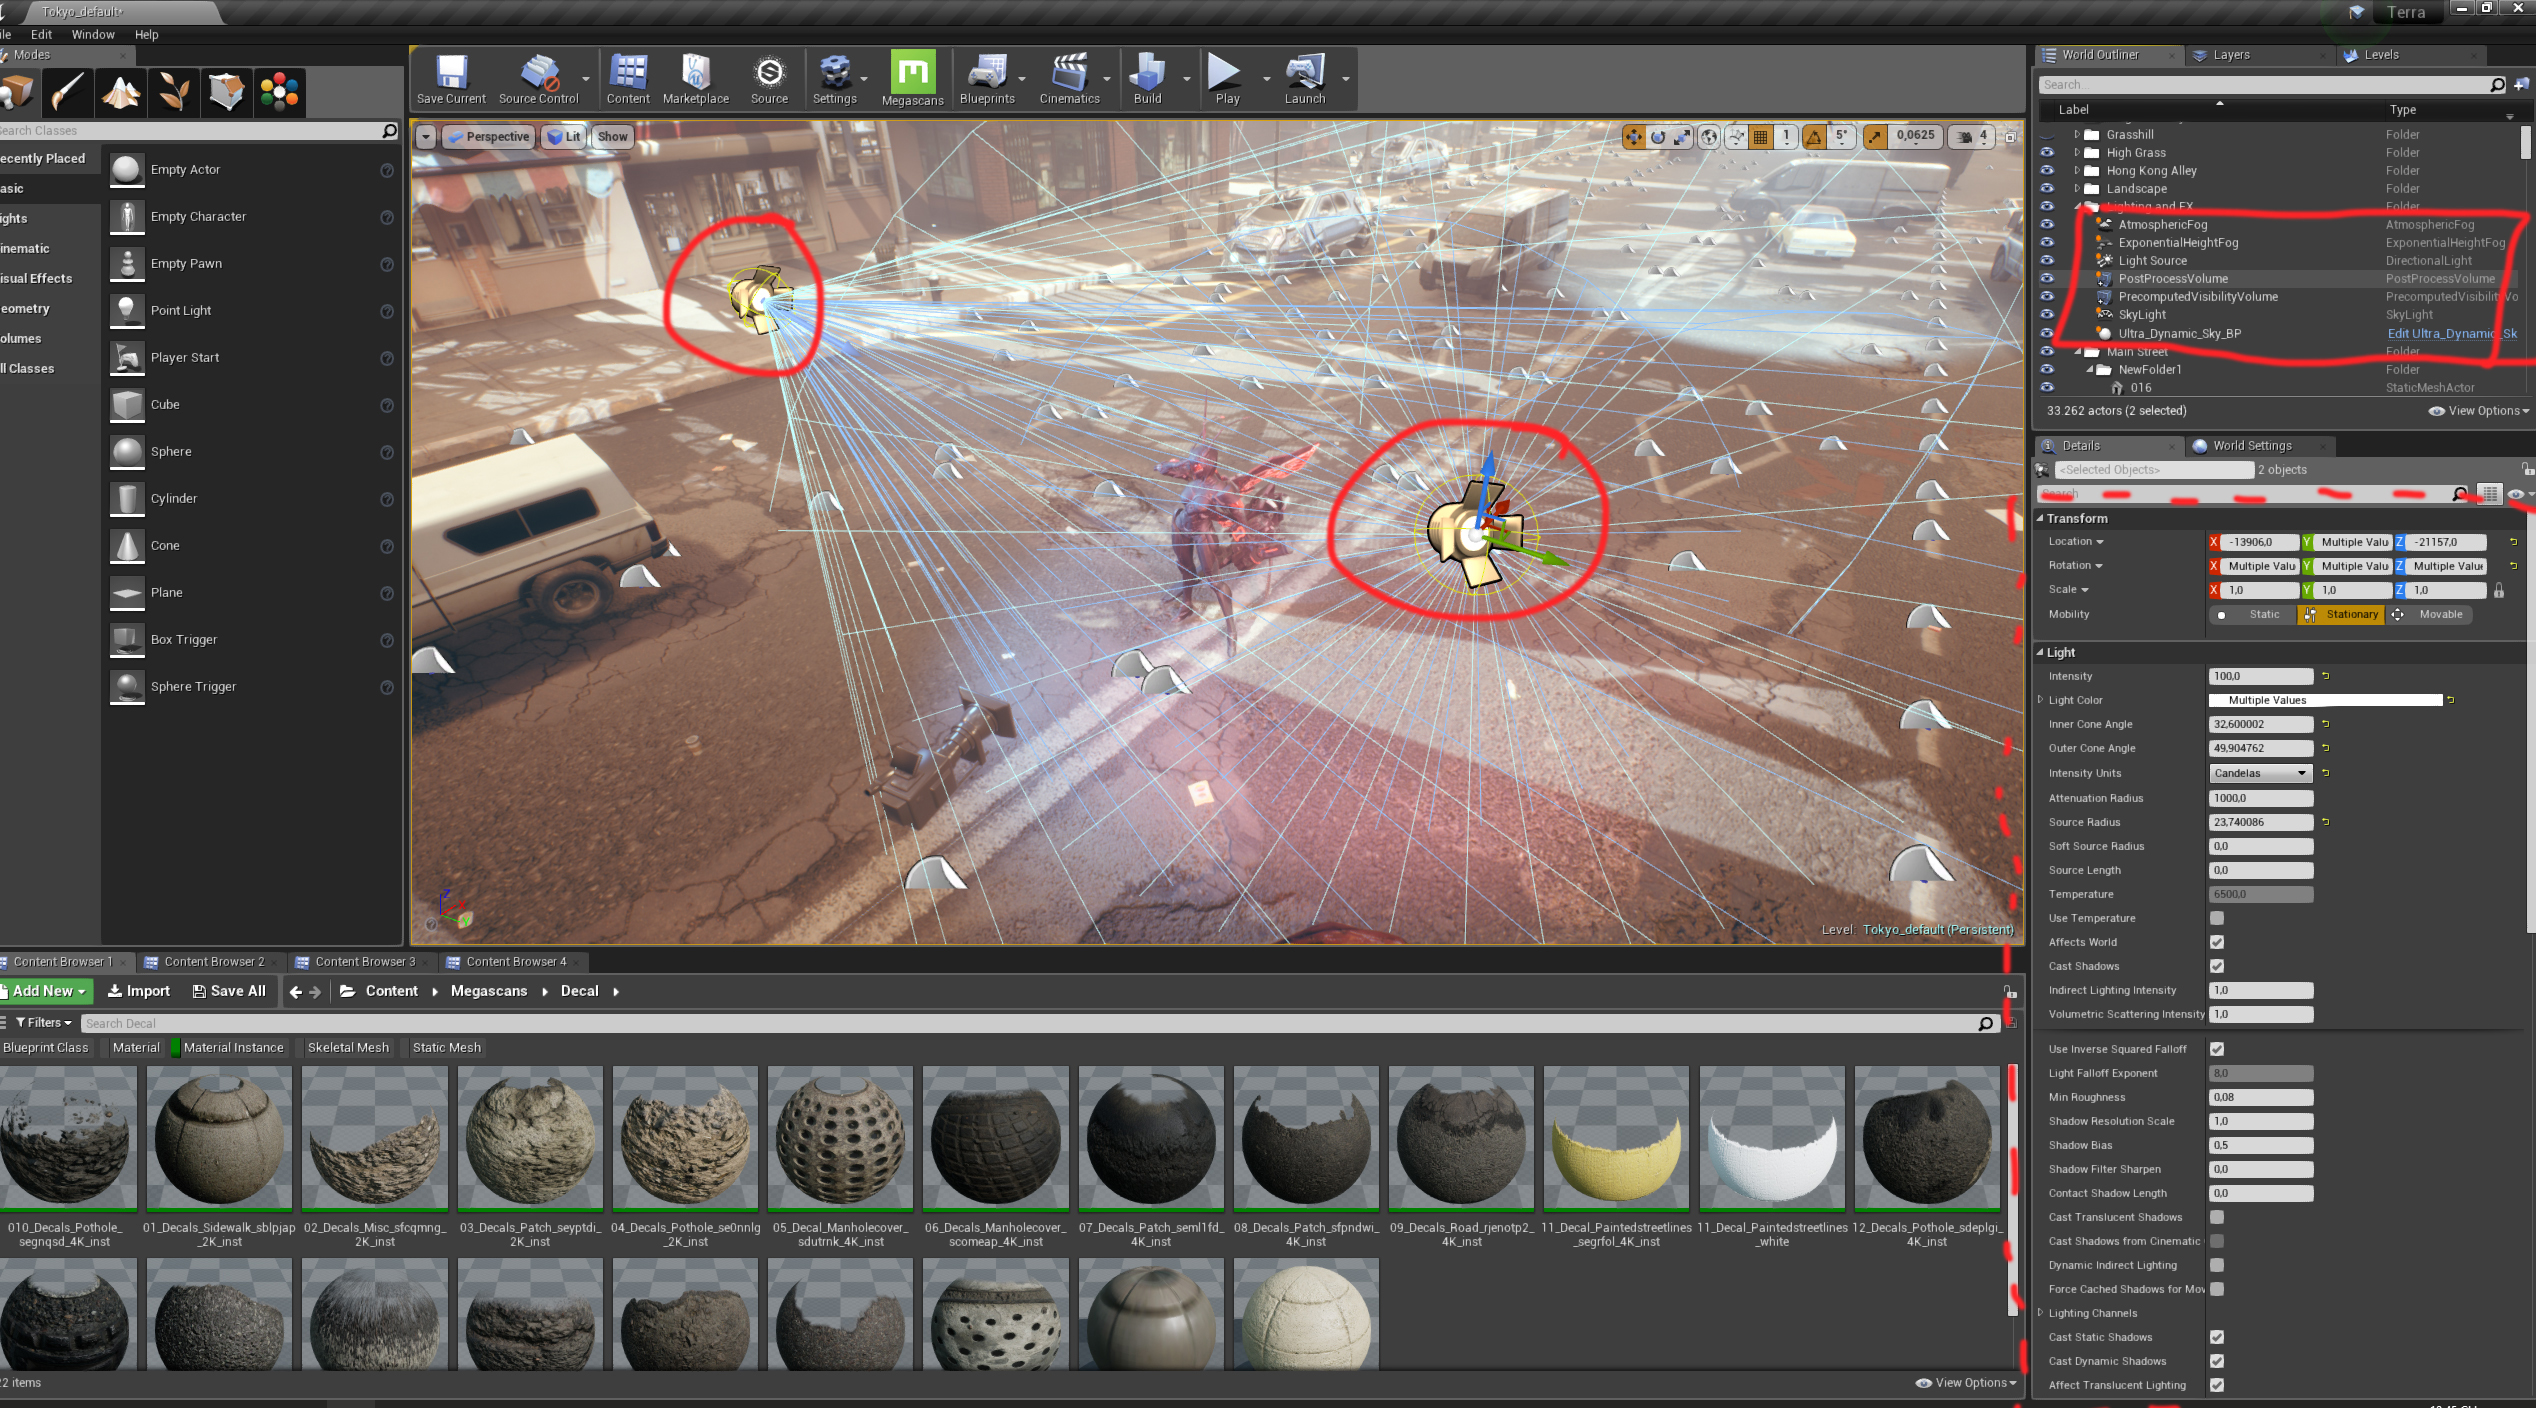
(Talis’ dynamic lights, the scene’s lighting actors, and post process)
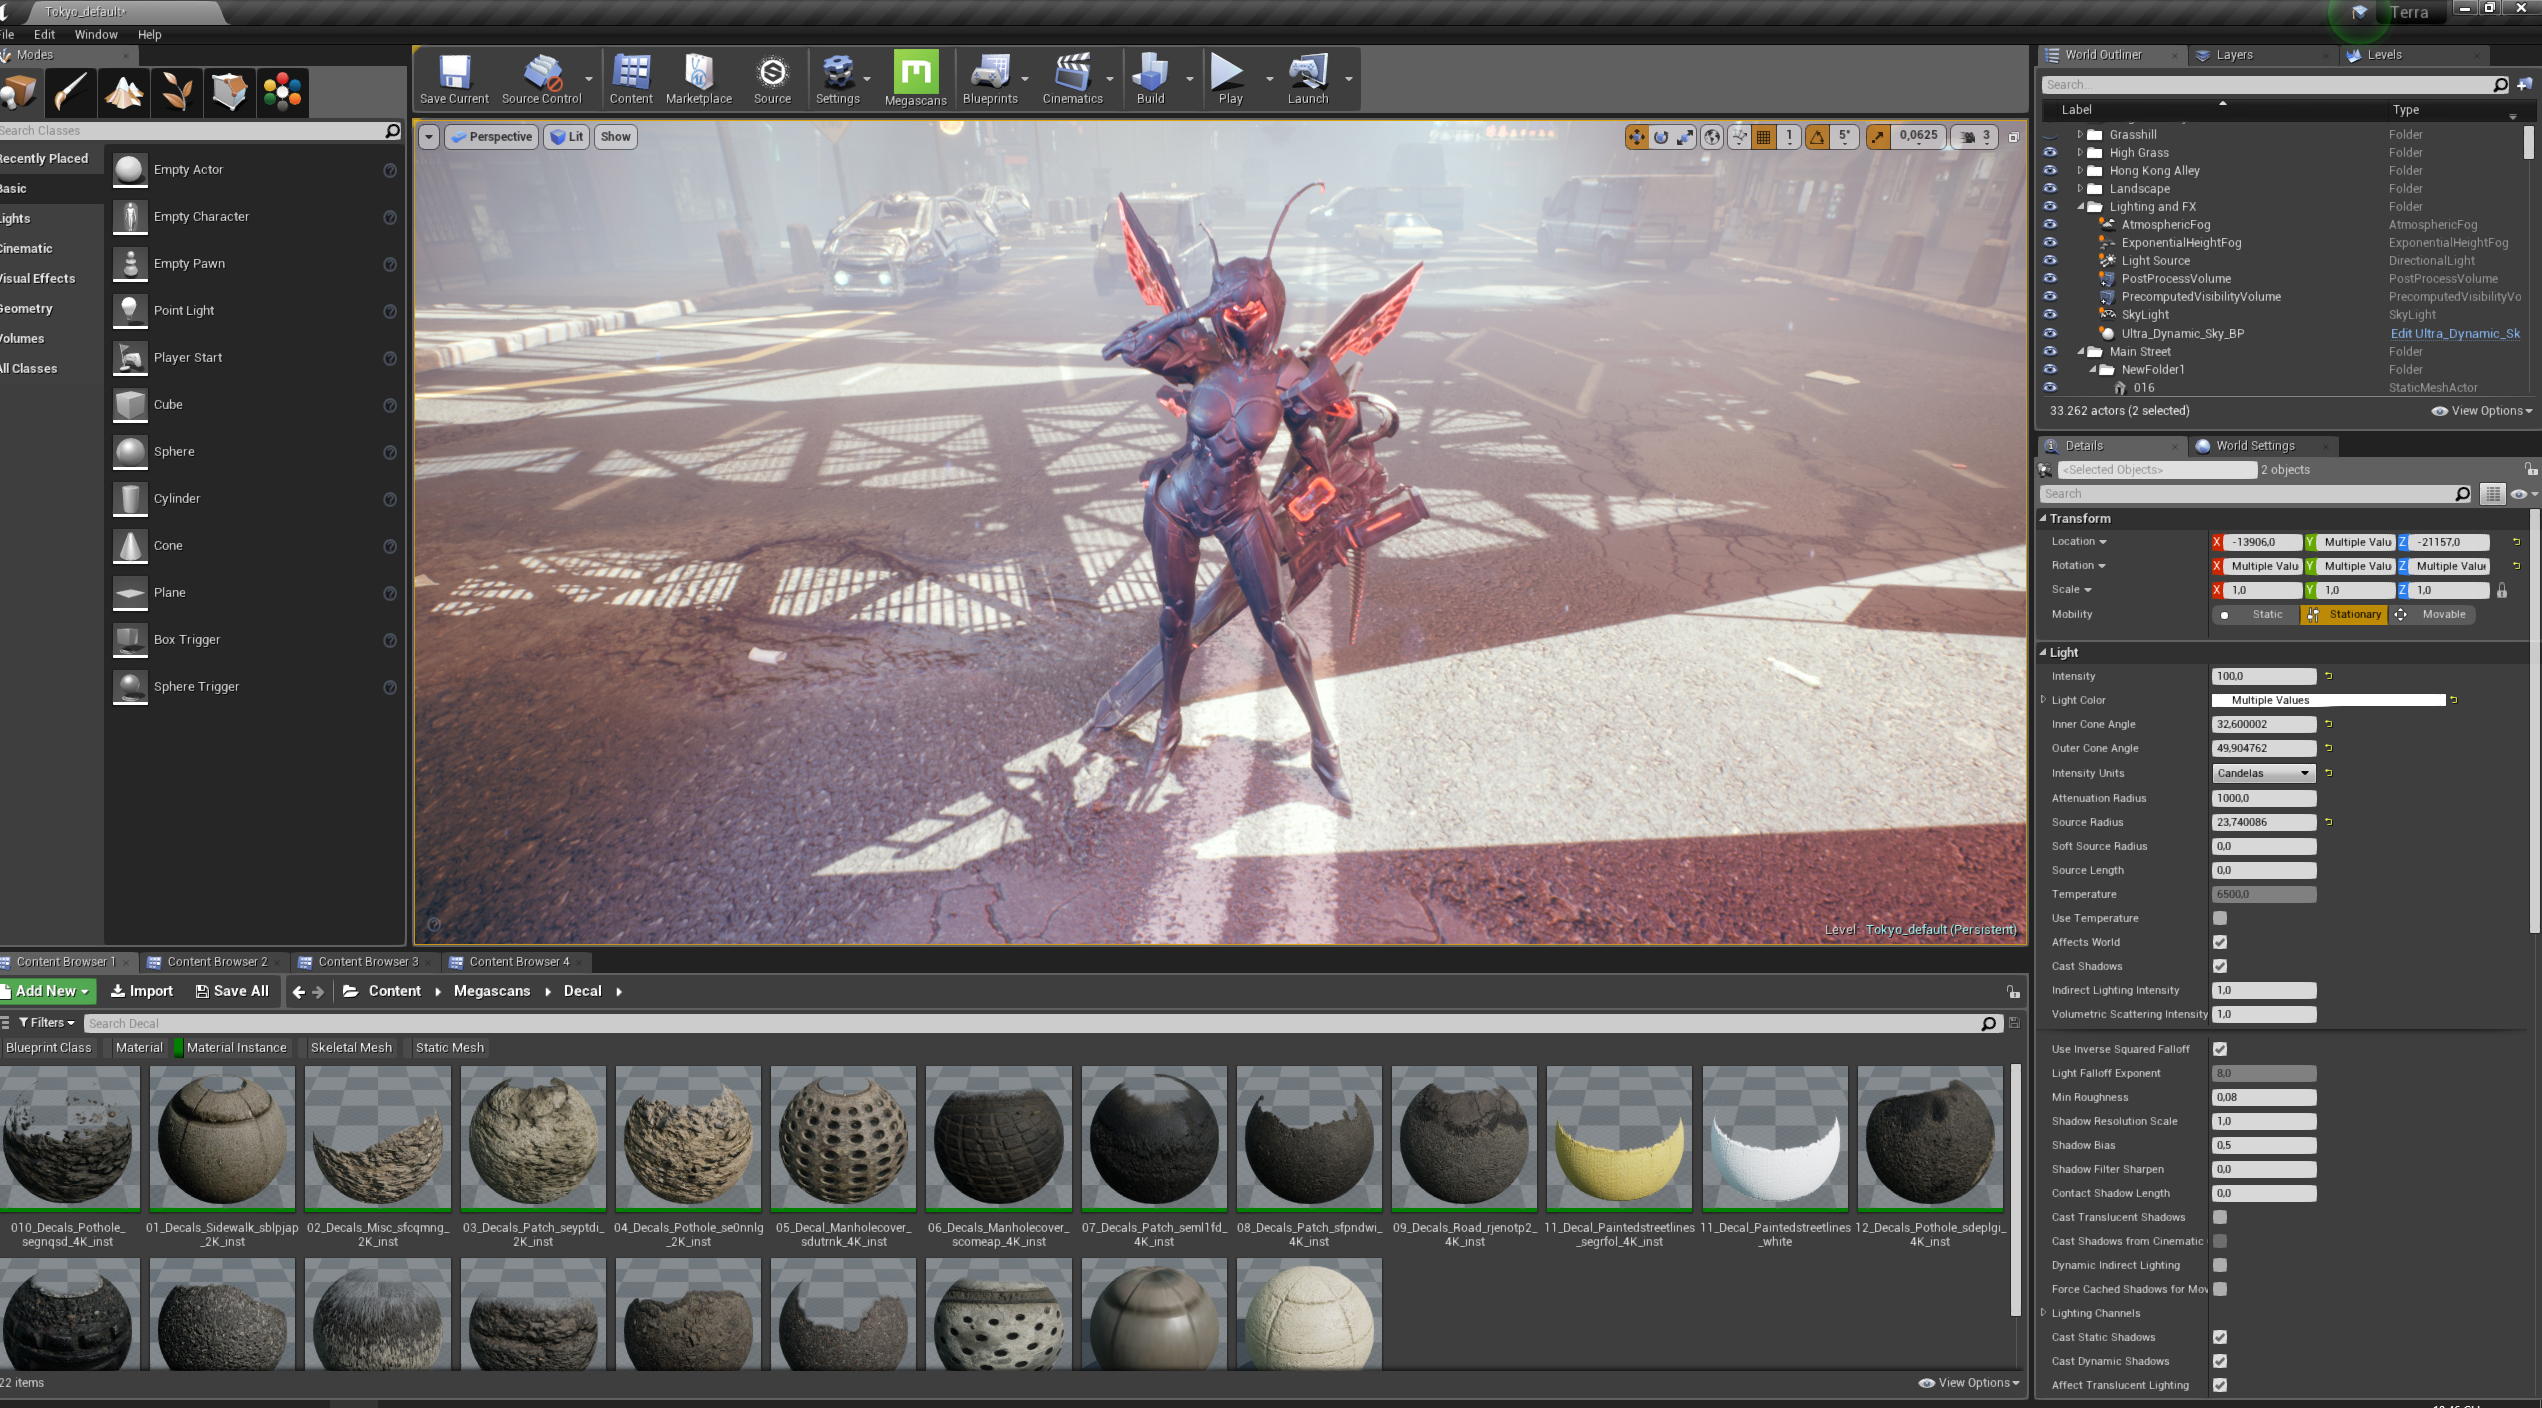
Final Results
Overall, this project is a lot of work for a single artist, but I had a lot of fun making it, and Megascans really did help me speed up the project with high-quality assets. I really like the way Bridge works too. Looking forward to more amazing work from Quixel. Thank you for reading!
Many thanks, Thuan! Be sure to check out Thuan Duong‘s stellar portfolio on ArtStation.
Got a Quixel-infused project you’d like featured? Send your process breakdown write-up, bio, and hi-res images to blog@quixel.se.