Artist Spotlight: Bringing real-world locations to life with Michael Fedichkin
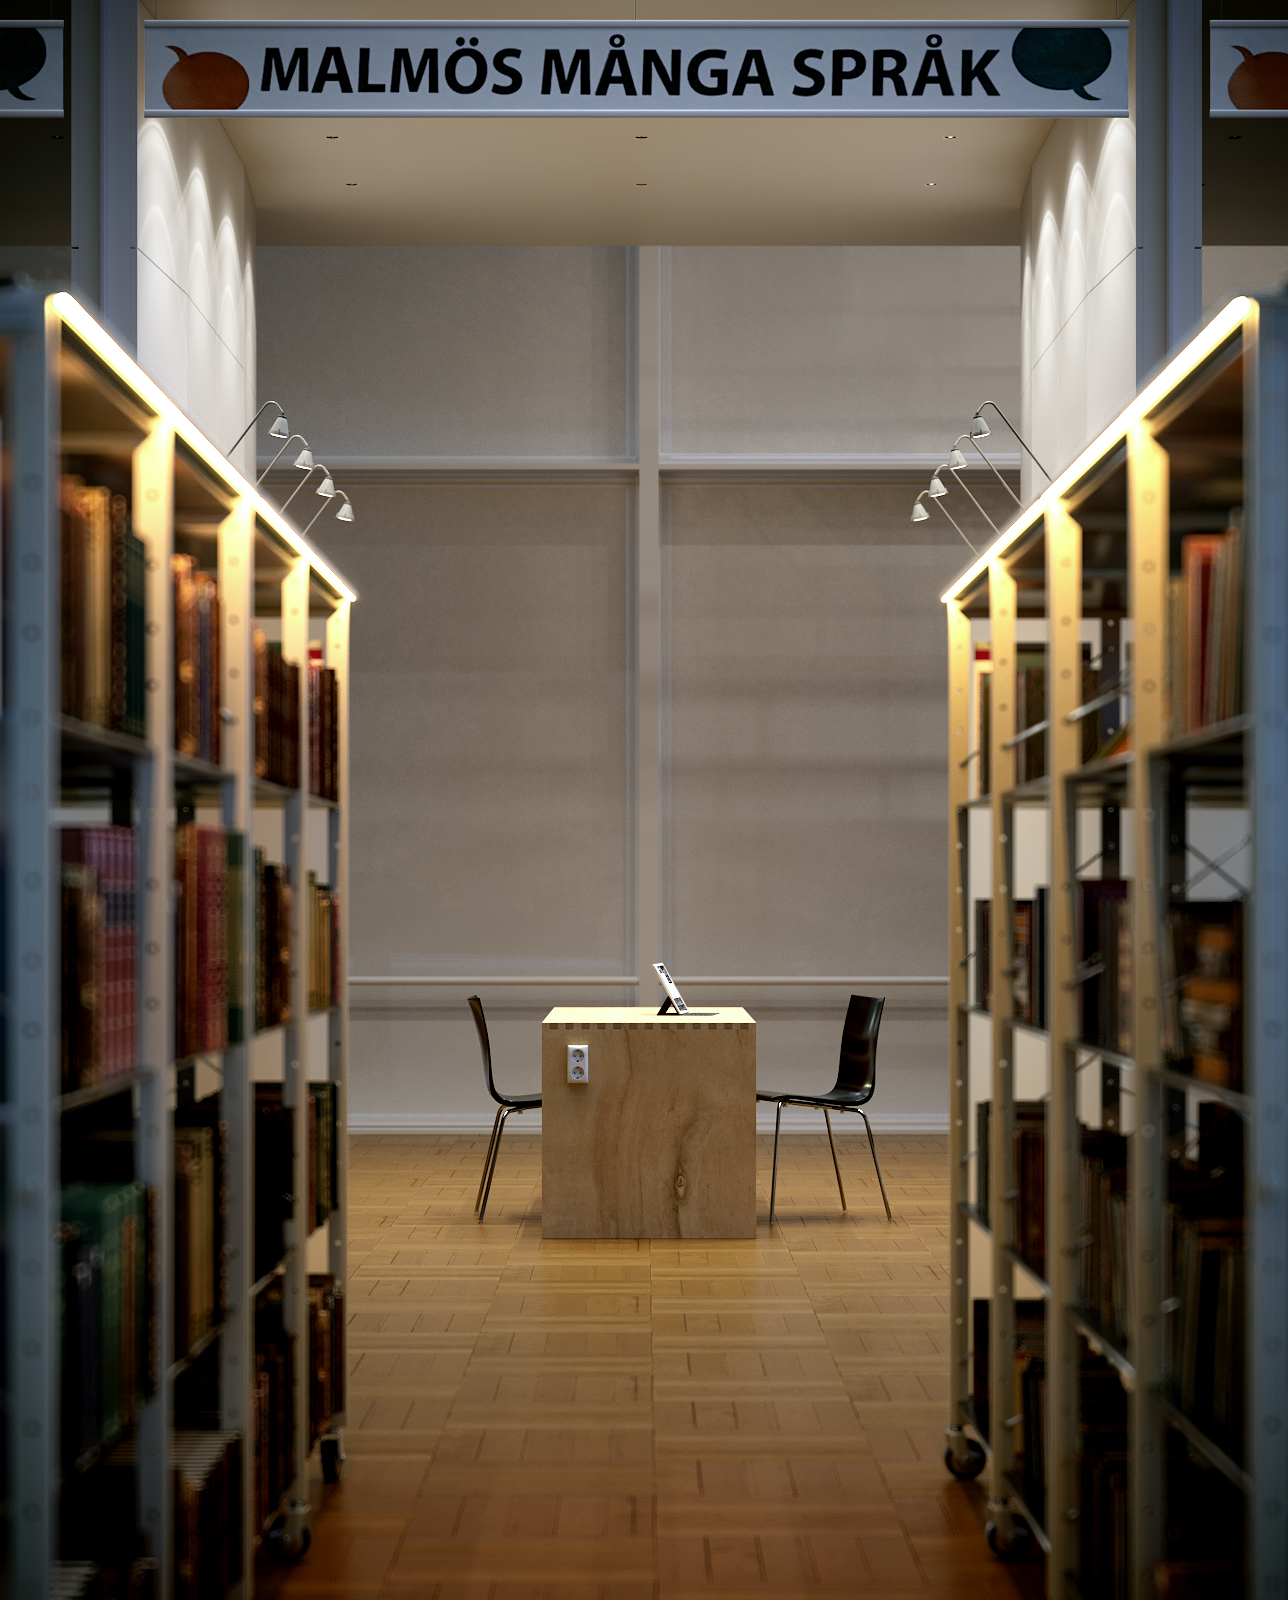
We return to our Artist Spotlight series with an incredible recreation of the Malmö City Library (Malmö Stadsbibliotek) by the talented Michael Fedichkin.
Last year we showed you how he was able to recreate, in amazing detail, the Casaplata bar in Seville, Spain, using nothing more than reference photography and the power of Megascans.
This recreation of the Malmö Stadsbibliotek is a further refinement of Michael’s technique. Learn more in this exclusive scene breakdown.
In Michael’s words:
Hi! Michael here. And I’m very excited to share with you the making-off from my recreation of the Malmö Stadsbibliotek.
Inspiration
From the very beginning, I must say that I really don’t know how I set my mind to the library in Malmö as a subject. I am always convinced, that there is some kind of an inner power which I am driven by. I can’t find a logical answer to how the ideas for my personal projects come to me.
It’s very important to go with your gut and catch the inspiration, and then try to generate your thoughts, feelings, and ideas in 3D. This is definitely what will make your works more original, not like the other ones, and with your own style and charm. And for sure, the great stuff from Quixel is one of my main weapons in this creation.
Modeling
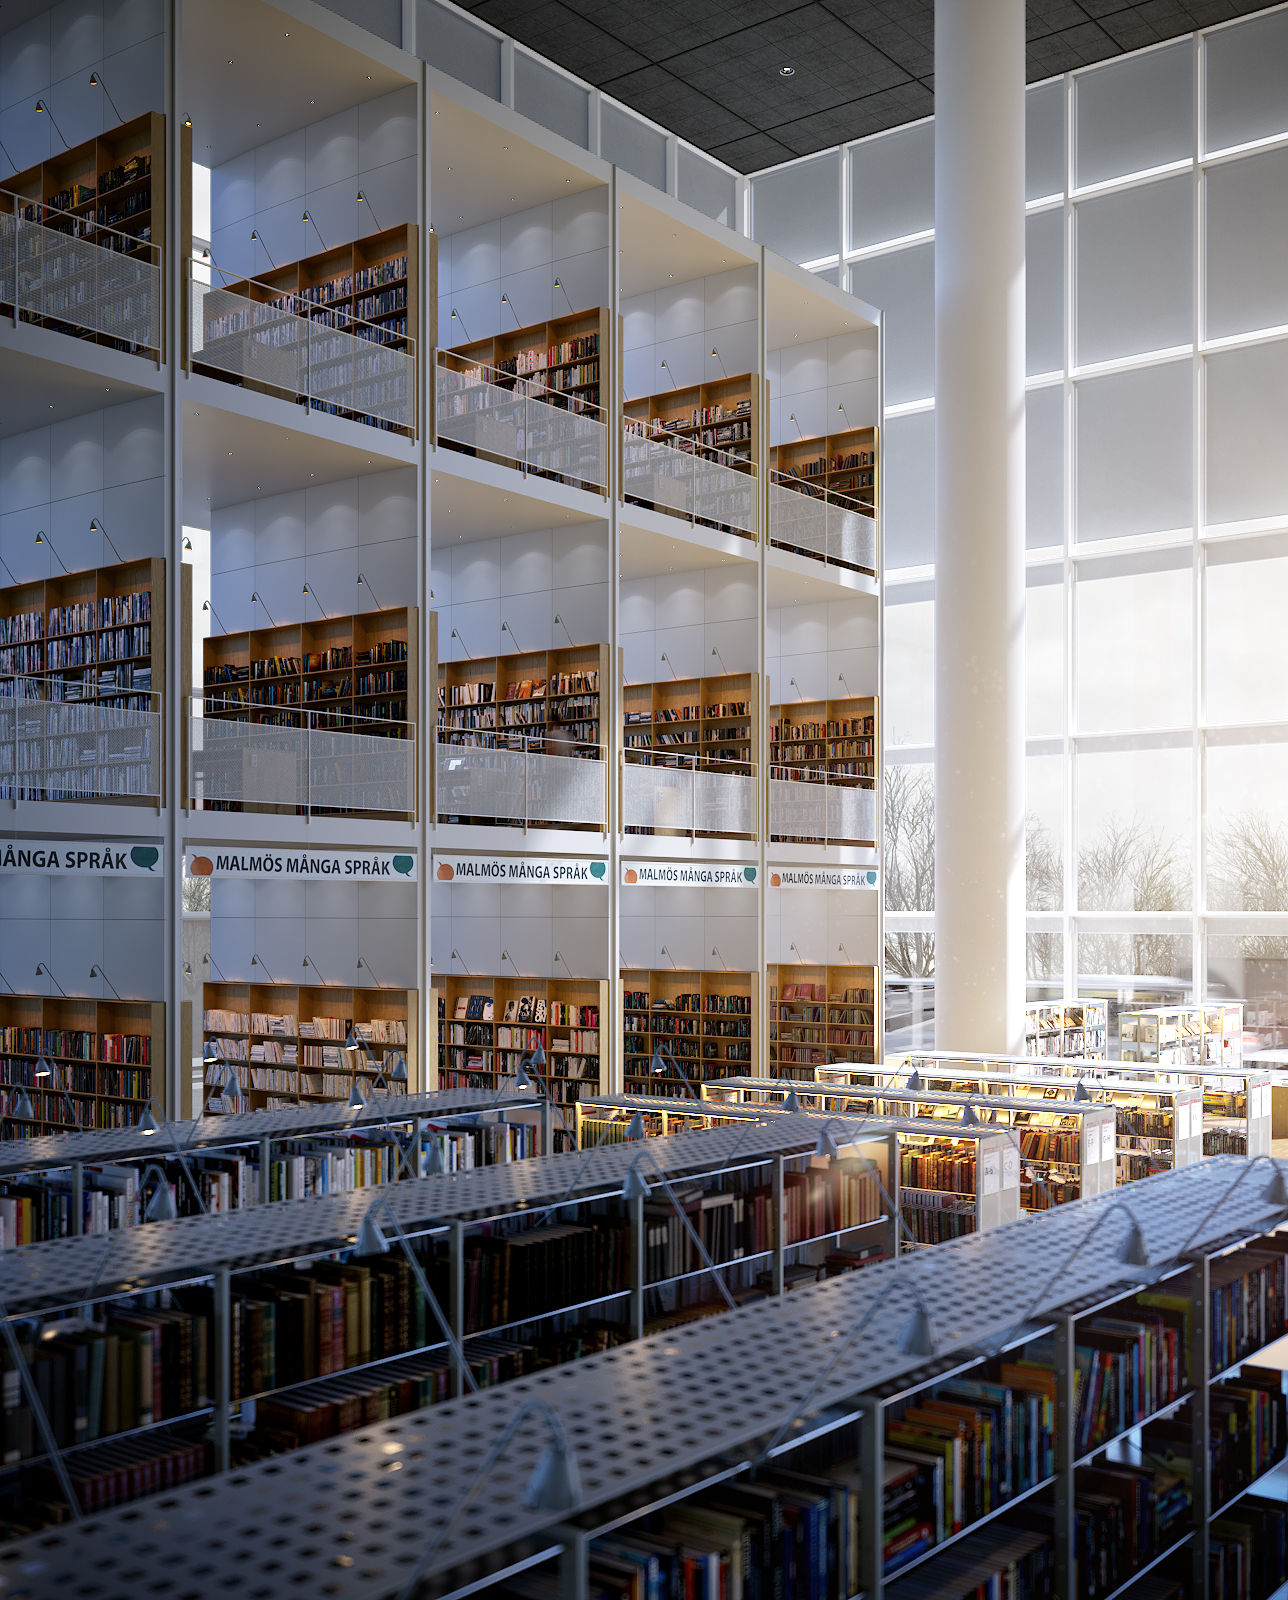
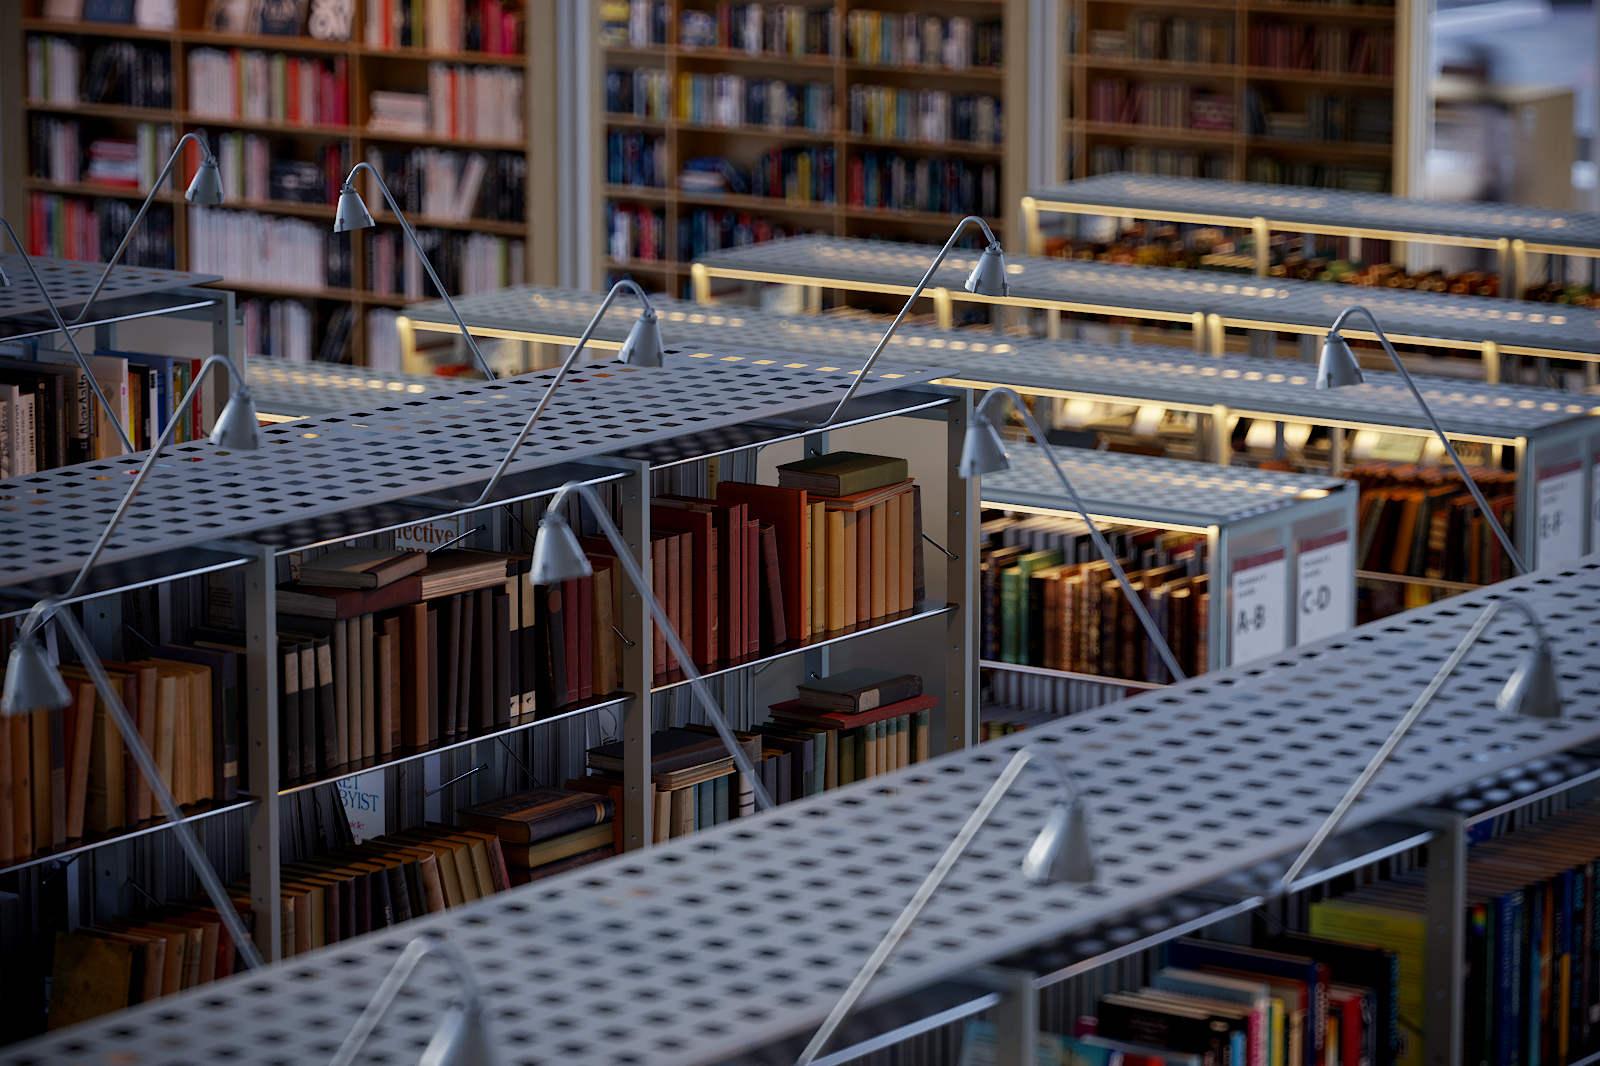
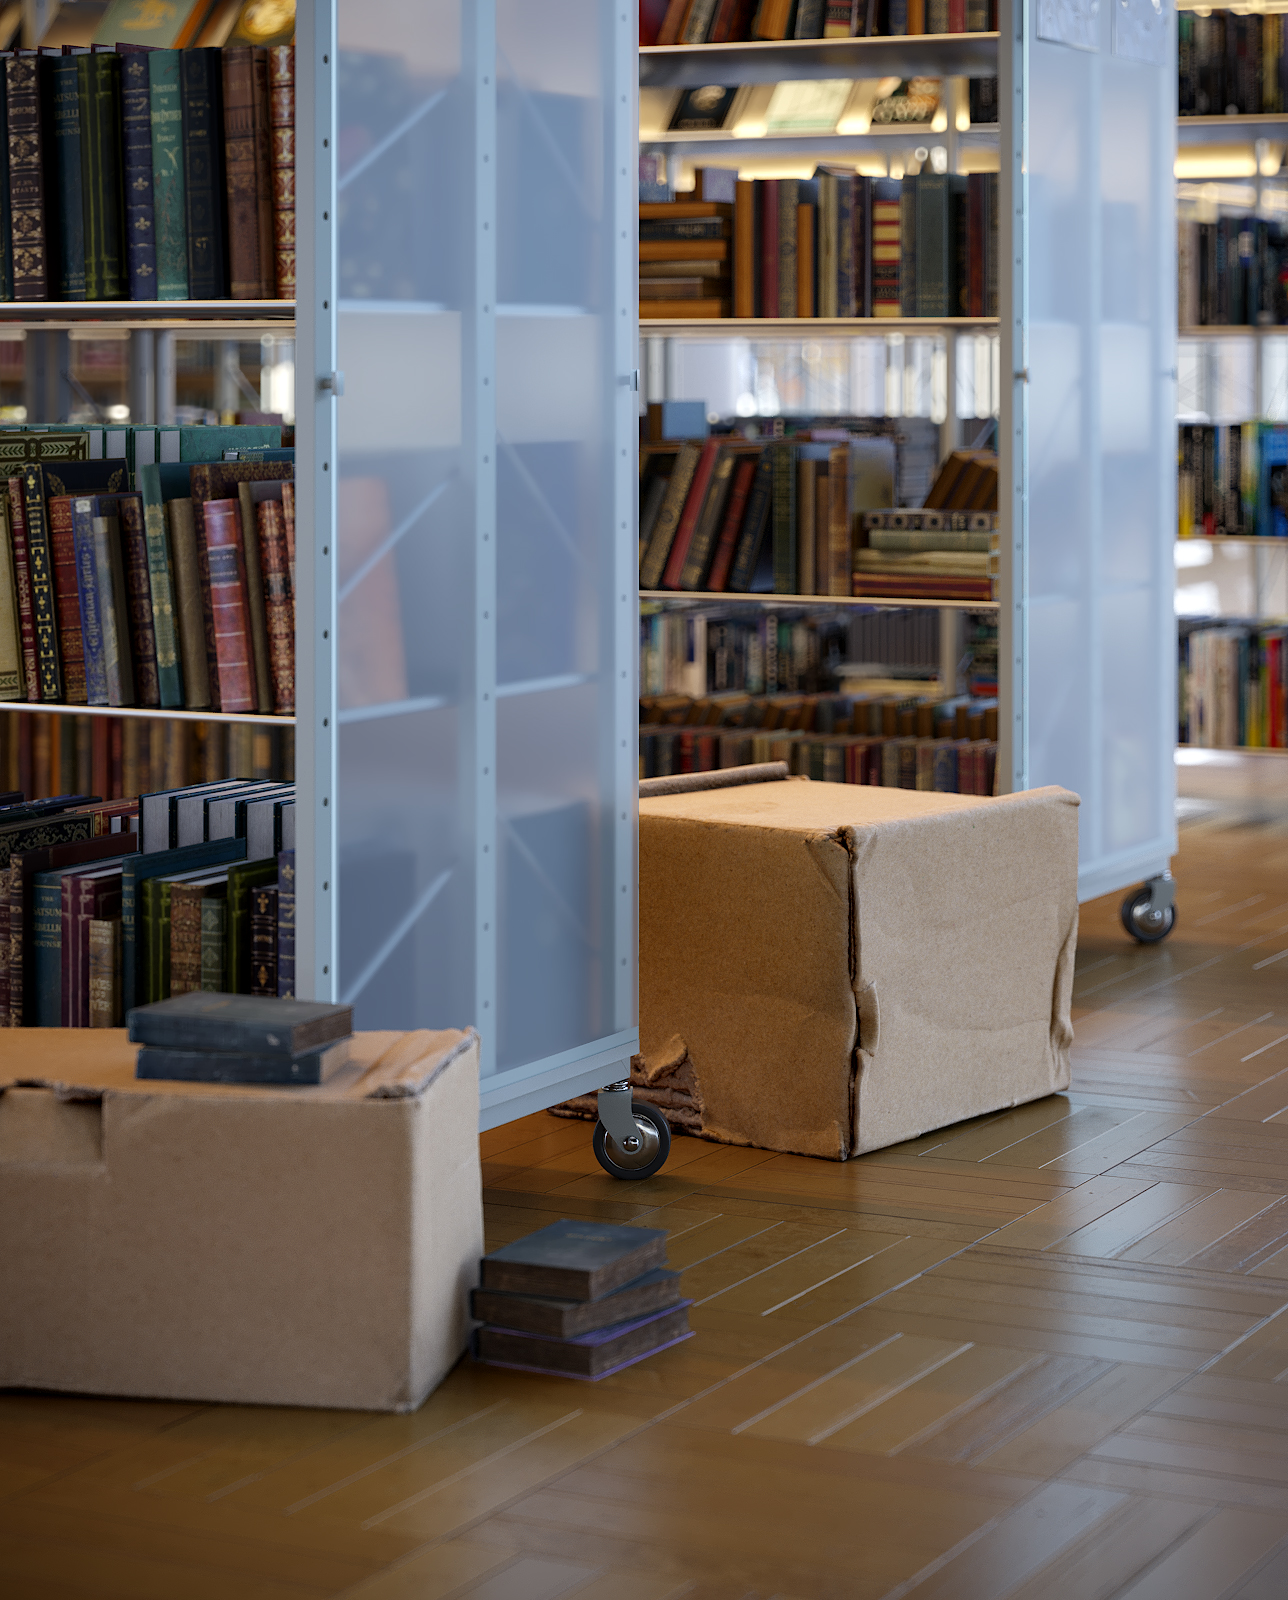
The сreation of Malmö Stadsbibliotek took about 2-3 weeks. Of course, the main feature of the scene is the books—more precisely, the sheer amount of them. I still really don’t know how many books are there in the scene altogether. Thousands, no doubt. And all of them were placed manually, without using any scripts, etc.
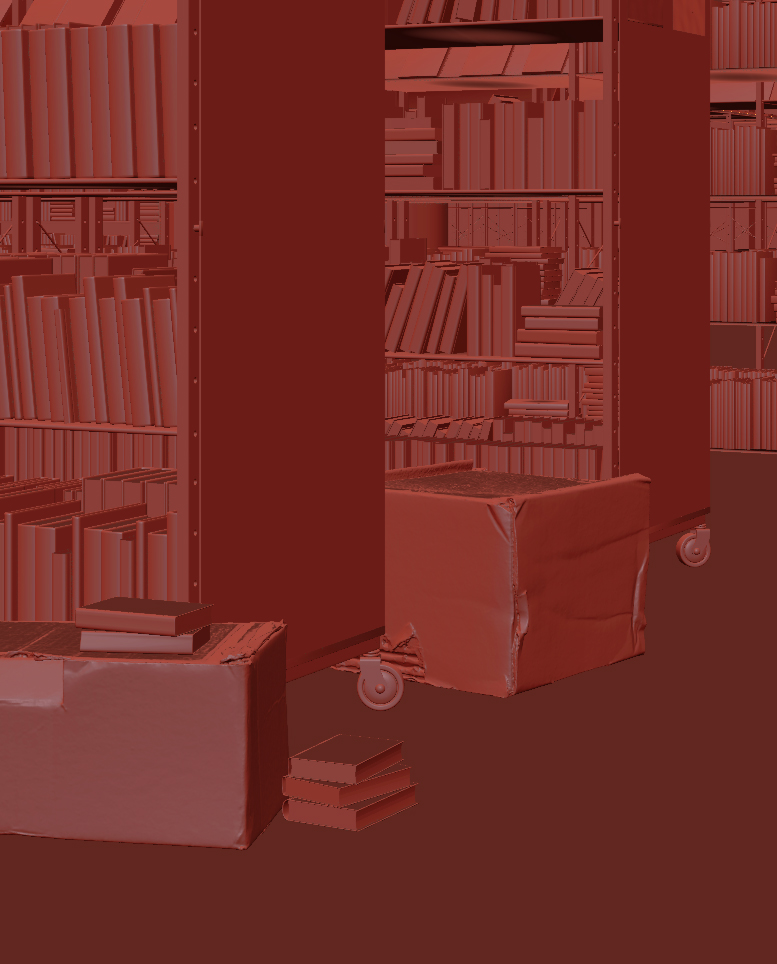
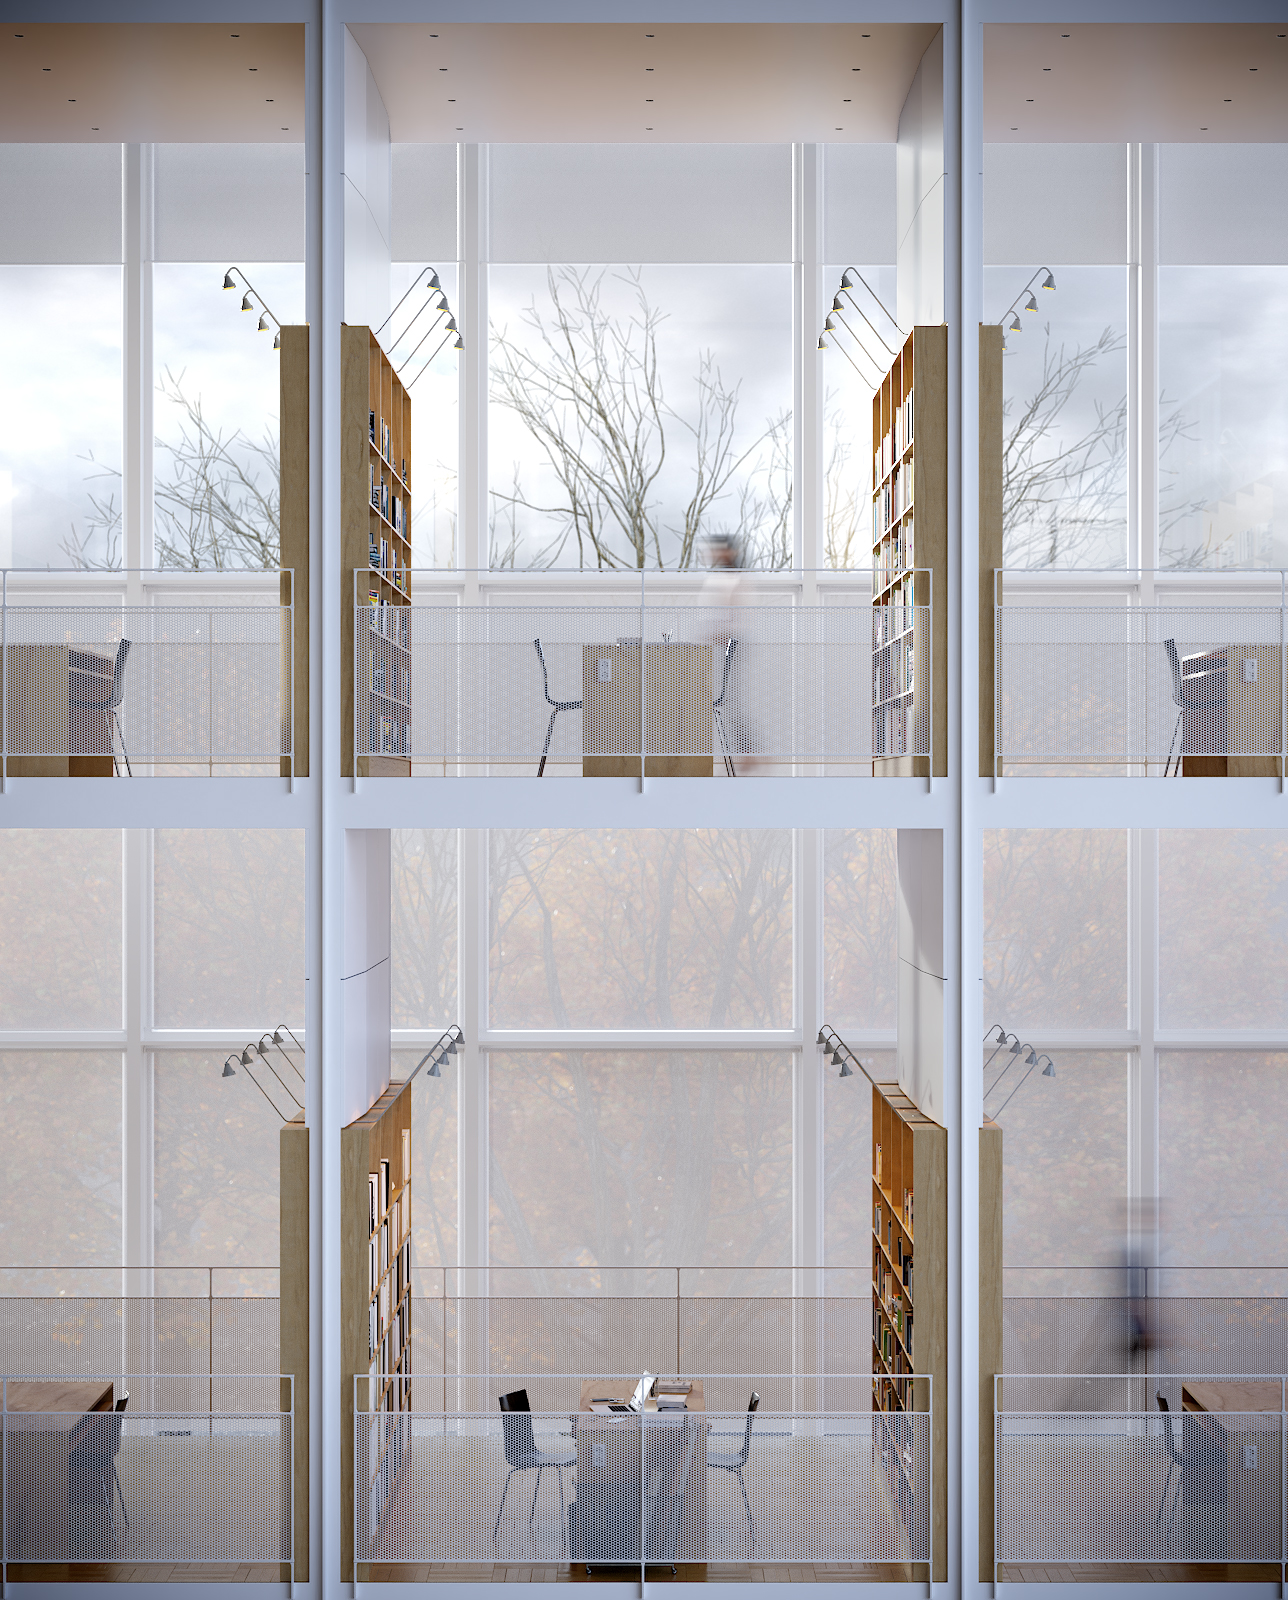
There is a little chaos of books on the shelves. I’ve just tried to recreate the atmosphere of space. Having only photos from the internet and Instagram, I tried to recreate bookcases, tables, and shelves with lamps, precisely.

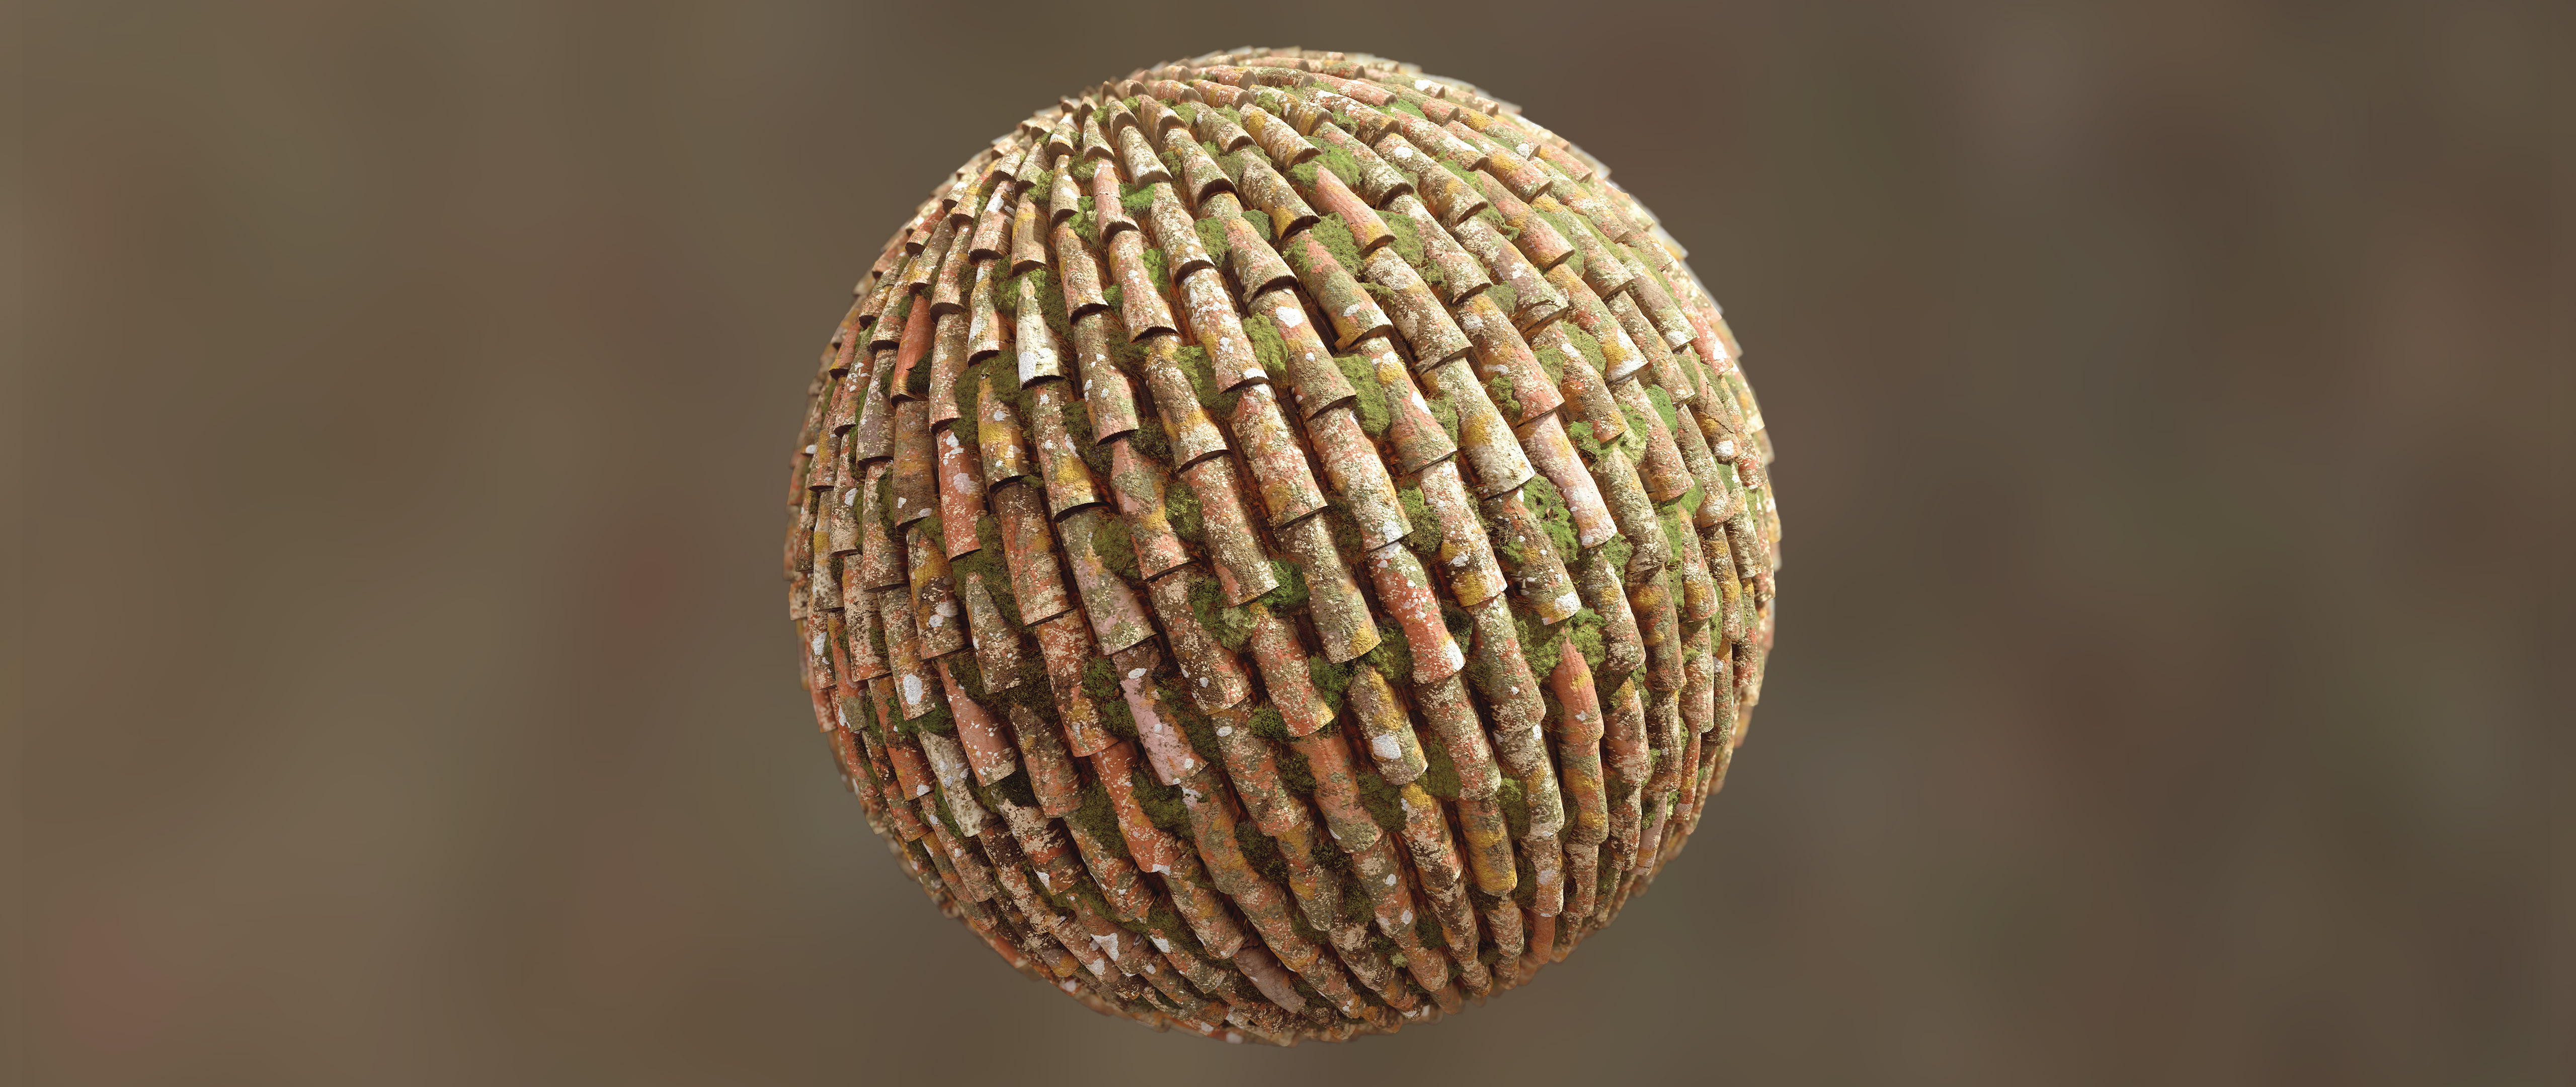
Materials and assets
In Malmö Stadsbibliotek, I used more than 30 assets from Megascans library. I like Quixel Bridge for its simplicity and usability, so it is a pretty cool software for browsing and exporting these assets into your scenes.
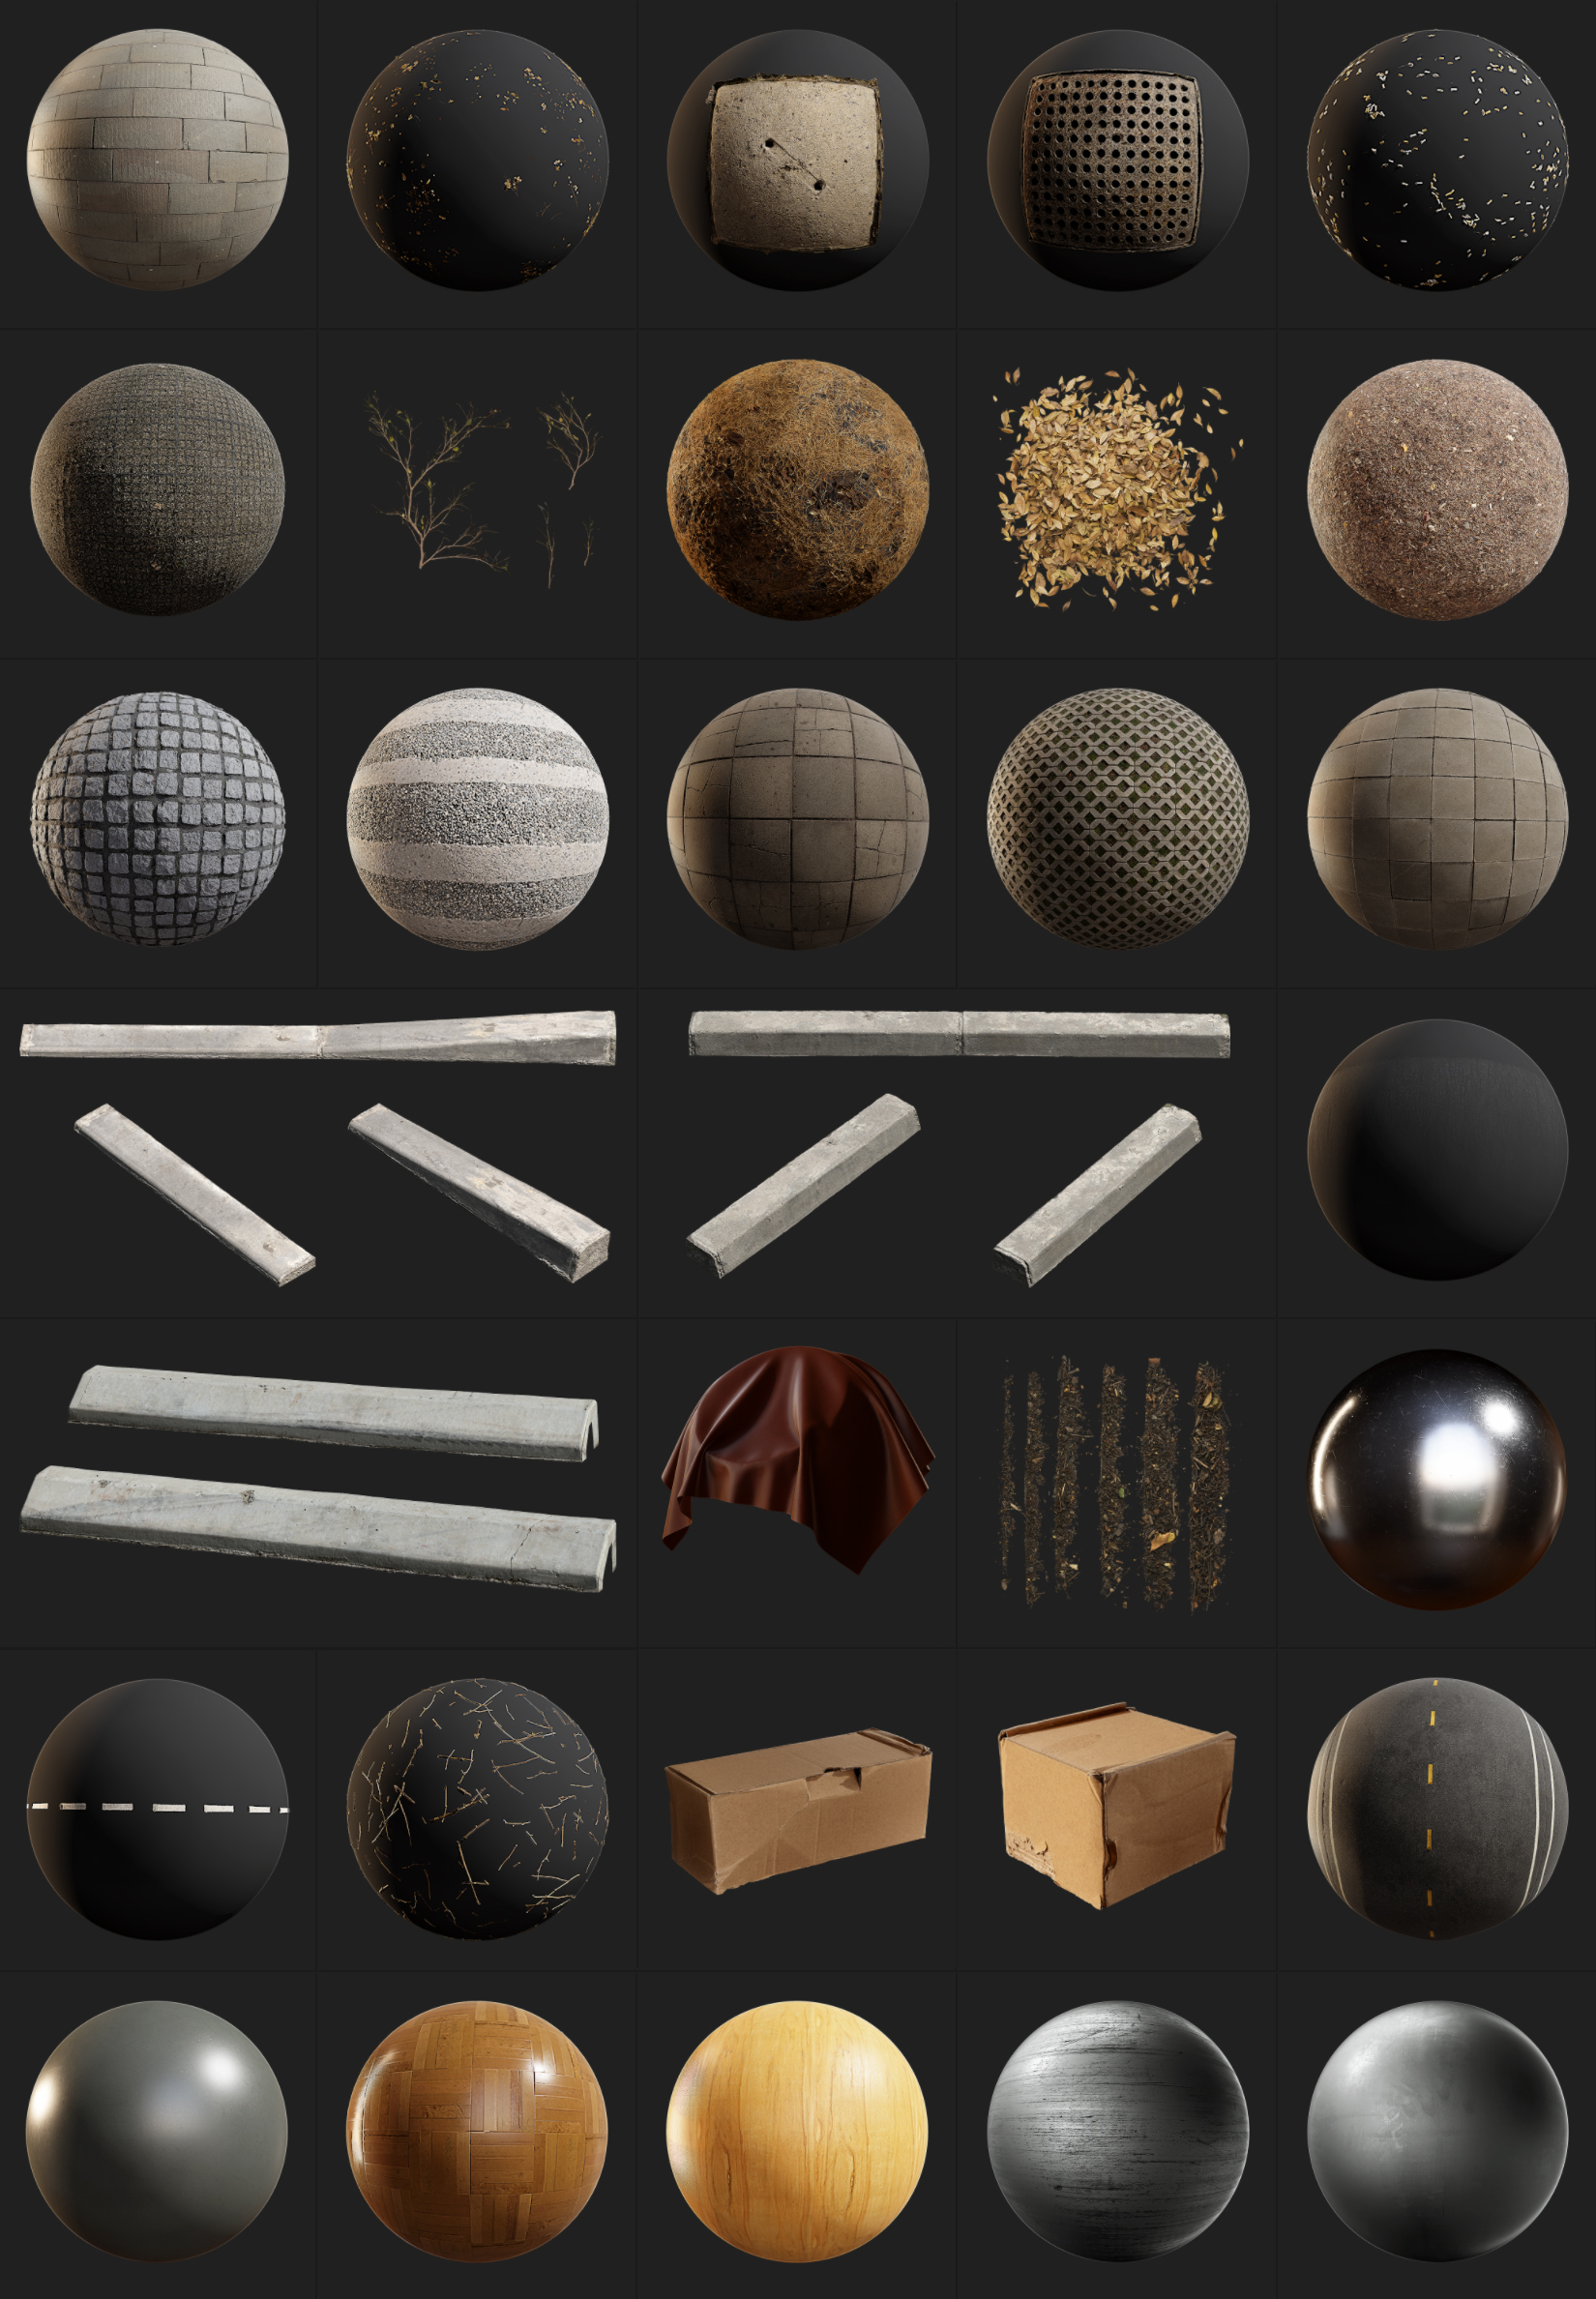
All the assets had the correct material settings, and only the diffuse maps were modified by me a bit.
Lighting and post-production
To light my scene, I used the HDRi map from Real Light 22 HDRi Pro Pack. For each camera/image I always try to find the best position by rotating the HDRI map, so a lot of light tests are usually made during the process.
Sometimes the rotating of HDRI a few degrees can radically change the atmosphere of your image. This is kind of an artistic process, so I always advise you to experiment with light.
Post-production as always was done in Photoshop. Post-processing is important, but in each case, I try to make my raw images of high quality from the very beginning.
Camera settings
I always like the details, so close-up shots are my favorite ones. In real life, I’m a big fan of old manual lenses with the stunning bokeh patterns, such as Carl Zeiss Jena Biotar 75/1.5 mm.
So for the focal lense, I use 75/85/105 mm, just like I would with real lenses. As for the Depth of Field, I always use a custom aperture. Generally, it can change your blurred background in small details and will give some cool effects to your final render.
Don’t forget to render RGB masks for each object in the scene. This will always allow you to work with each object separately.
Softwares used
3ds Max 2018, Corona Renderer, Photoshop CC, Quixel Megascans, Quixel Bridge.
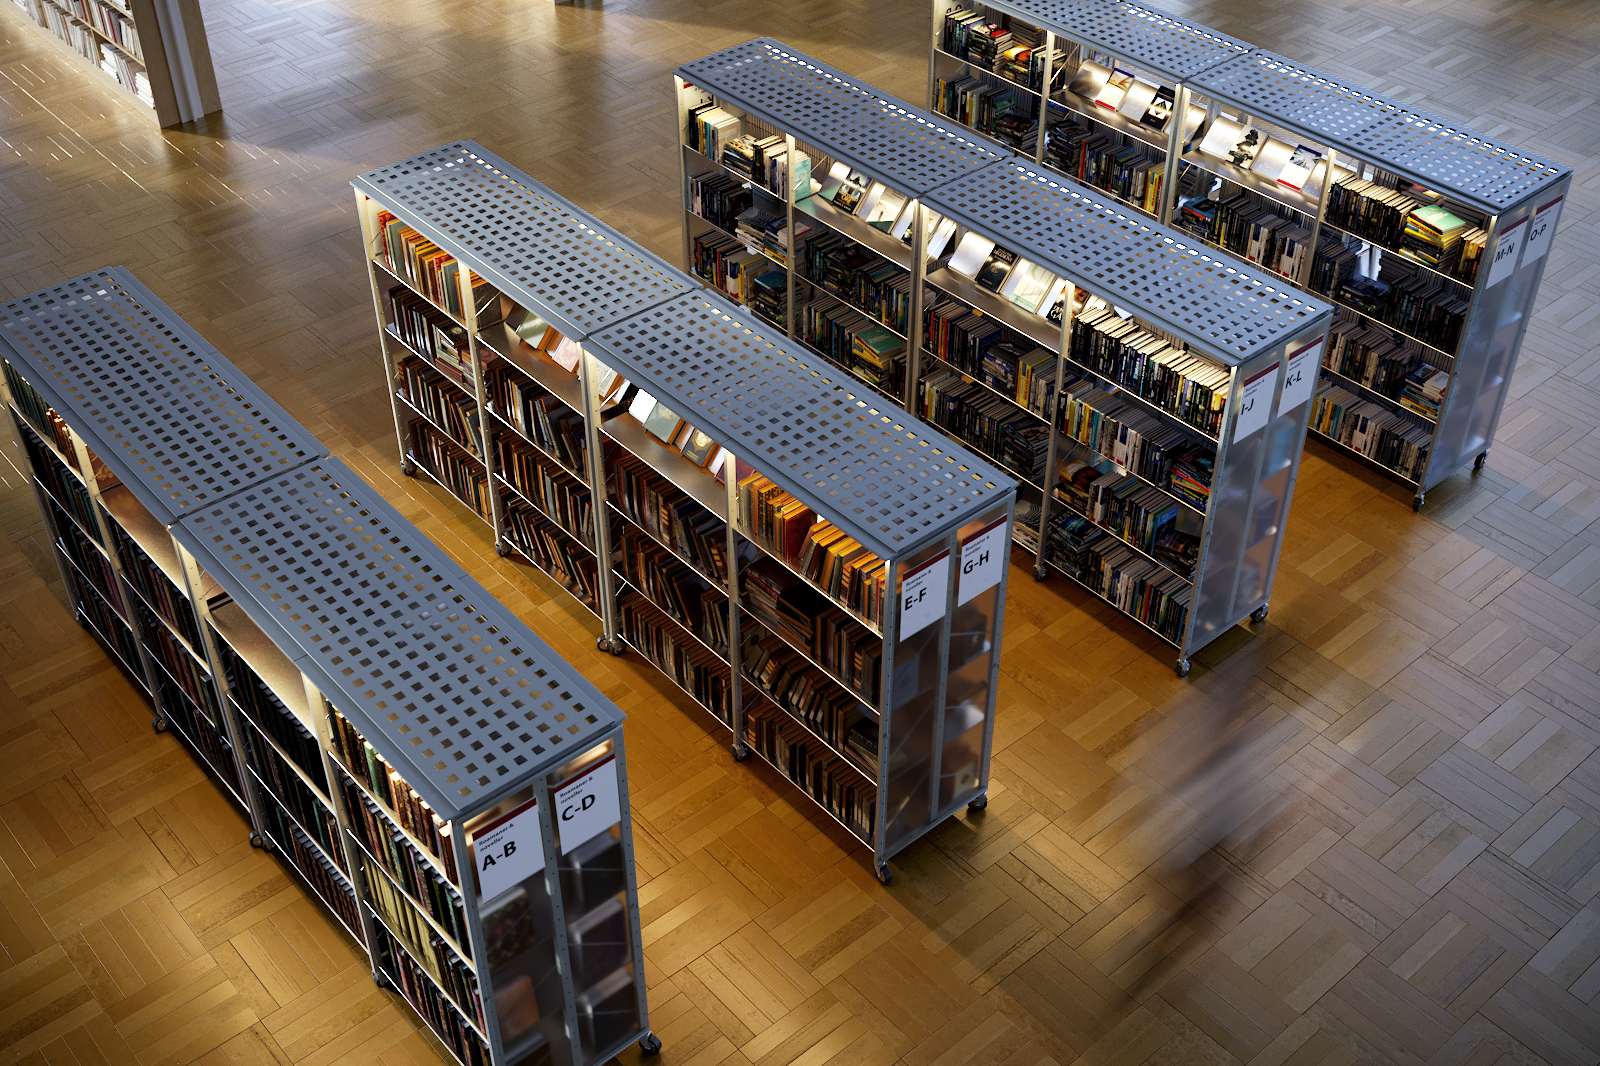
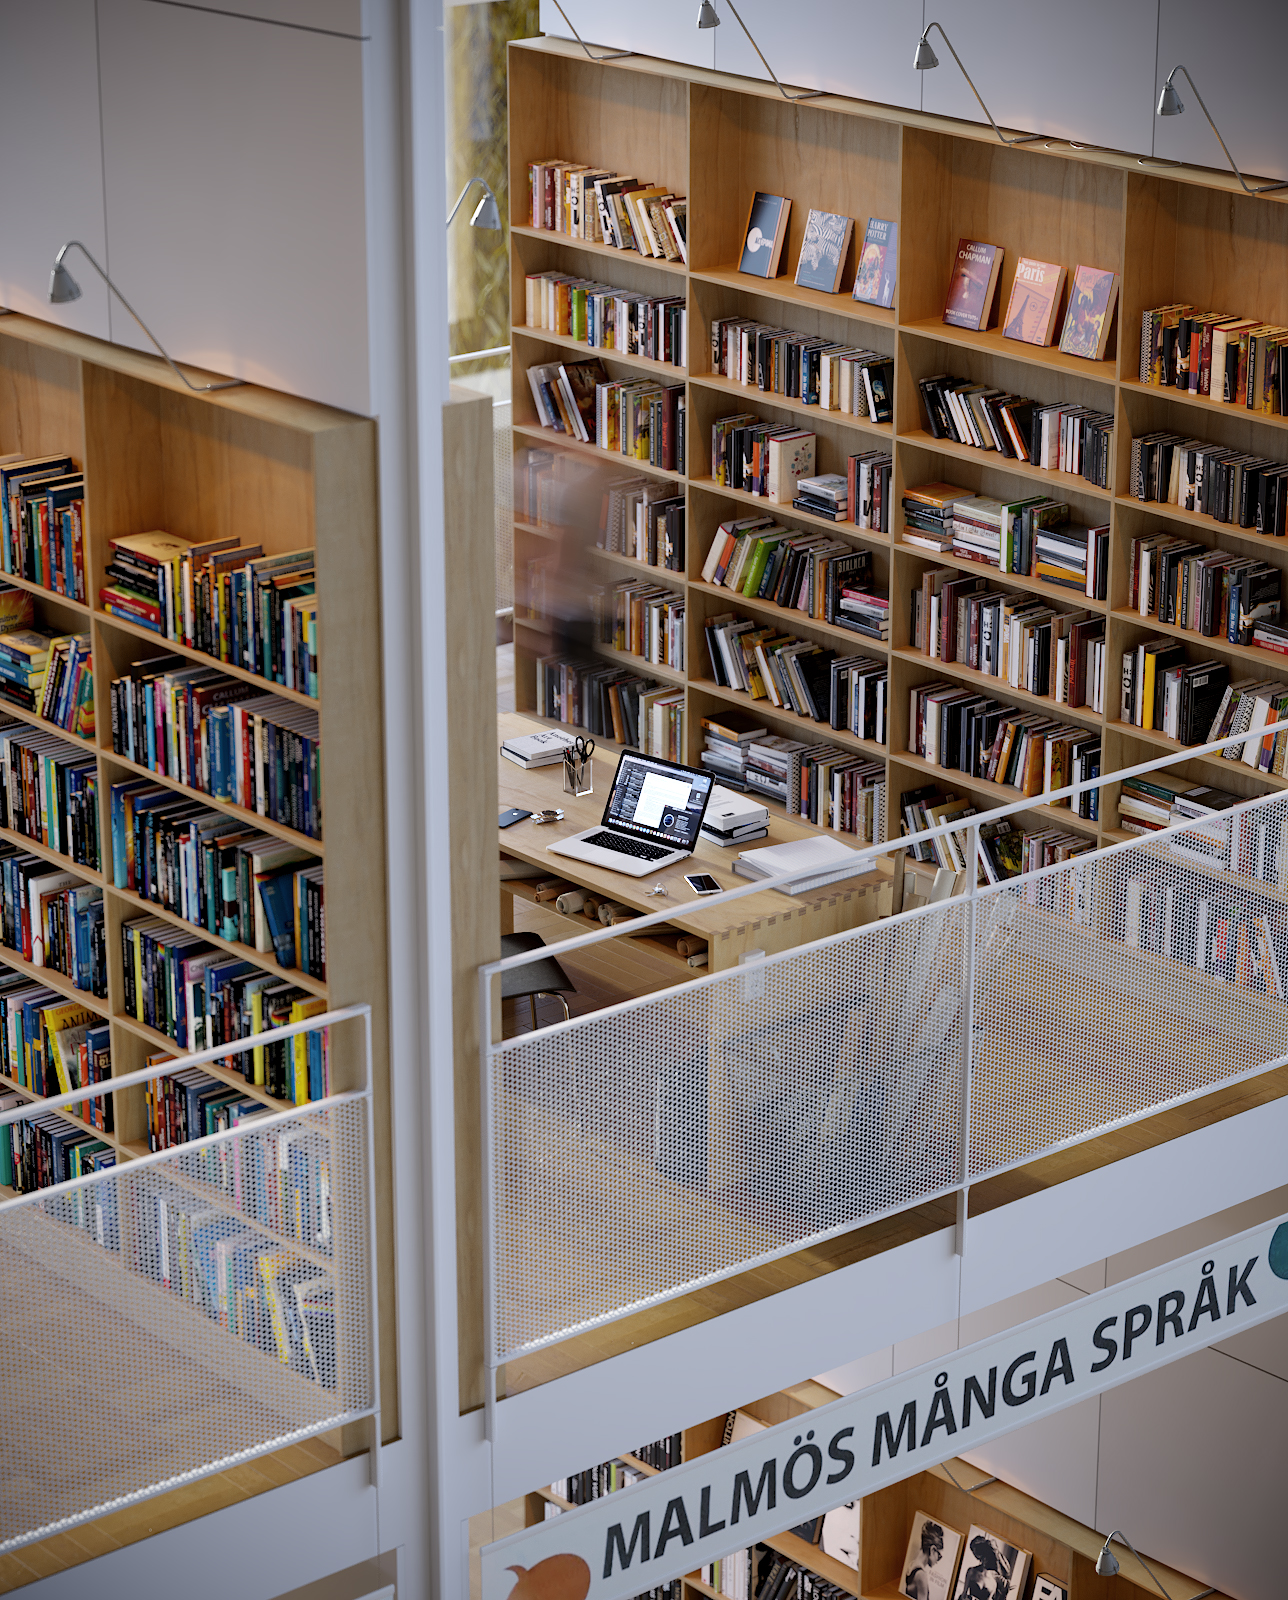
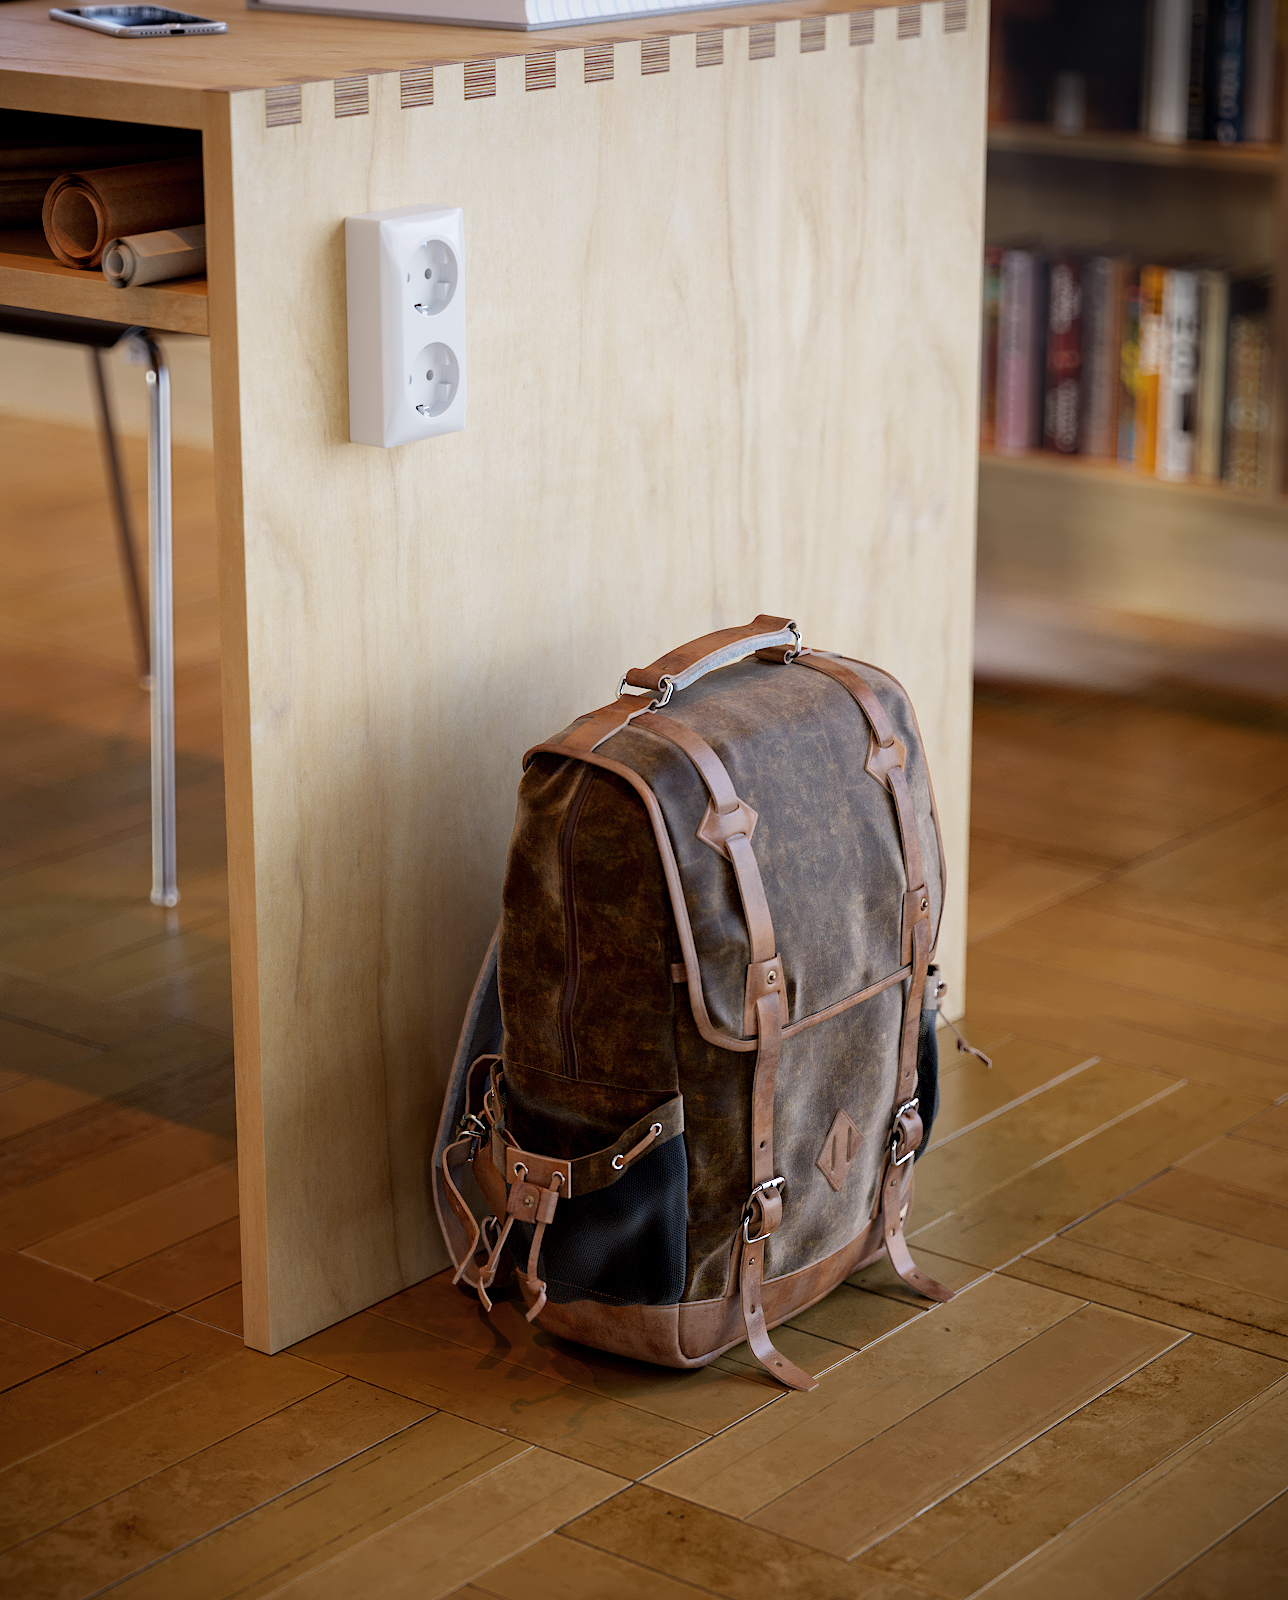
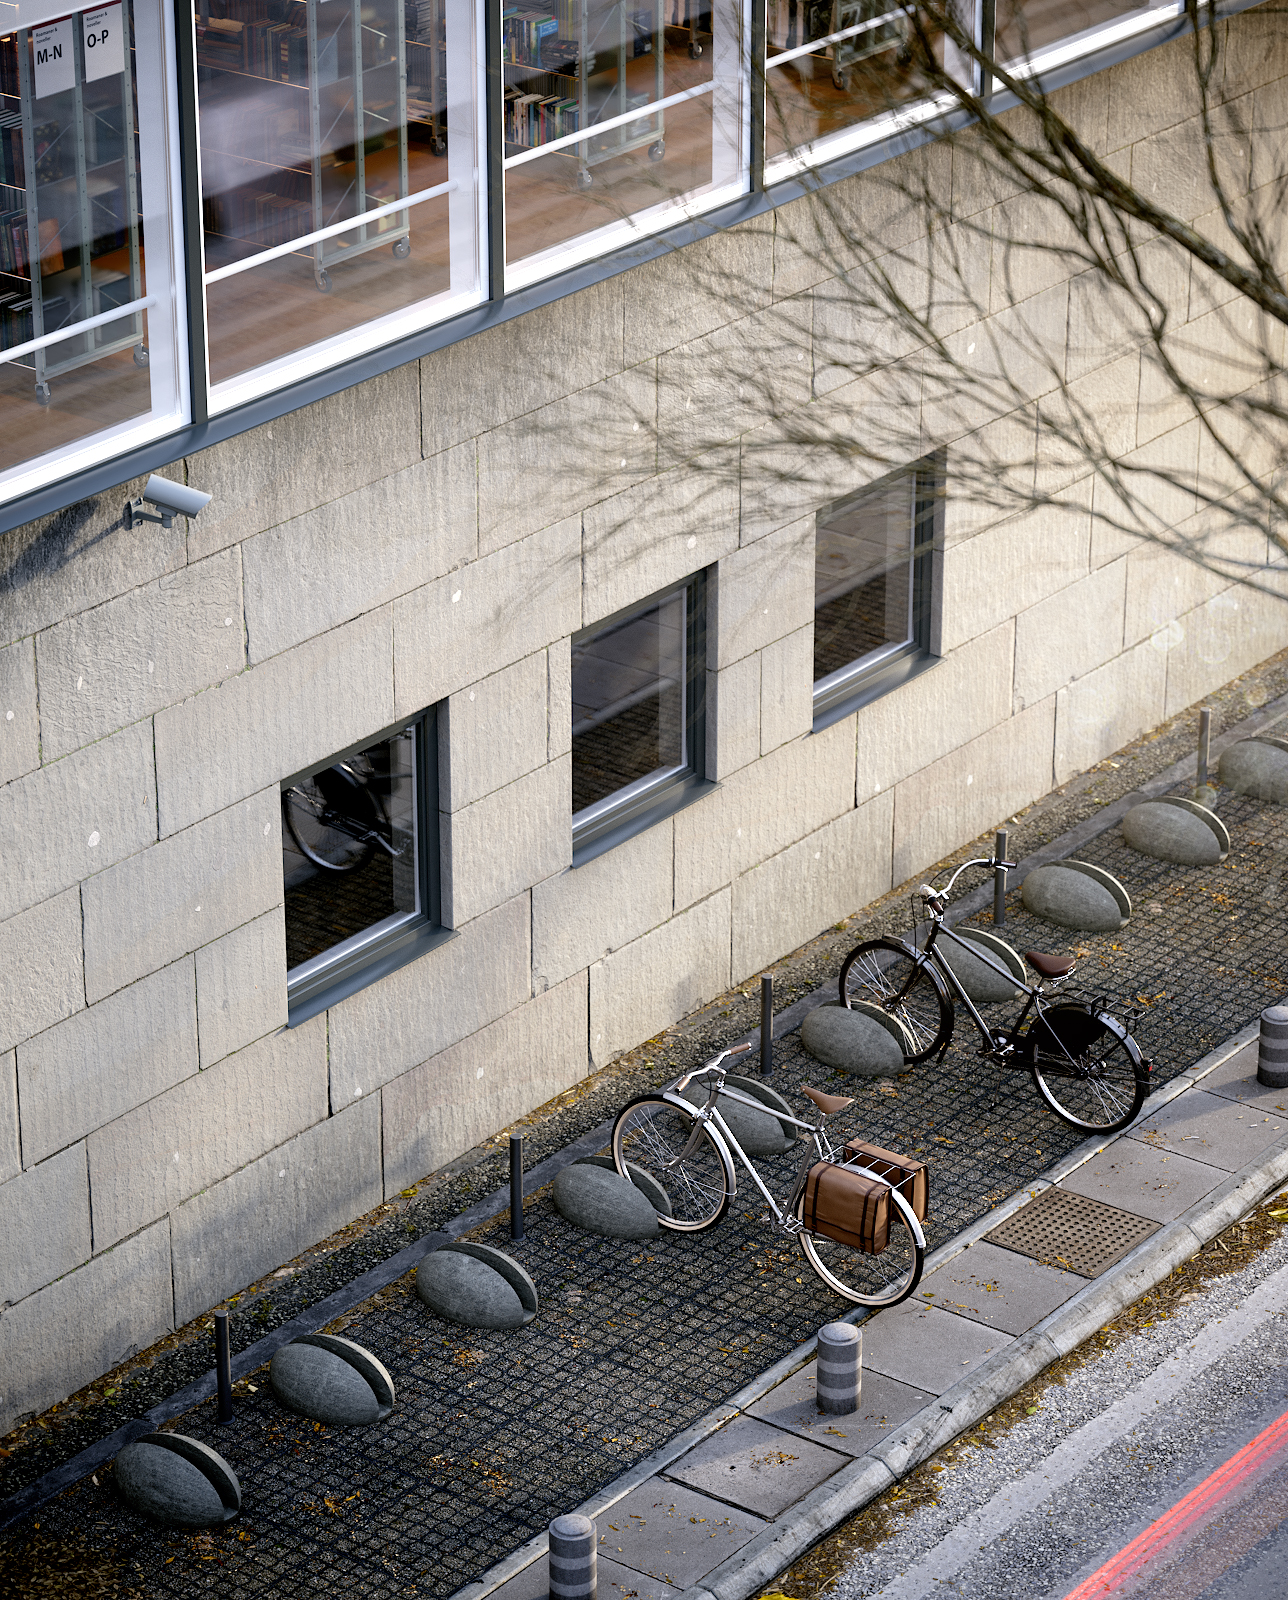
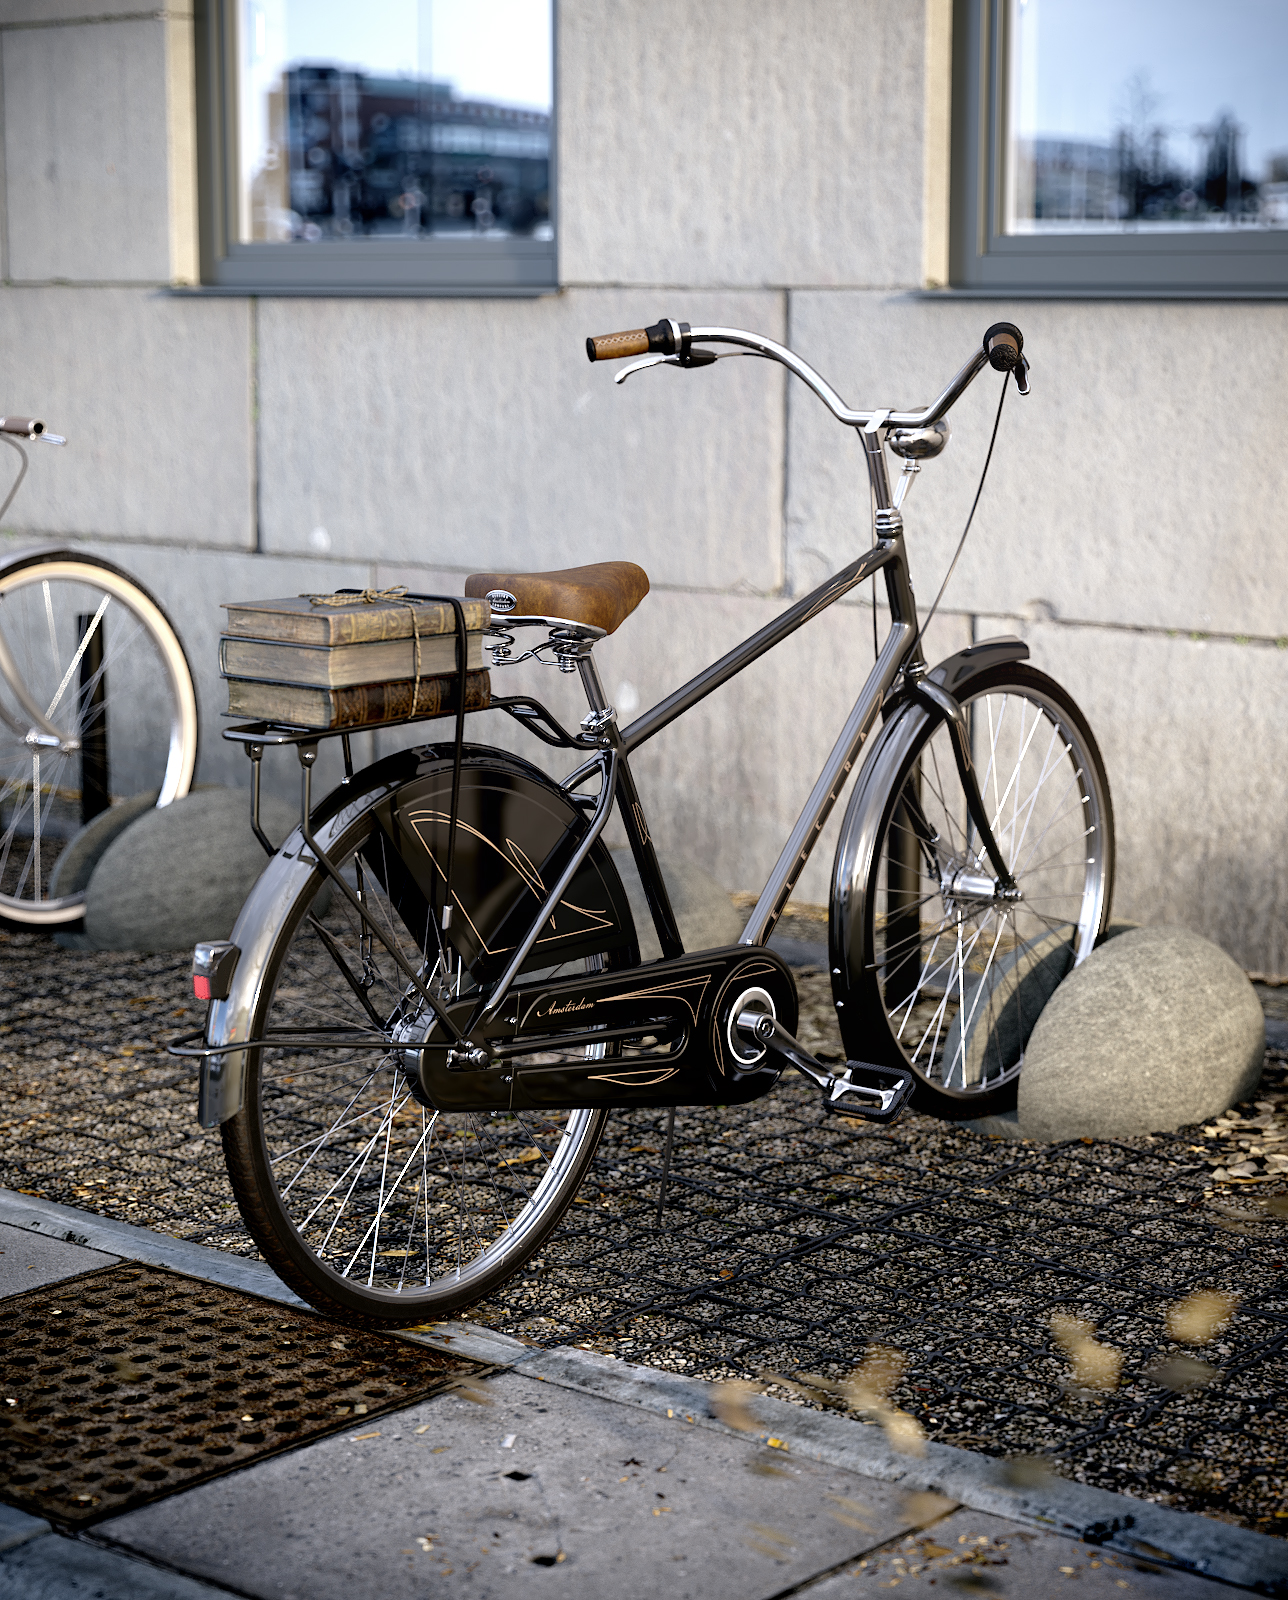
Final renders
Final thoughts
As the main conclusion and some kind of advice from me, I always recommend you to move in a creative direction when choosing your personal projects. Try to explore and choose interesting and unusual ideas.
Your style must be recognizable, and so you should focus on the atmosphere of your work. That will make it unique and memorable.
Great thanks to all the Quixel team!
From Ukraine with love 😉
Michael Fedichkin
Discover more of Michael’s incredible work.
Got a Quixel-infused project you’d like featured? Send us a write-up with a little bit about yourself, a detailed project breakdown, and hi-res images to blog@quixel.se.