Artist Spotlight: Javier Perez wins ArtStation contest using Quixel Suite 2
It’s always a joy to see an artist unleash their talent on a project — and for that project to receive acclaim from a global community of art lovers. And we’re even happier when Quixel helps make that possible.
Javier Perez, a 26-year-old environment artist, did just that. He recently won first place in the rendered prop art category of ArtStation’s global ‘Beneath the Waves’ showcase (Contest #38). Quixel Suite 2 was Javier’s tool of choice in this contest.
In Javier’s words:

My name is Javier Perez, and I’m a senior environment artist working at Intrepid Studios. Throughout my career, I’ve worked at studios such as Infinity Ward, Kojima Production, Sony Online, and Redemption Games, to name a few. I had never entered an art competition before, but I was instantly compelled to enter as soon as I saw Billy Machin’s underwater bibbers. I’ve always been a fan of hard surfaces, and I knew Quixel Suite would be the perfect tool to get the high-quality results I wanted.
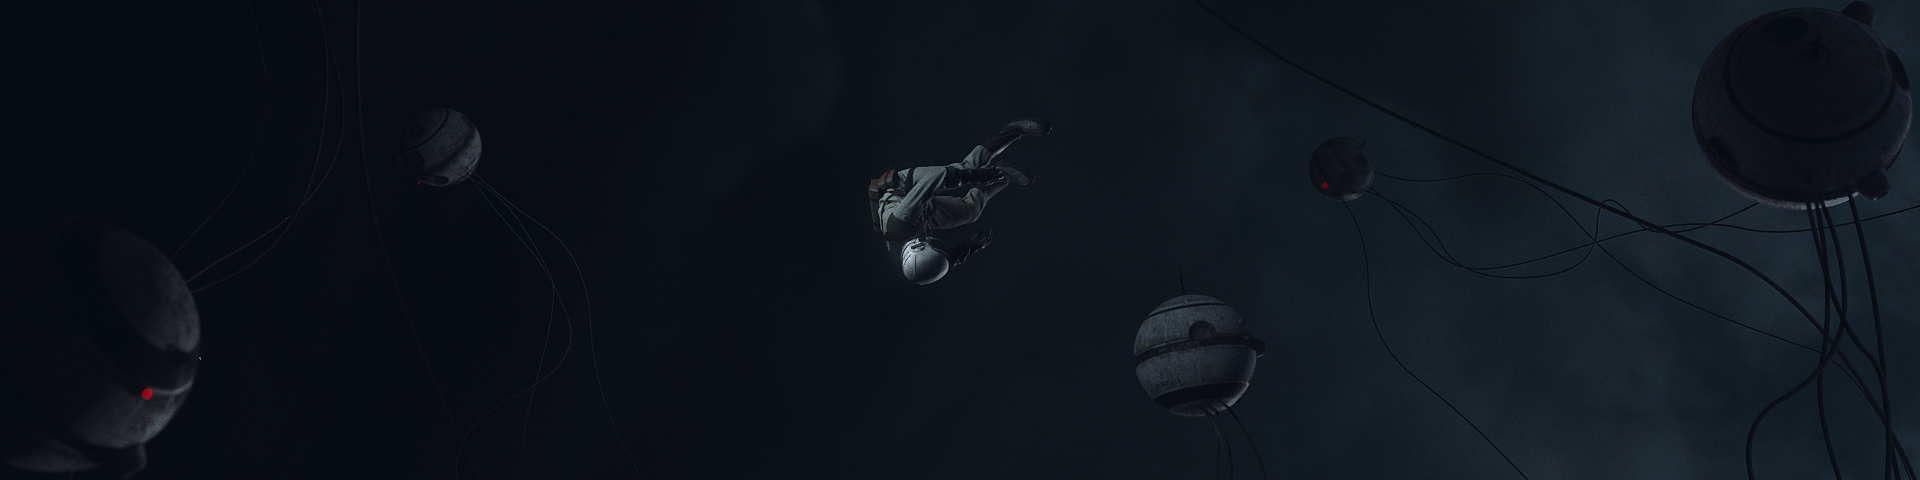
Concepts by Billy Machin

Modeling
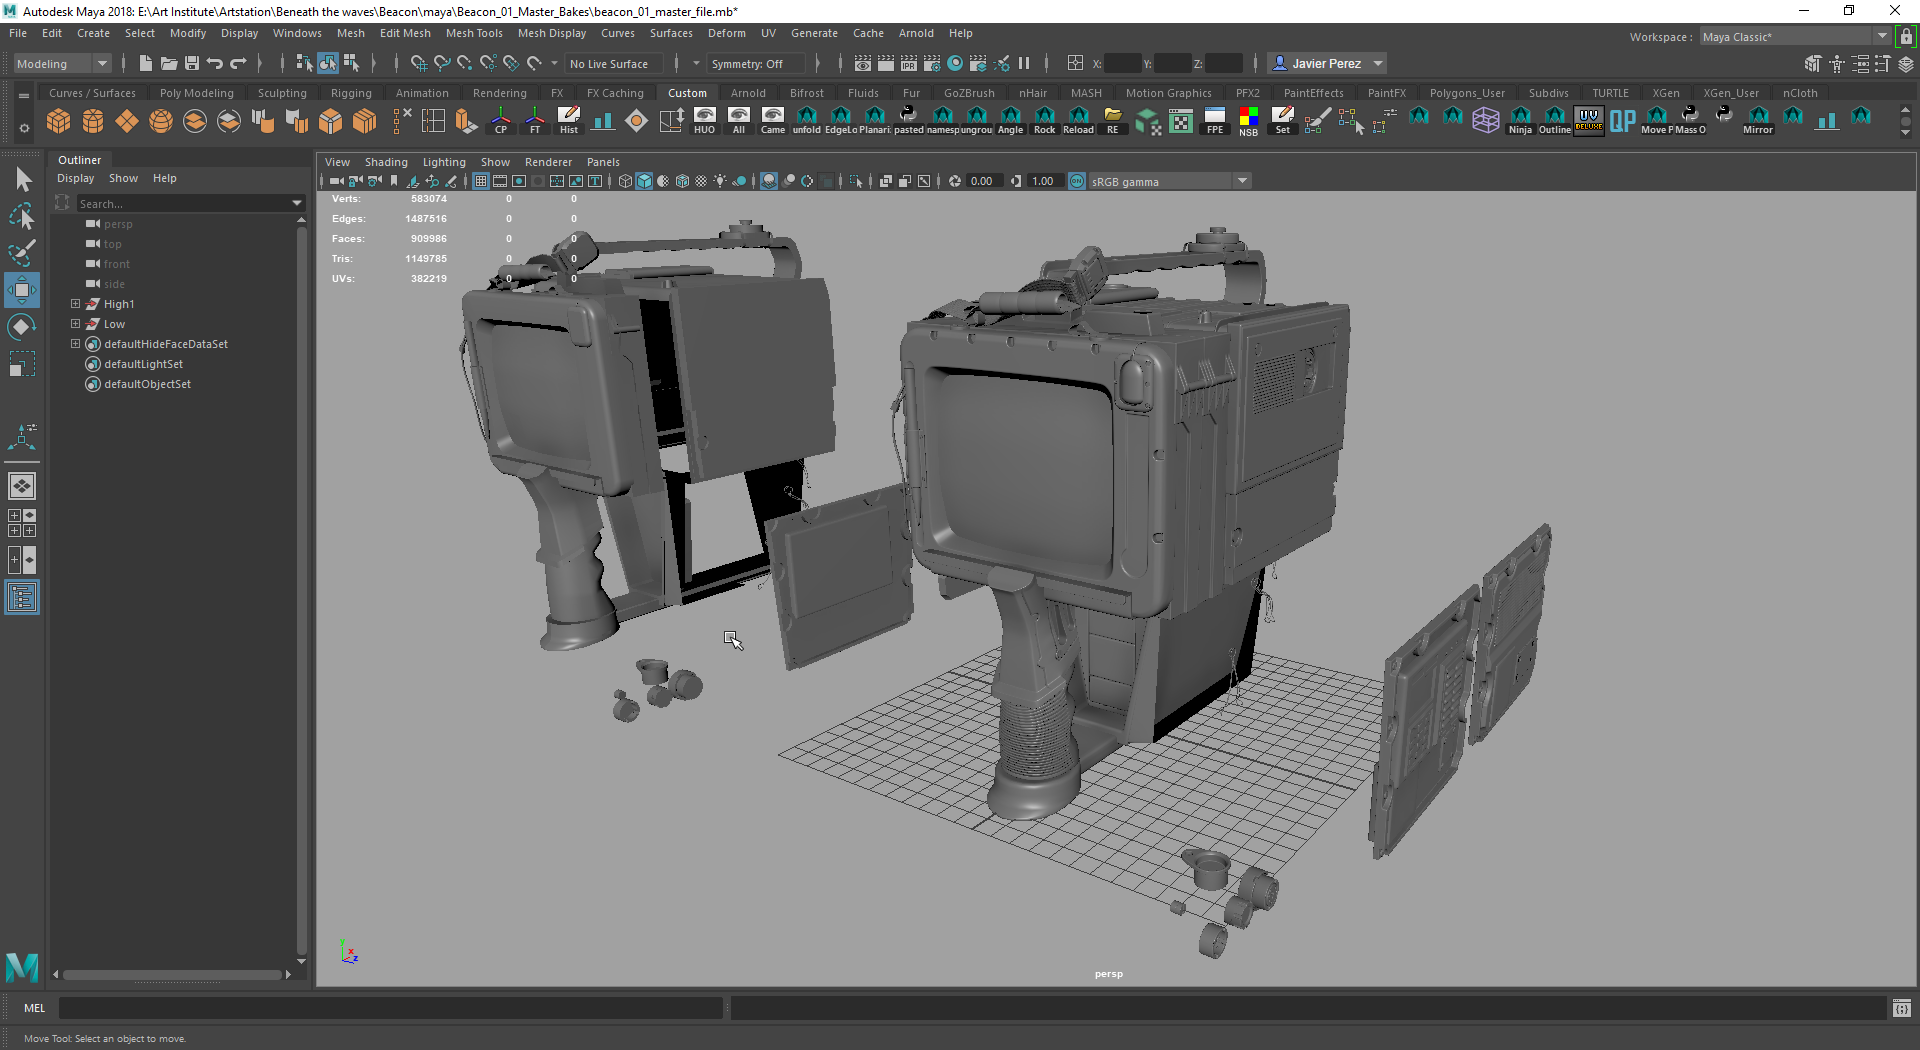
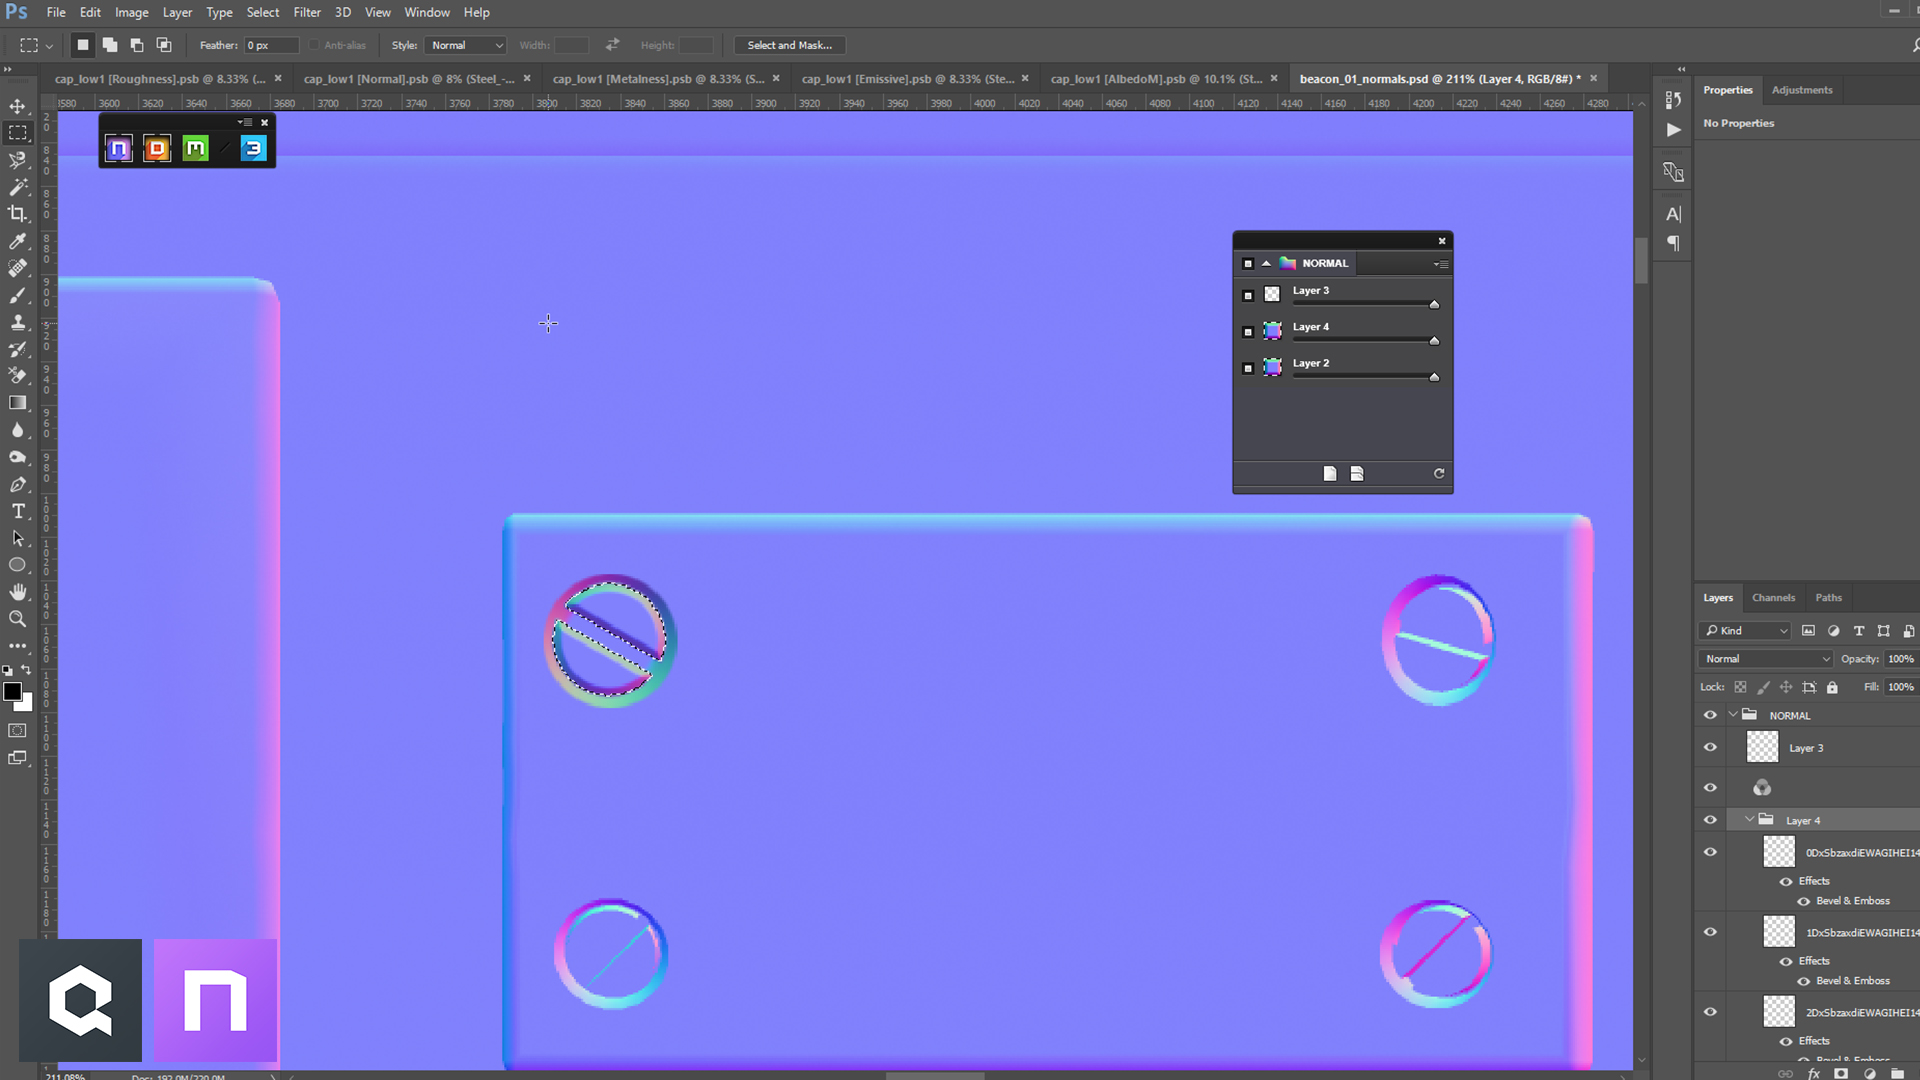
Autodesk Maya is my modeling package of choice. I started out with box modeling the high poly and taking any intricate pieces into ZBrush to boolean panels and bolts. Before applying any smoothening, I saved a low poly variation which began as my base for the low poly. I deleted edge loops and mirroring, and then applied a few lamberts for my material IDs, and was ready to take it into Marmoset Toolbag to bake.
Baking
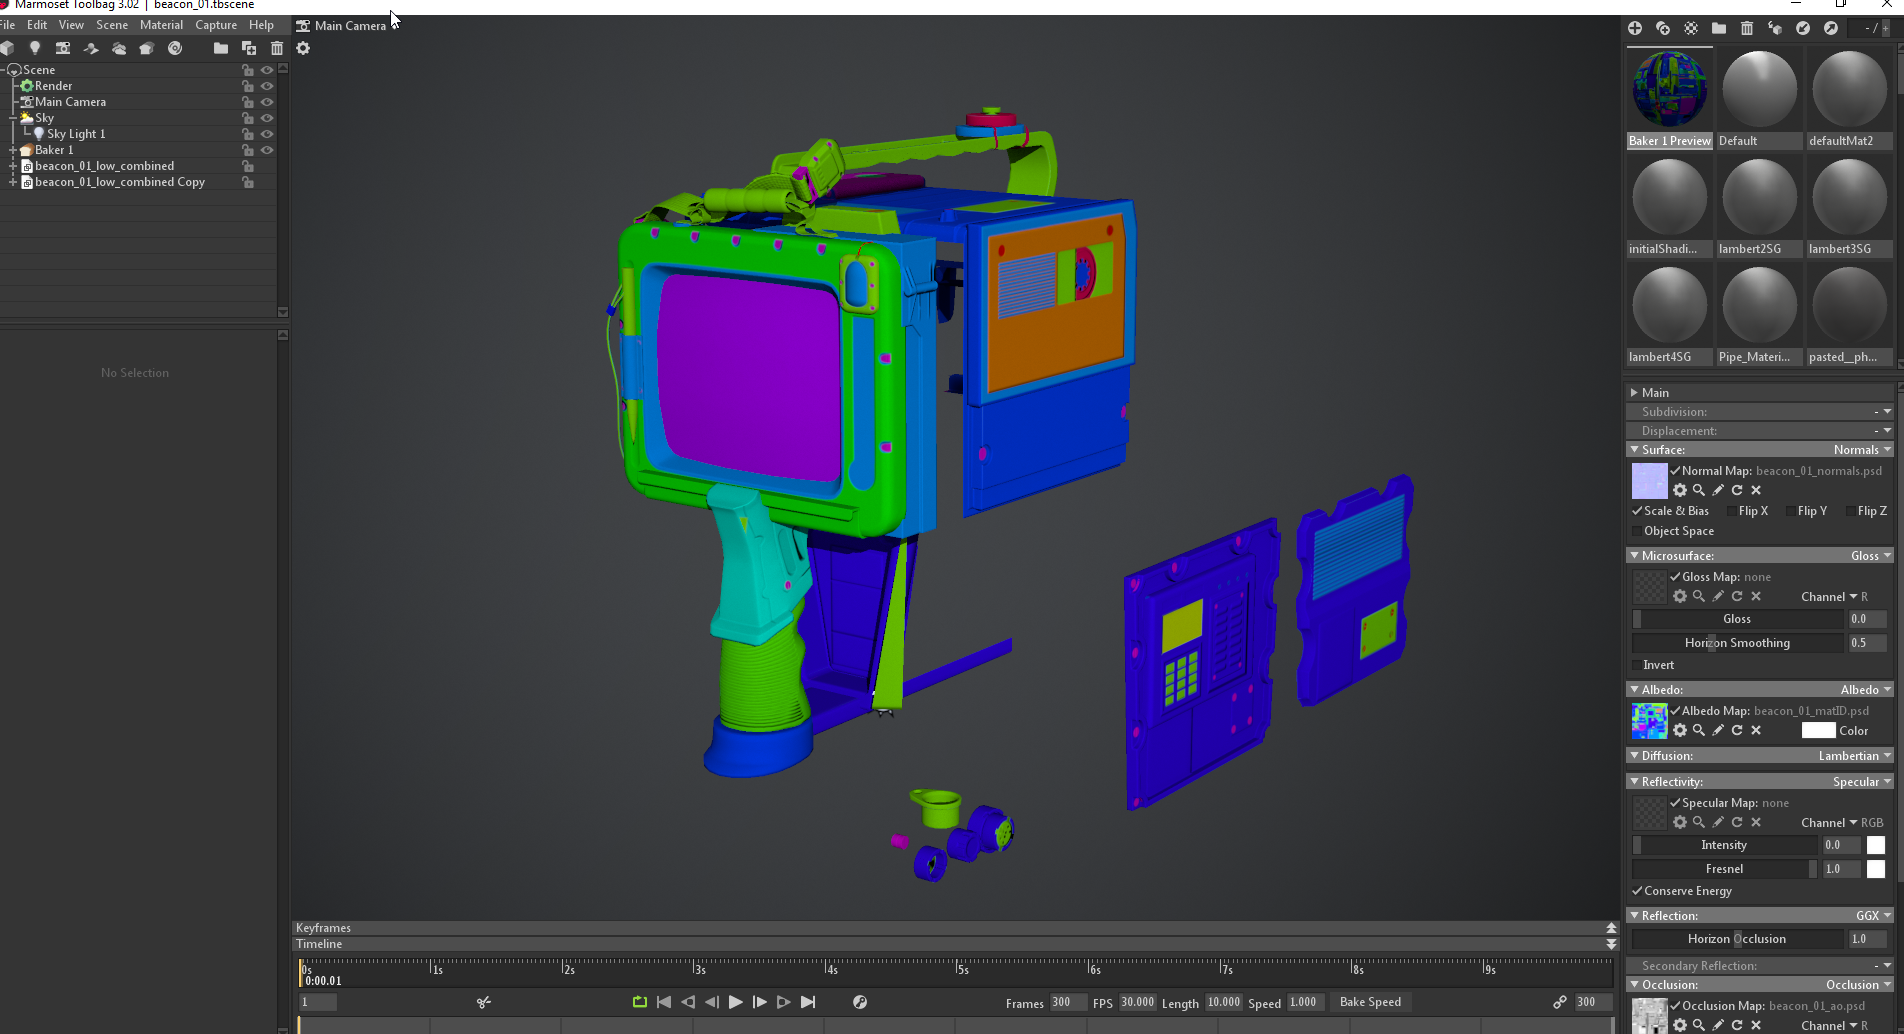
Marmoset Toolbag was a quick way to bake out all the maps I needed, before getting started with Quixel Suite. I made sure my material ID was the top priority, as Suite relies on them for material selections. I had a few tiny errors come up in the normal map, but I wasn’t too worried because I knew I could fix it with NDO.
NDO
Some of the biggest errors I had from my bakes were skewing, or bolts completely disappearing. With NDO, I was able to quickly marquee select the shape of the bolt and create a normal that closely resembled what I originally had in my high poly. From there, I duplicated and moved the bolt to any errors I found. One of my favorite features of NDO is the fact that the normal angle is always relative, no matter how much you rotate your normal.
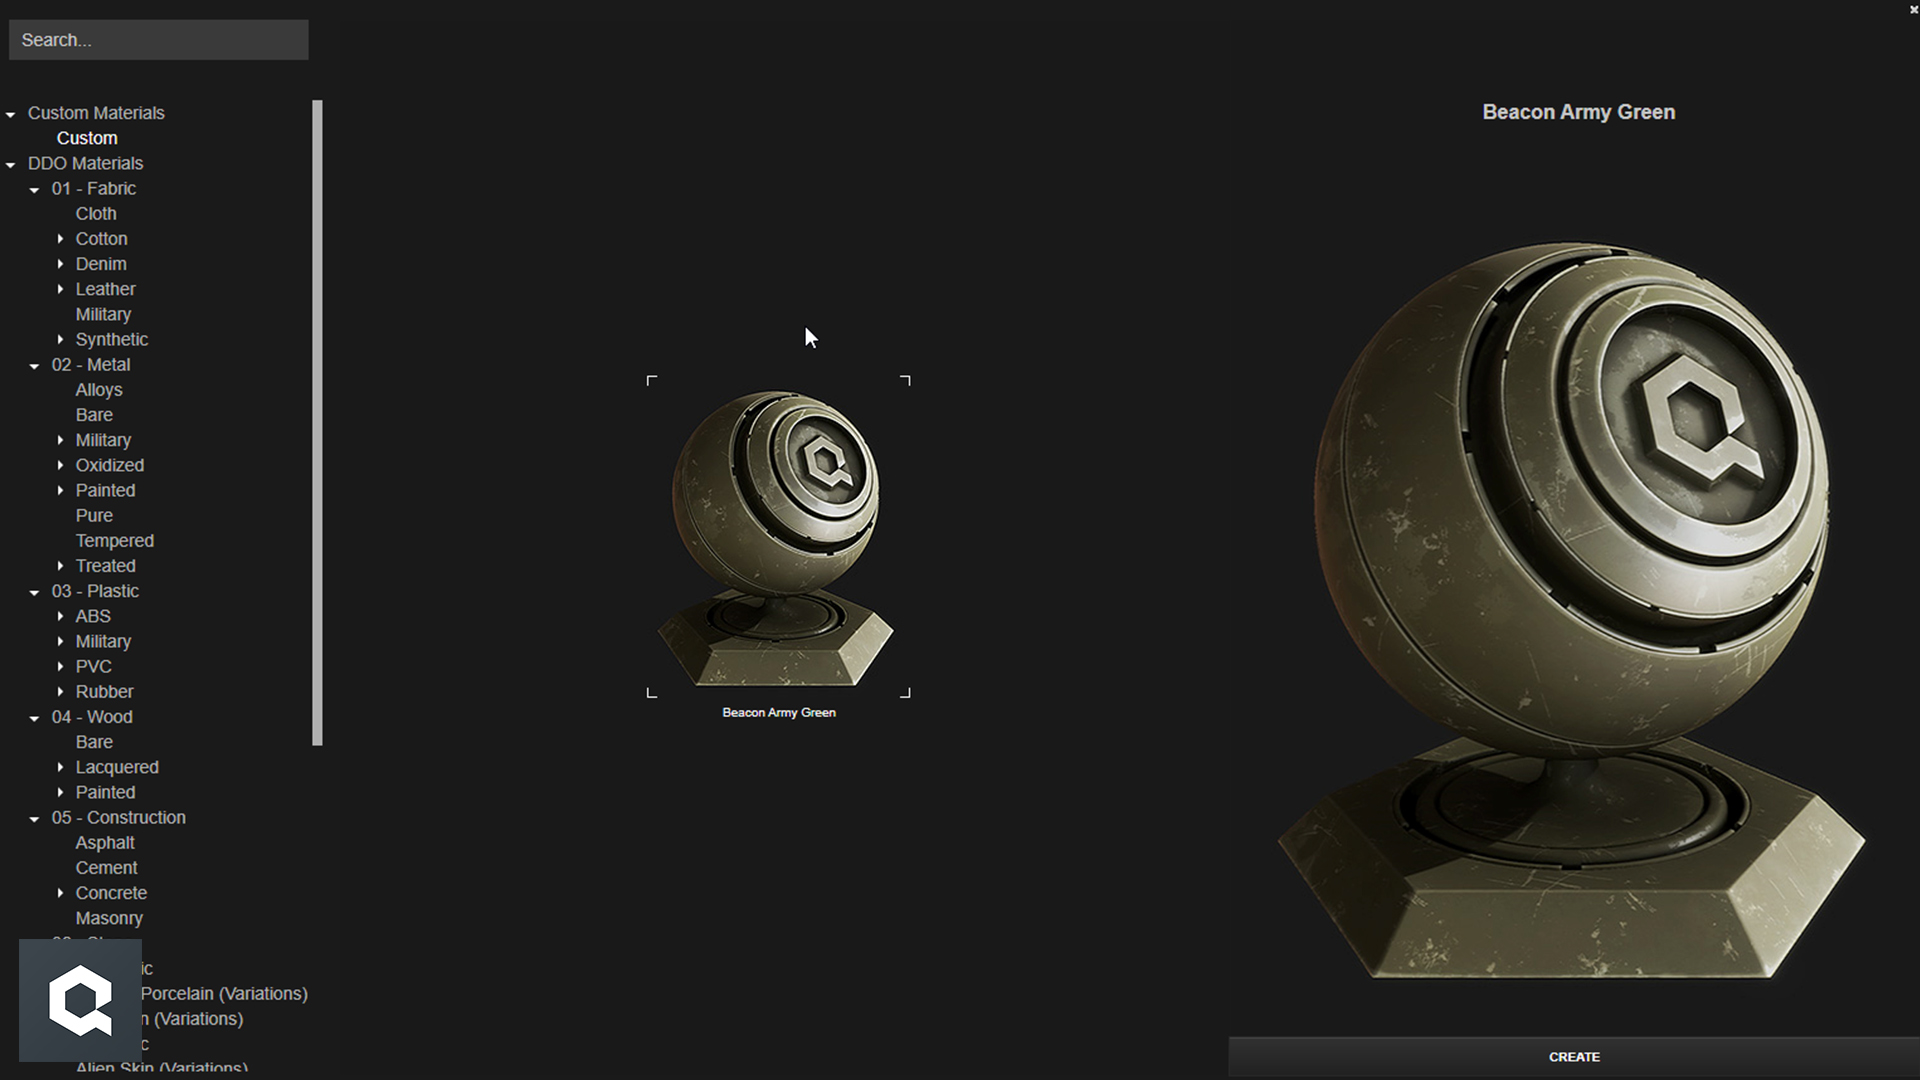
DDO
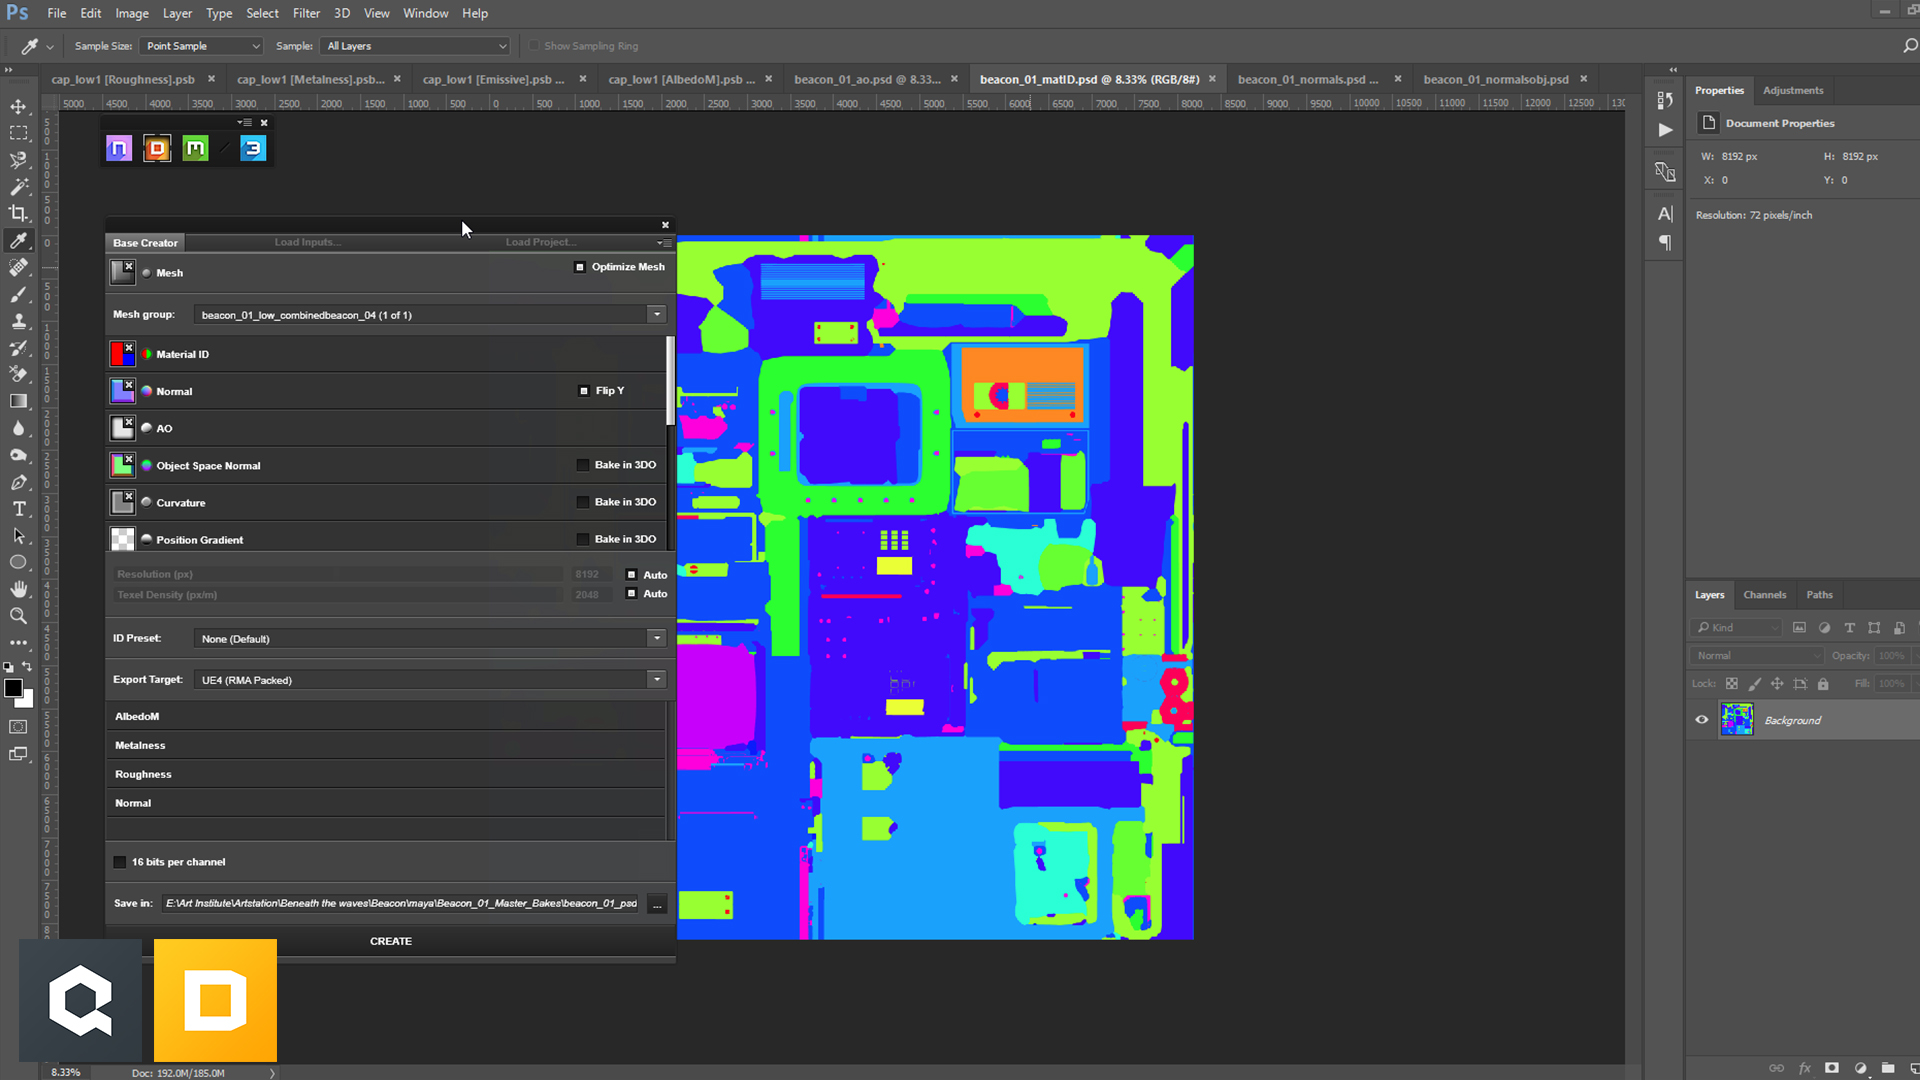
Once I had all my maps, I was ready to jump into DDO. It was super easy to import my maps and mesh when creating a new project. DDO has a huge list of export targets, so I know I’ll get the best results — whichever engine I use. For this, I knew I was going to render in Unreal Engine 4, so I chose ‘UE4 packed’. I liked that I didn’t have to manually pack the maps myself and that DDO does the hard work for me.
3DO
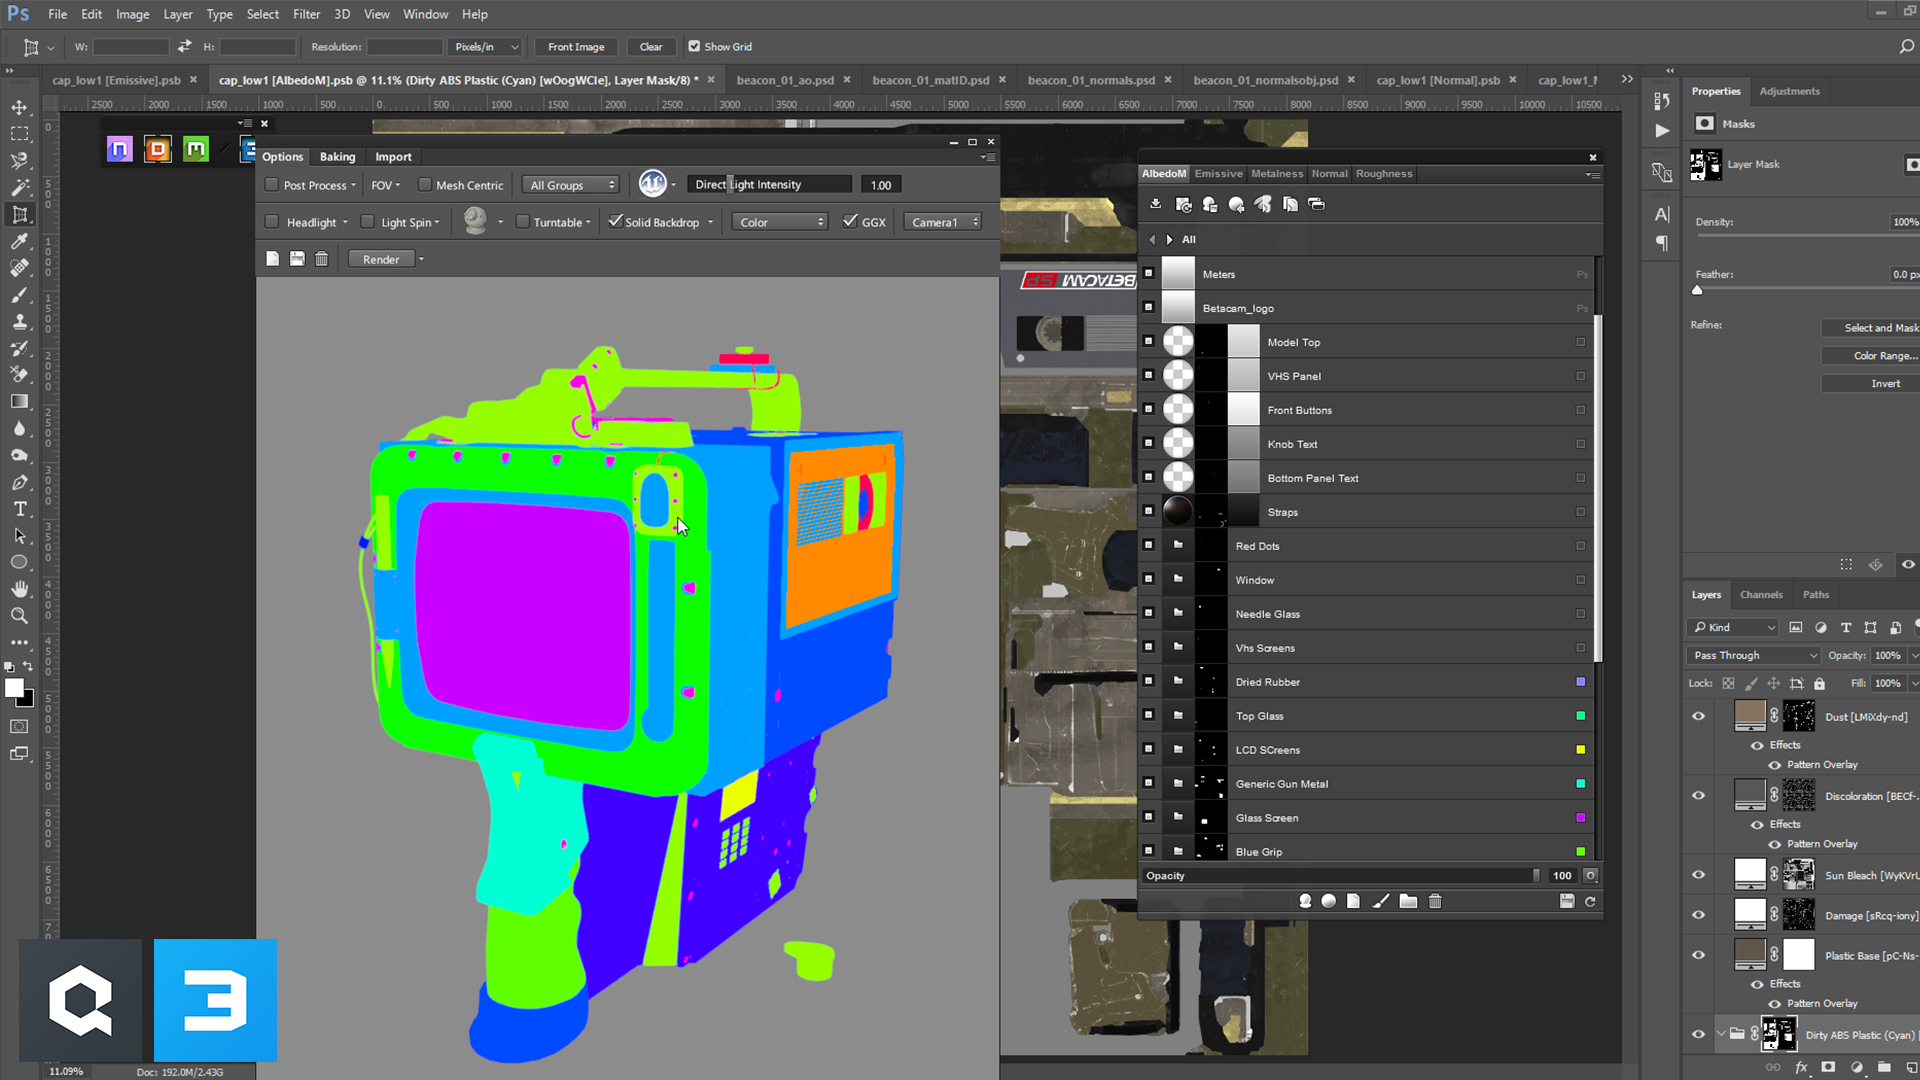
3DO was a very fast and efficient way to select my color IDs and start applying my materials to preview my results. I love that 3DO has a few different lighting options; it was nice to have a UE4 one, so I knew what kind of results I’d be getting as soon as I was in-engine. Another feature I used constantly in 3DO was the ability to switch between all my different maps. I used this mostly to see my roughness, and visually paint and edit my dirt masks.
Quixel Suite Smart Materials
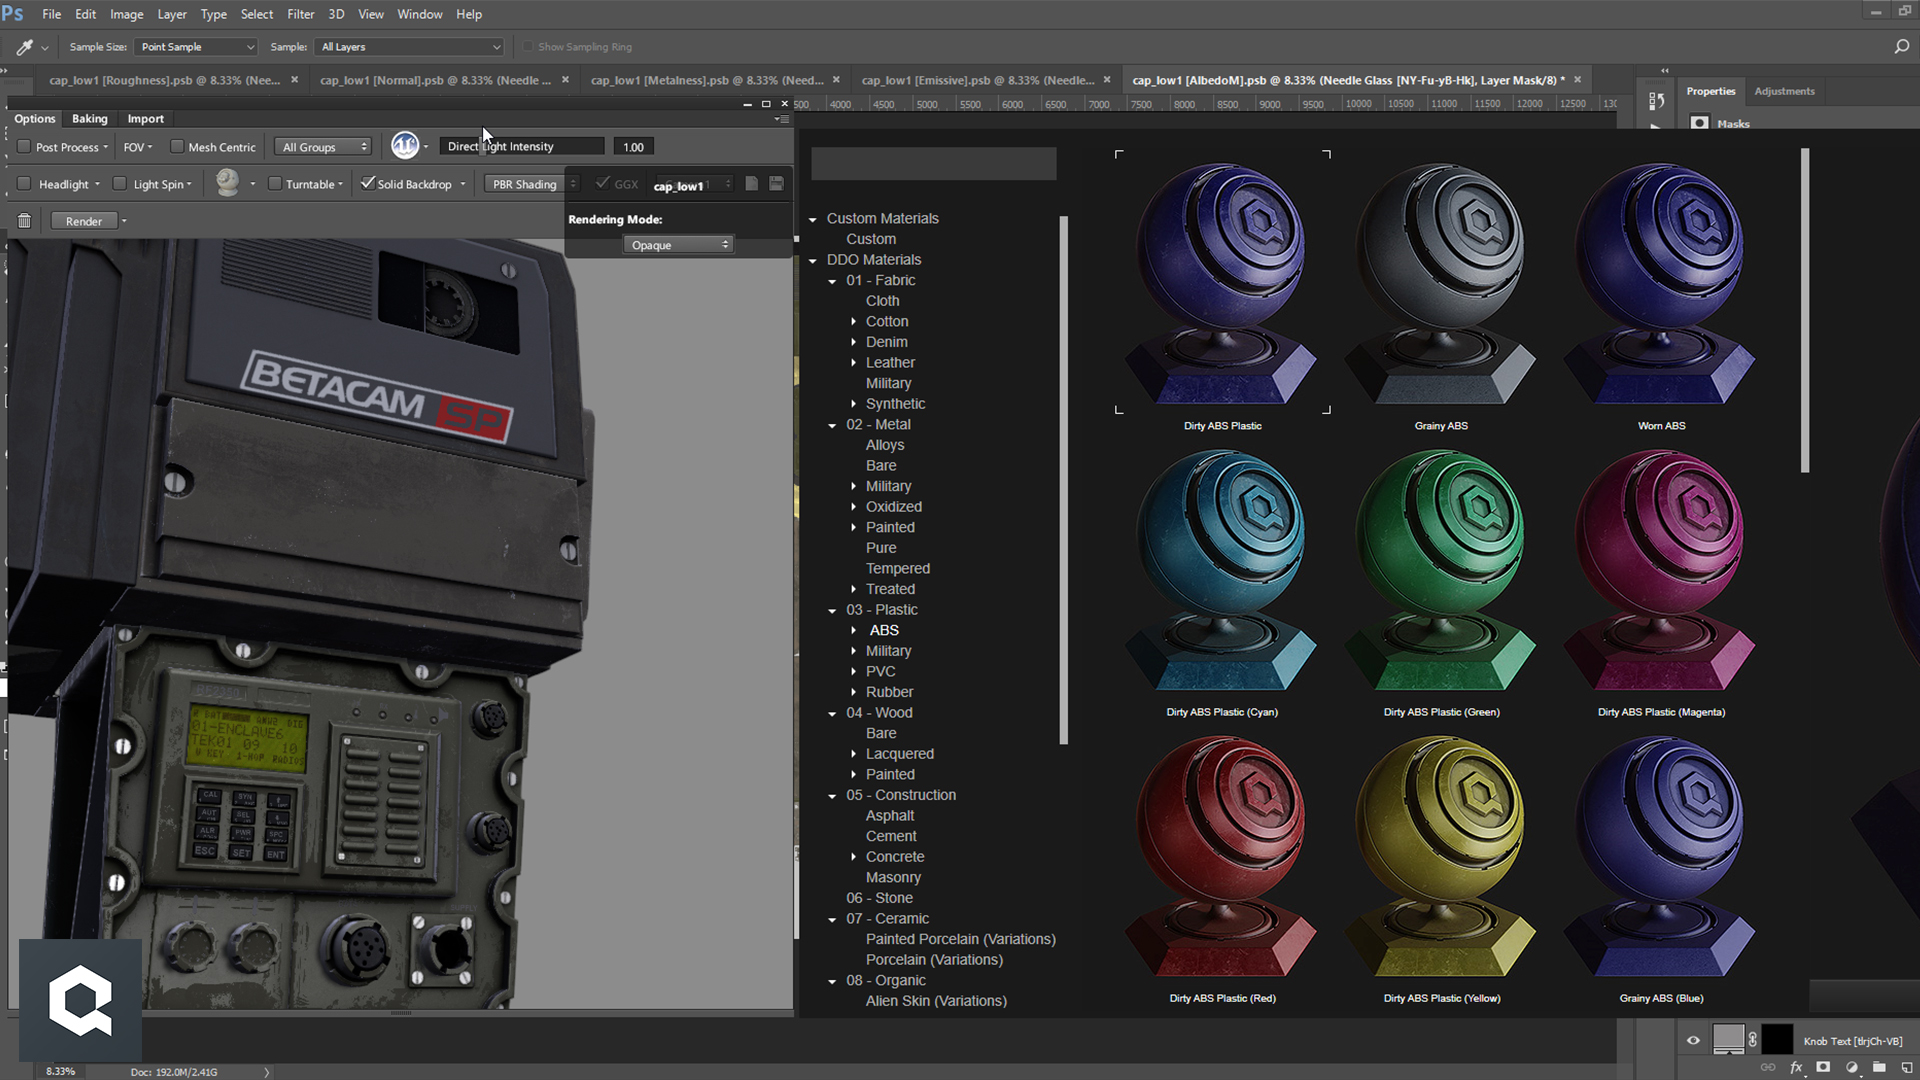
Quixel Suite Smart Materials played a huge part in this project. DDO has an extensive library and the ‘ABS plastics’ were a huge help to get the look and feel I wanted, with minimal effort. I knew that all the roughness and metallic values were physically correct, so it was one less thing I had to worry about. With some tweaking via the mask editor, I was able to get the dirt accumulating just the way I wanted, and even go in and paint some more refined areas with 3DO.
Another huge advantage I found was that all of my beacons shared the same material properties. Because of this, I was able to texture one and save my preset as a smart material inside DDO, which I could then apply to the other beacons to maintain consistency.
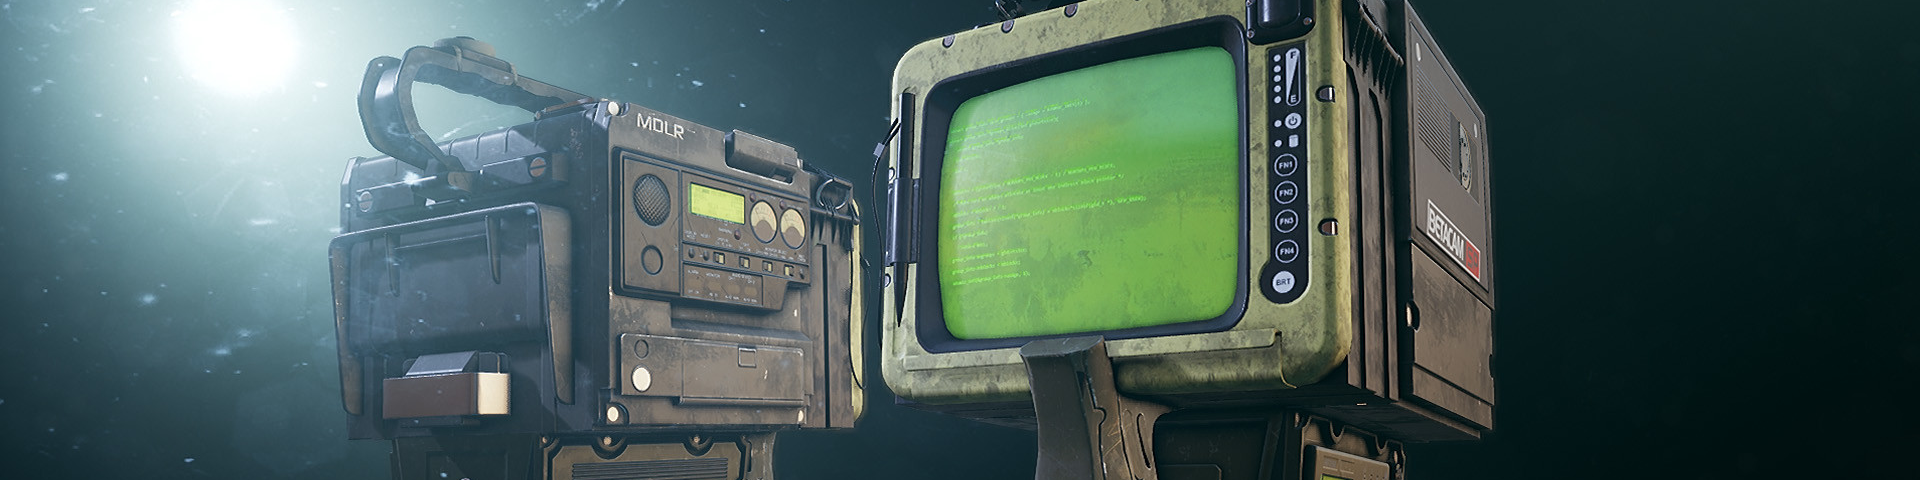
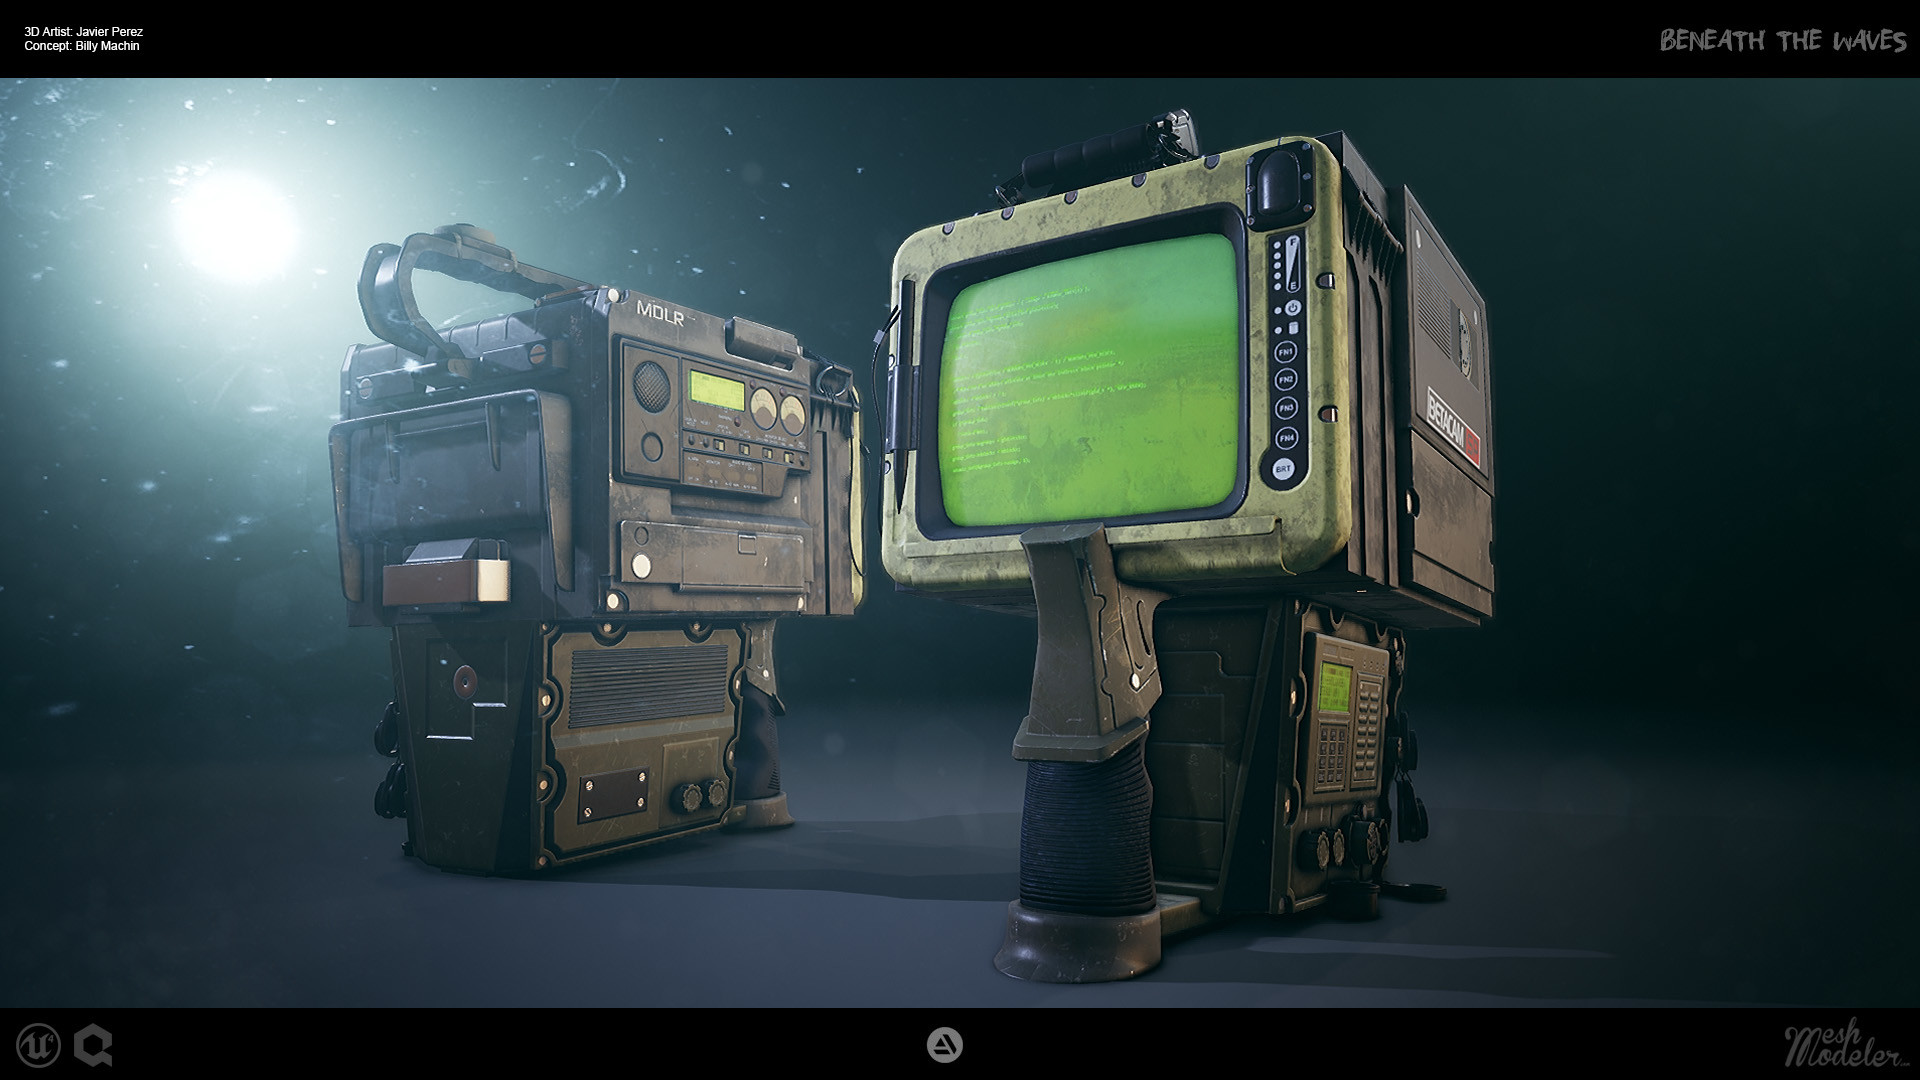
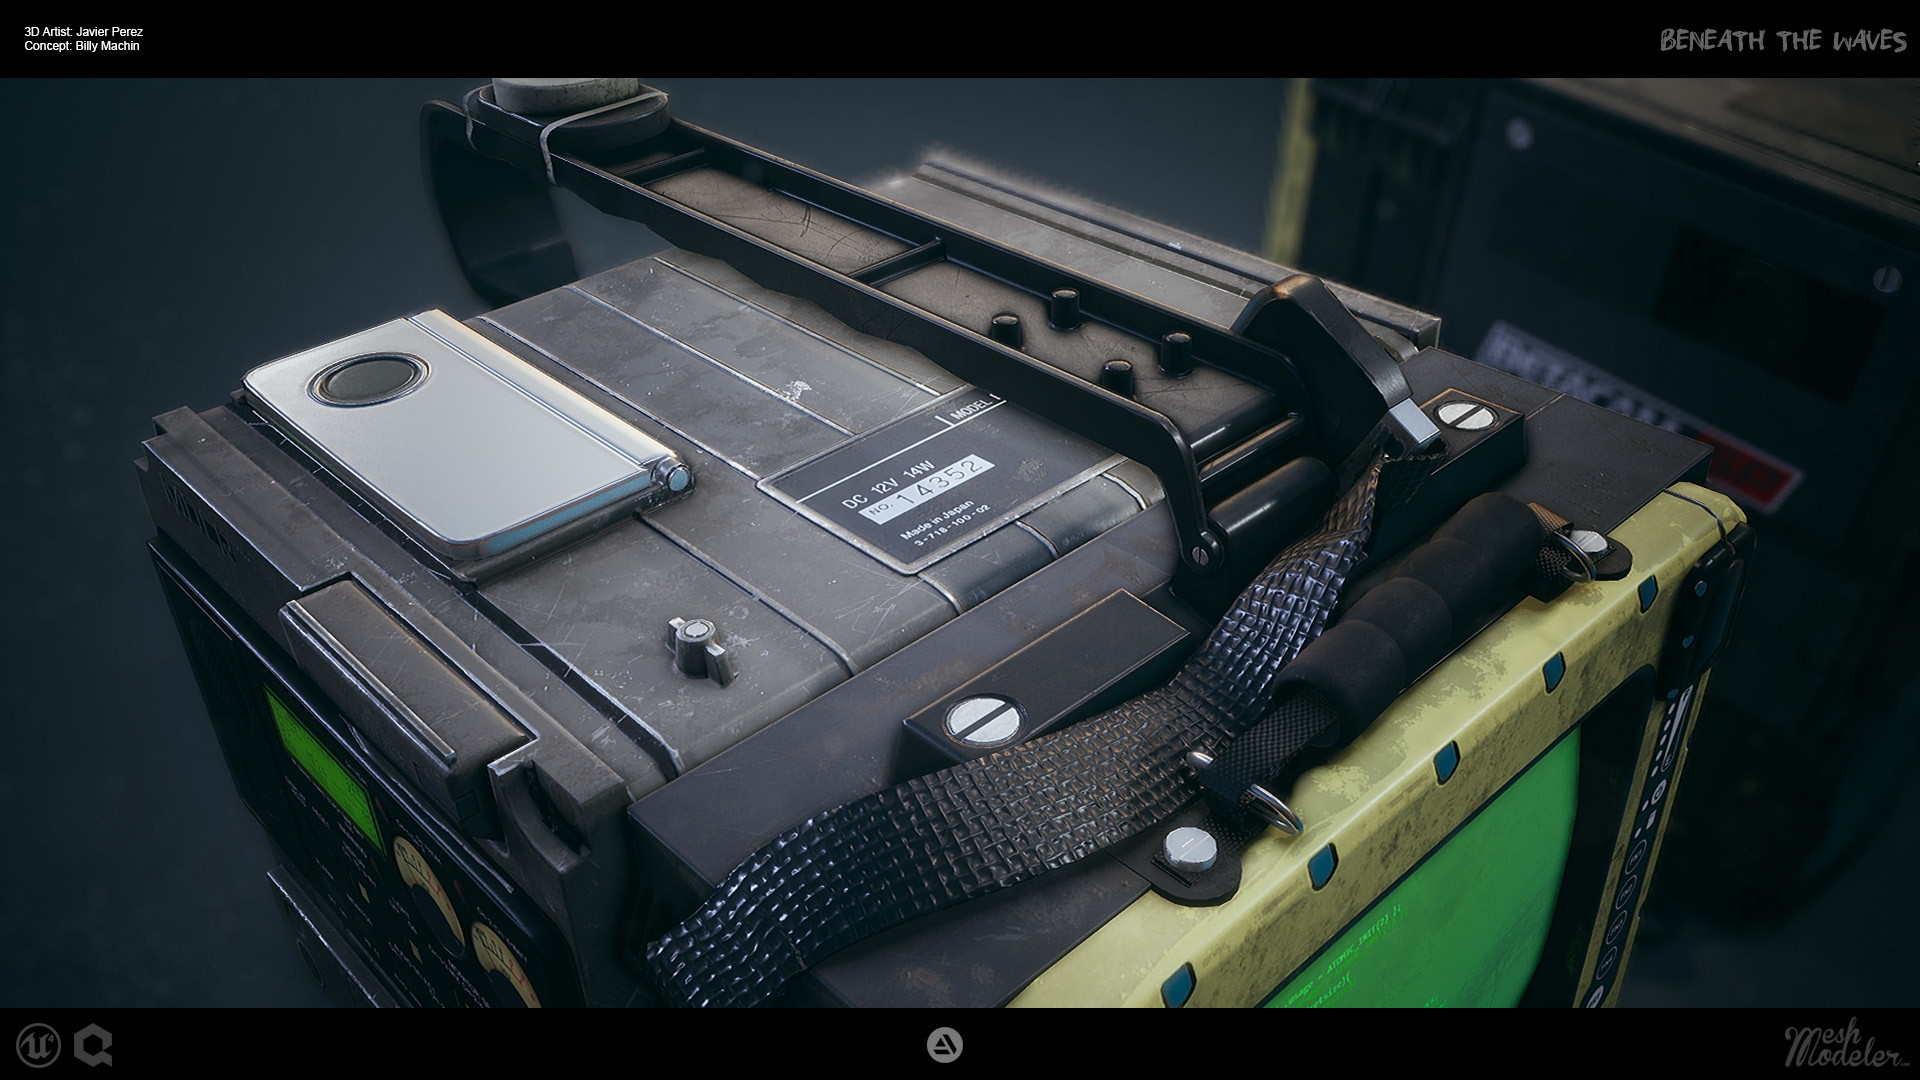
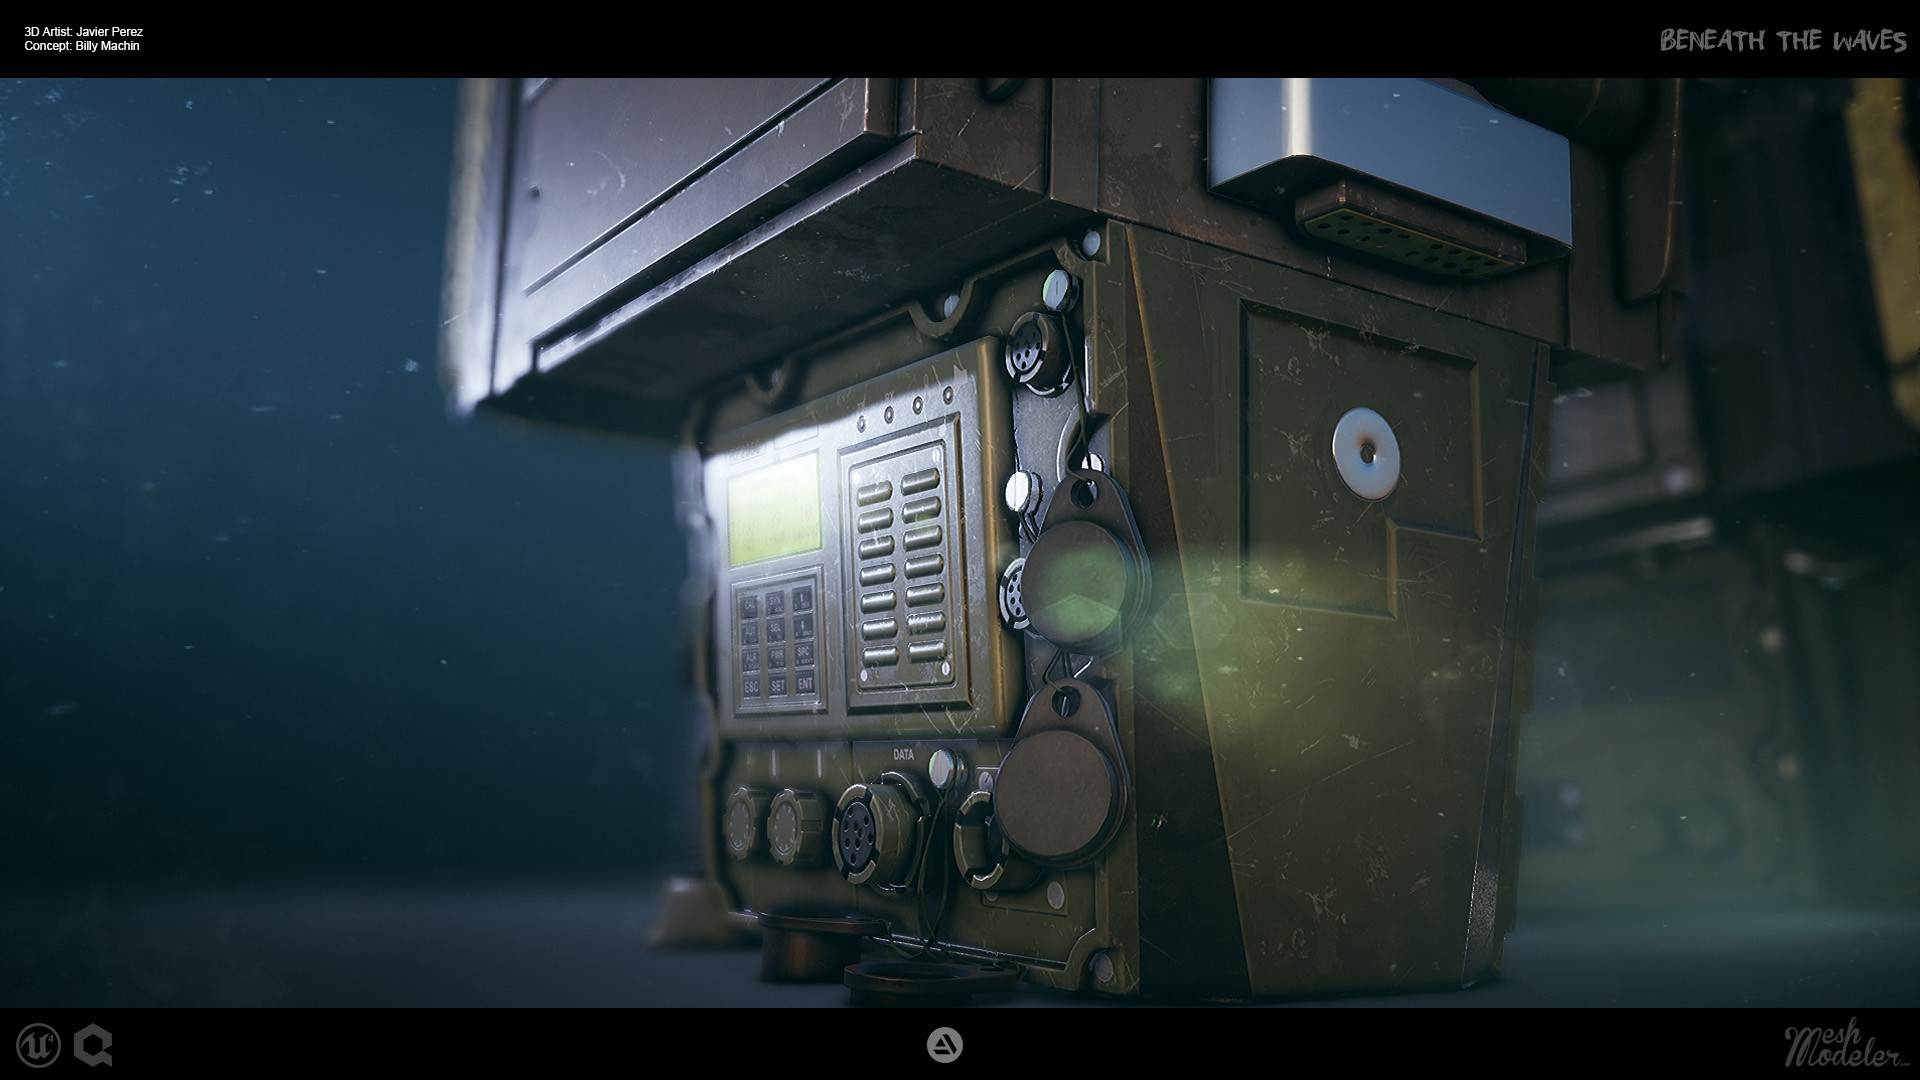
Exporting and Final Versions
![]()
![]()
![]()
![]()
![]()
![]()
![]()
![]()
Quixel Suite 2 is an amazing tool. Without it, I would have not been able to get the consistency and level of detail I wanted to achieve for this project. It is also an incredible time saver when creating your own smart materials to apply to multiple objects. I’m honored to have gotten 1st Place using this tool and to have been able to make use of its full potential.
Thank you, Javier!
See more of this talented artist over at meshmodeler.com.
Got a Quixel-infused project you’d like featured? Send your process breakdown write-up, bio, and hi-res images to blog@quixel.se.